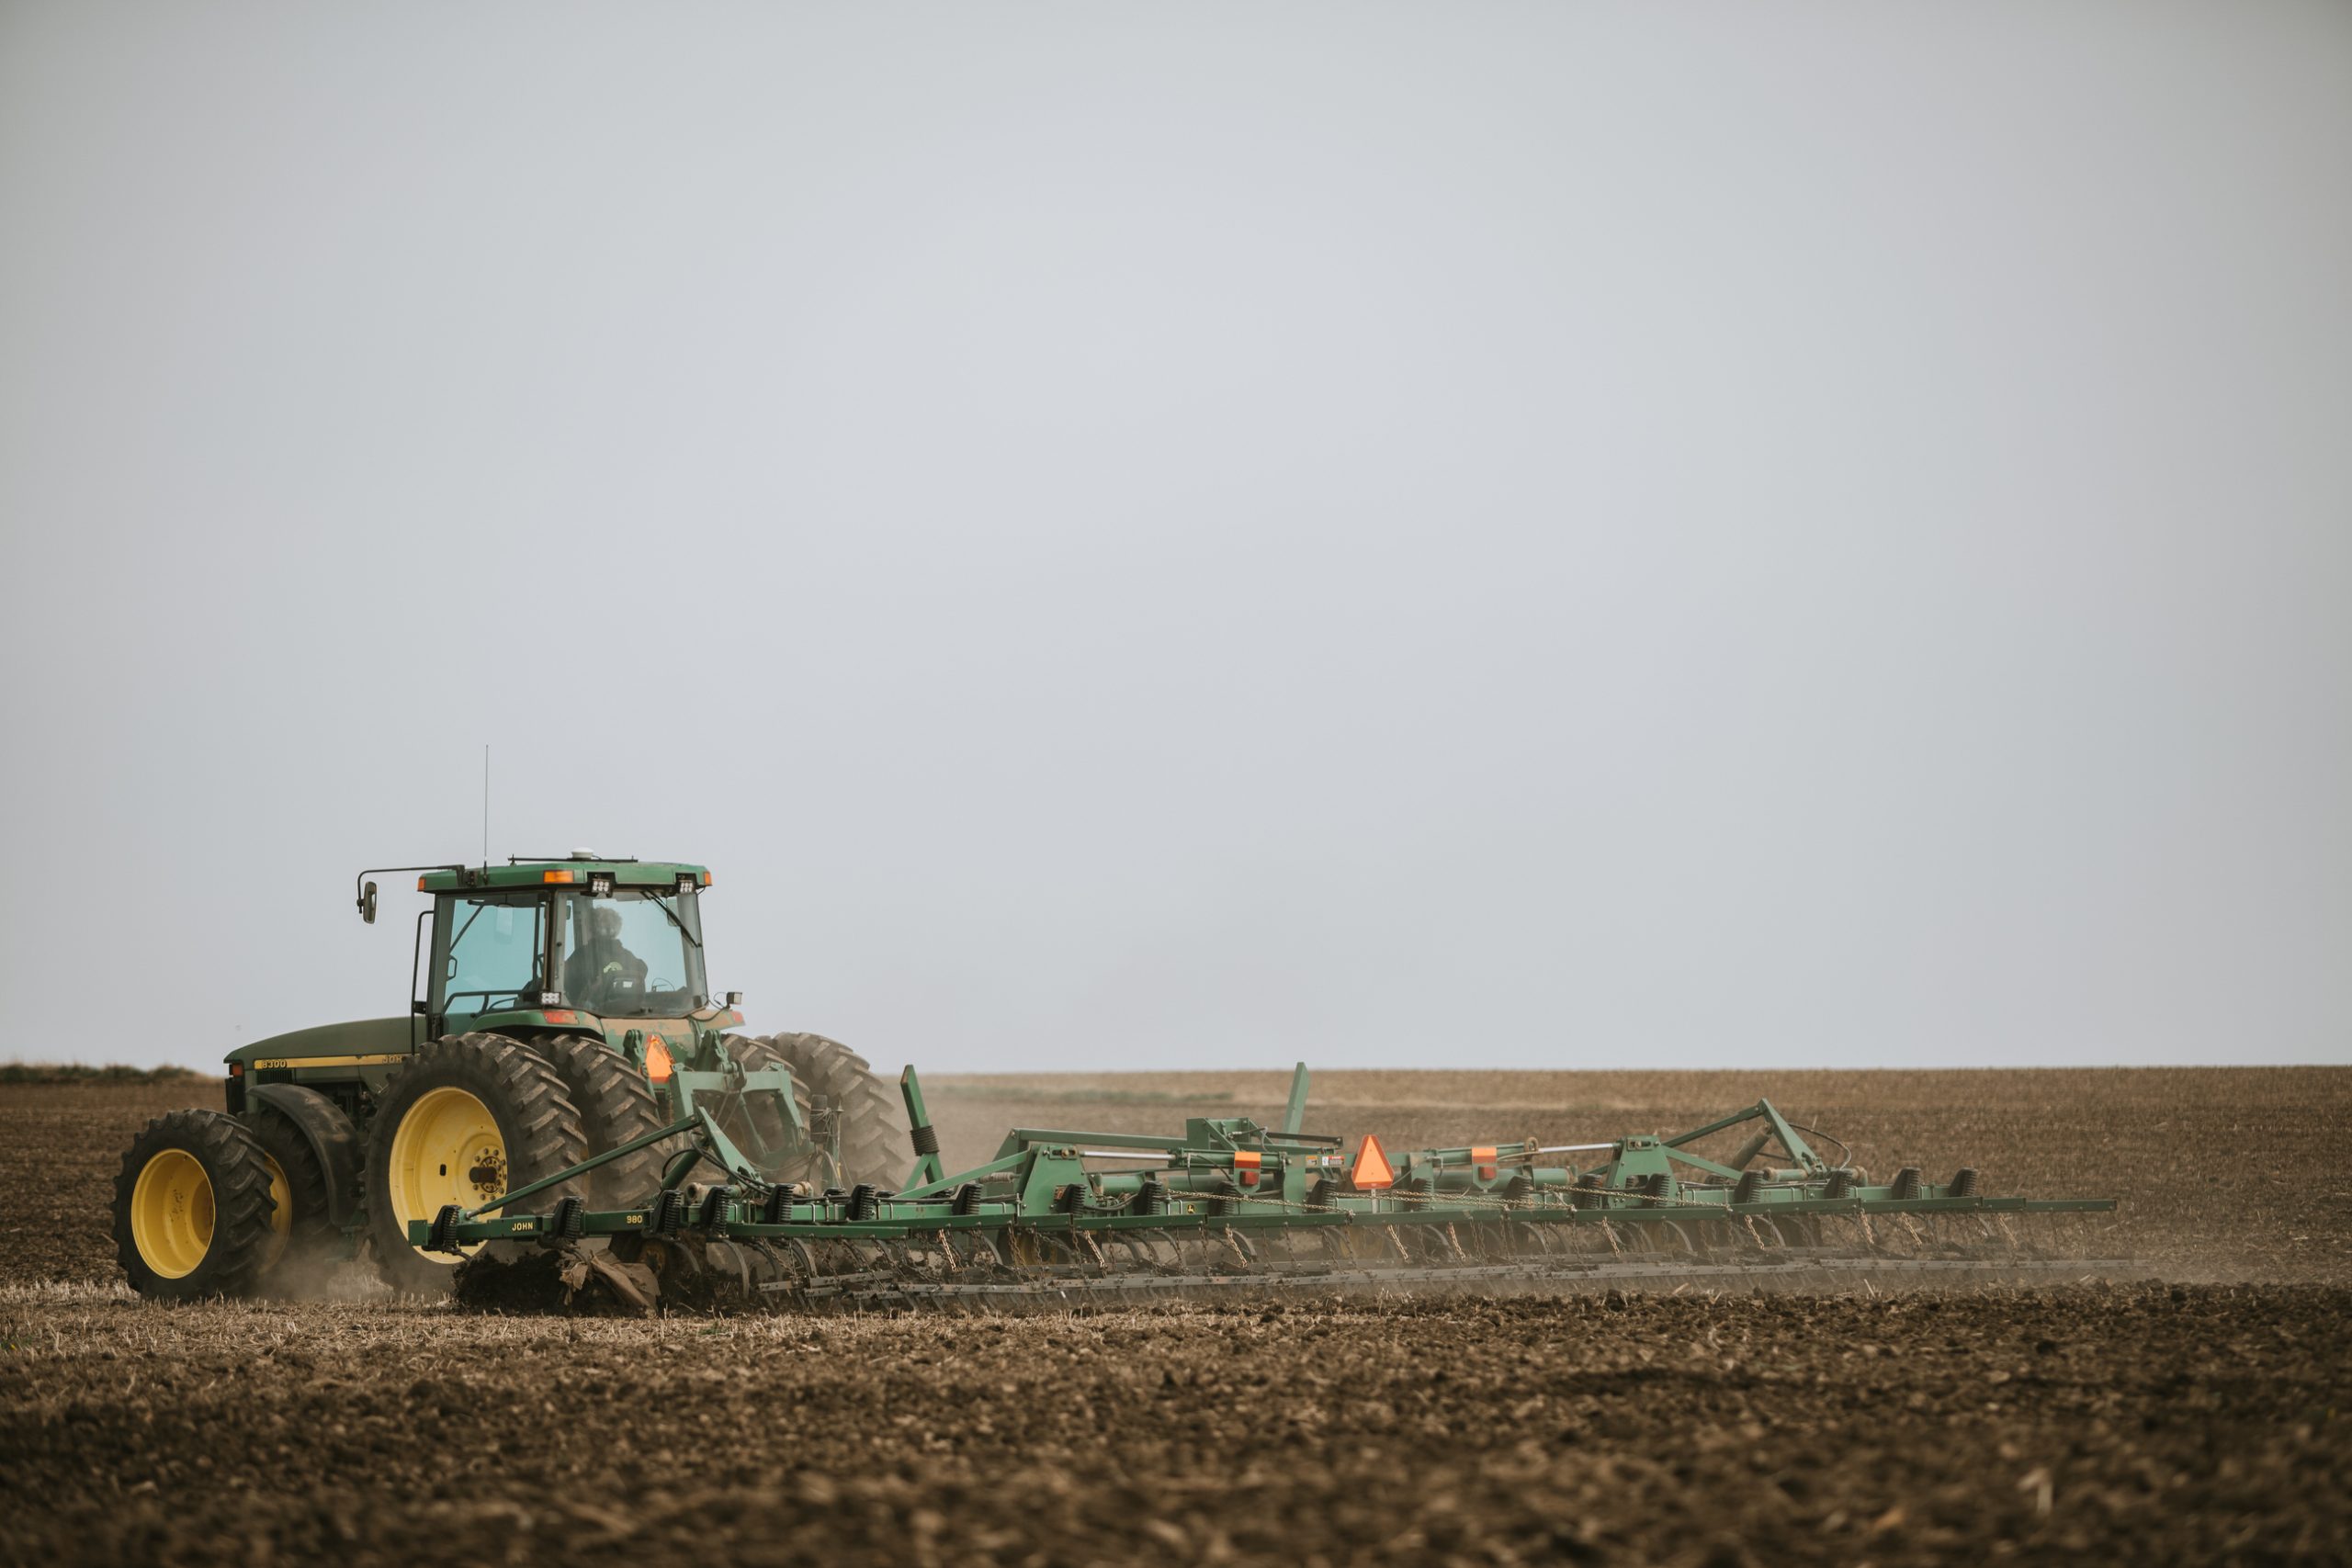
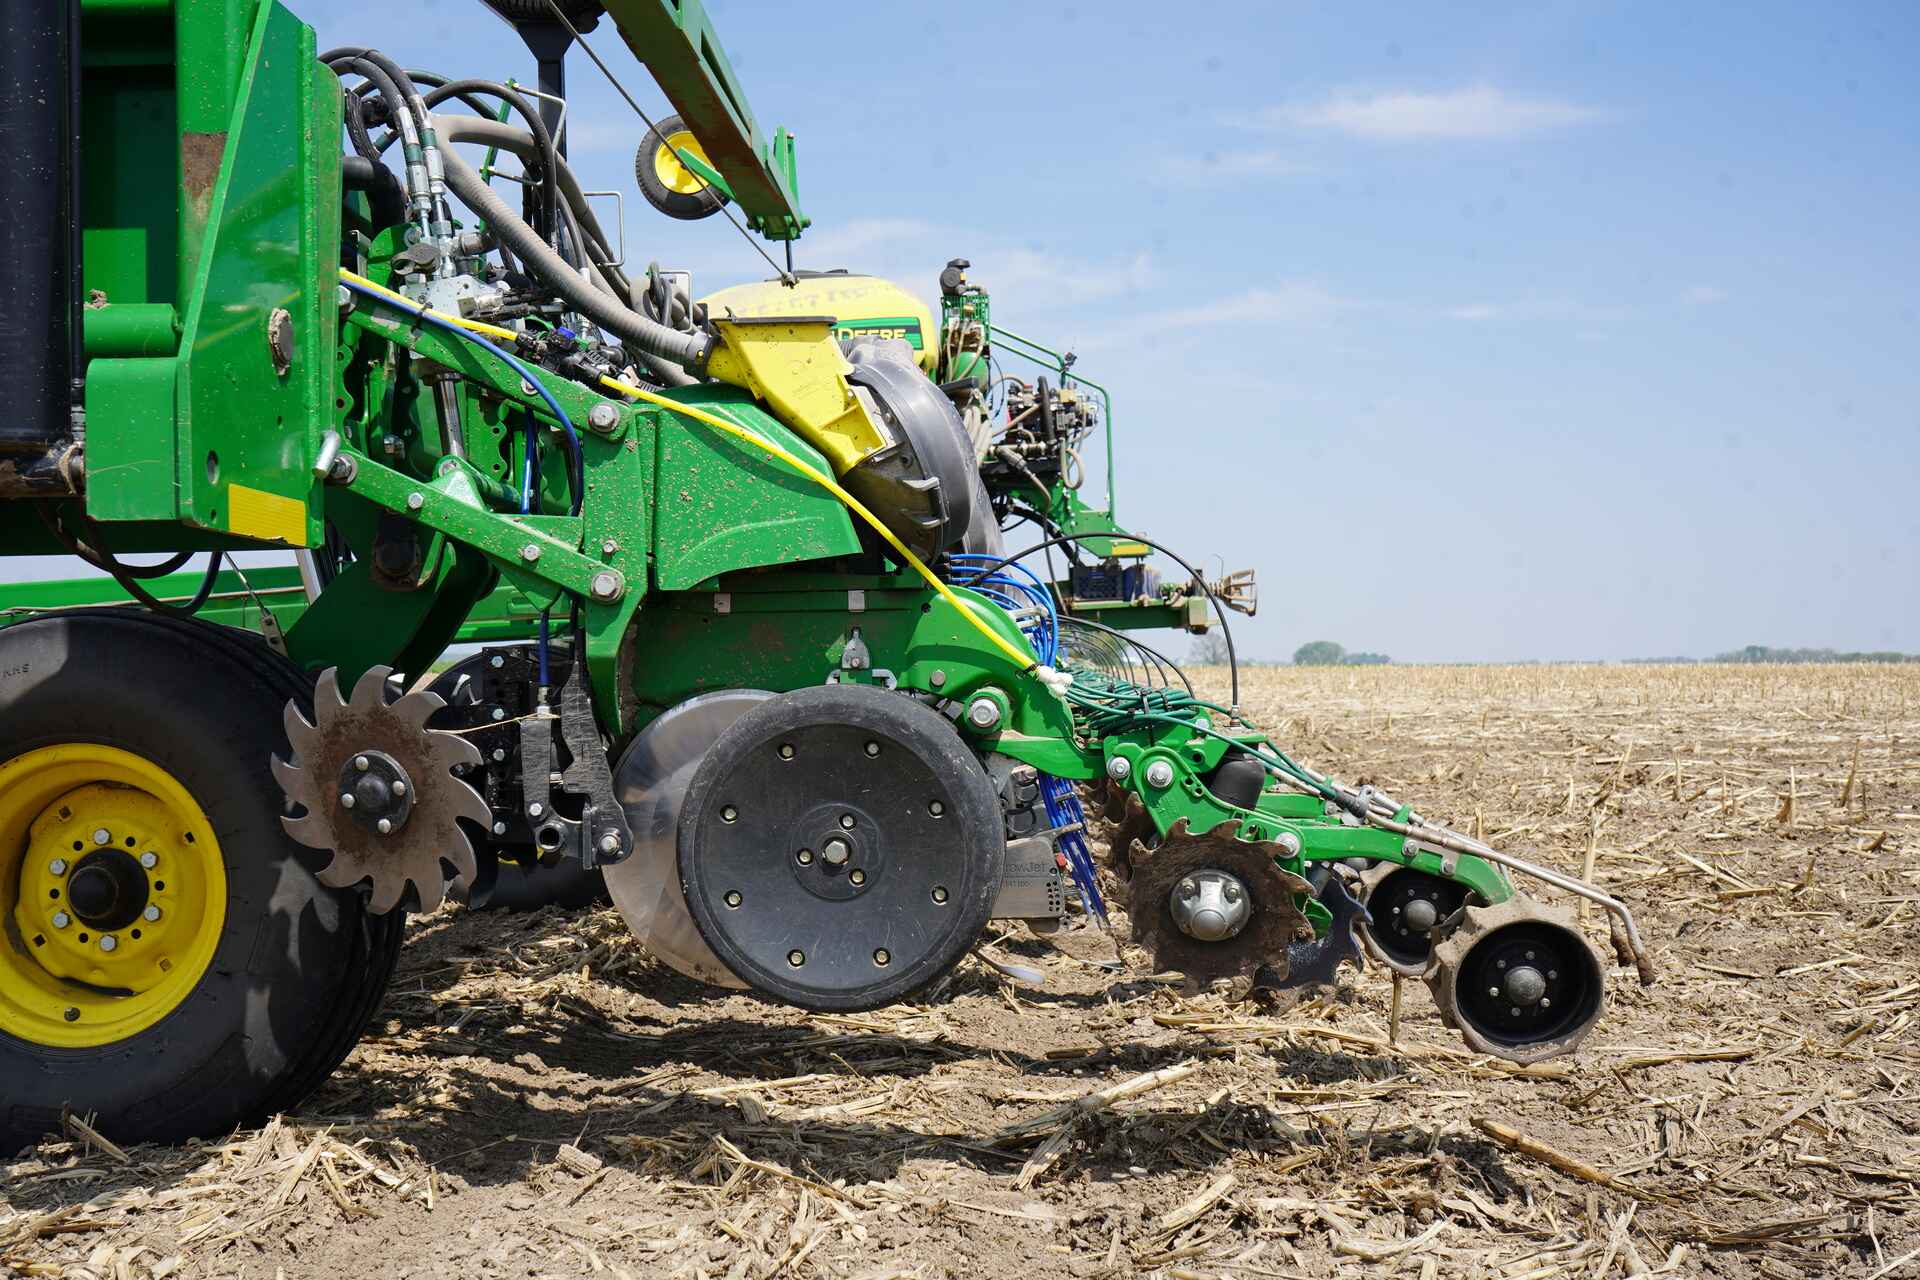
One of the most common questions we get asked in relation to tillage sweeps is whether we can provide a quick-change sweep to fit John Deere Perma-Loc.
We’re delighted to say that after a lengthy NPD process, the answer is yes! Our all-new Wearparts Raptor-Loc sweeps are designed as a direct alternative to John Deere Perma-Loc sweeps, delivering the additional wear life farmers expect from Wearparts PLUS the added speed and convenience of a knock-on sweep, with no adapters required.
What is a quick-change sweep?
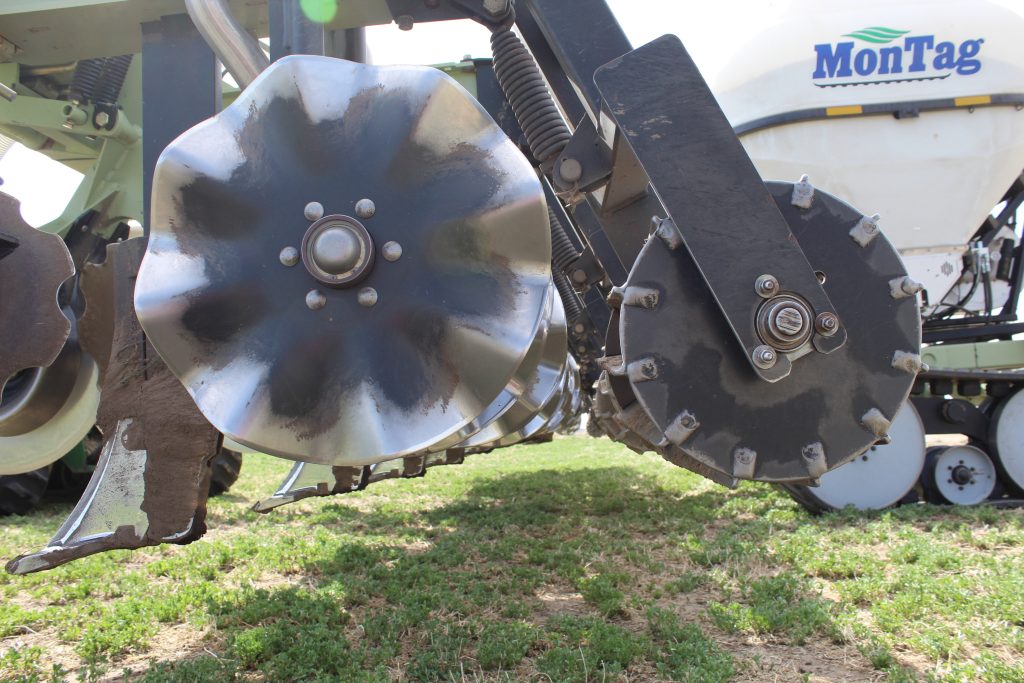
A quick-change or knock-on sweep is one that attaches to the shanks of the cultivator or toolbar with clips instead of bolts. The sweeps simply push on (sometimes a gentle knock with a mallet is required) and clip into place.
In the case of John Deere’s Perma-Loc sweep, the implement is then held in place with a spring latch, with no risk that they can work loose during use. When it’s time to remove them, you can use a specific tool or an ordinary screwdriver to push down the latch and release the sweep (again, sometimes a light tap with a hammer is needed).
Why choose quick-change sweeps?
The most obvious benefit of switching to quick-change sweeps is the significant time saving – farmers report being able to change every sweep on their field cultivator in as little as 20 minutes. There’s also the added convenience, since working with bolt-on sweeps means grappling with nuts, bolts and wrenches to get the sweeps attached and tightened adequately, often resulting in cut fingers.
About Wearparts Raptor-Loc sweeps
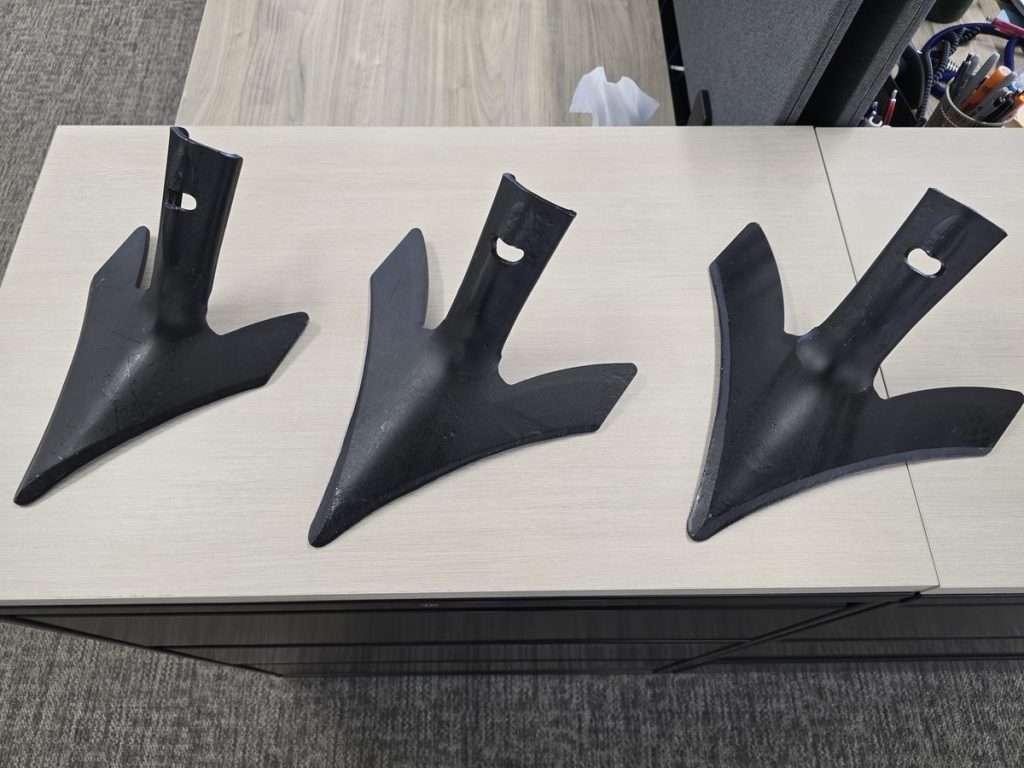
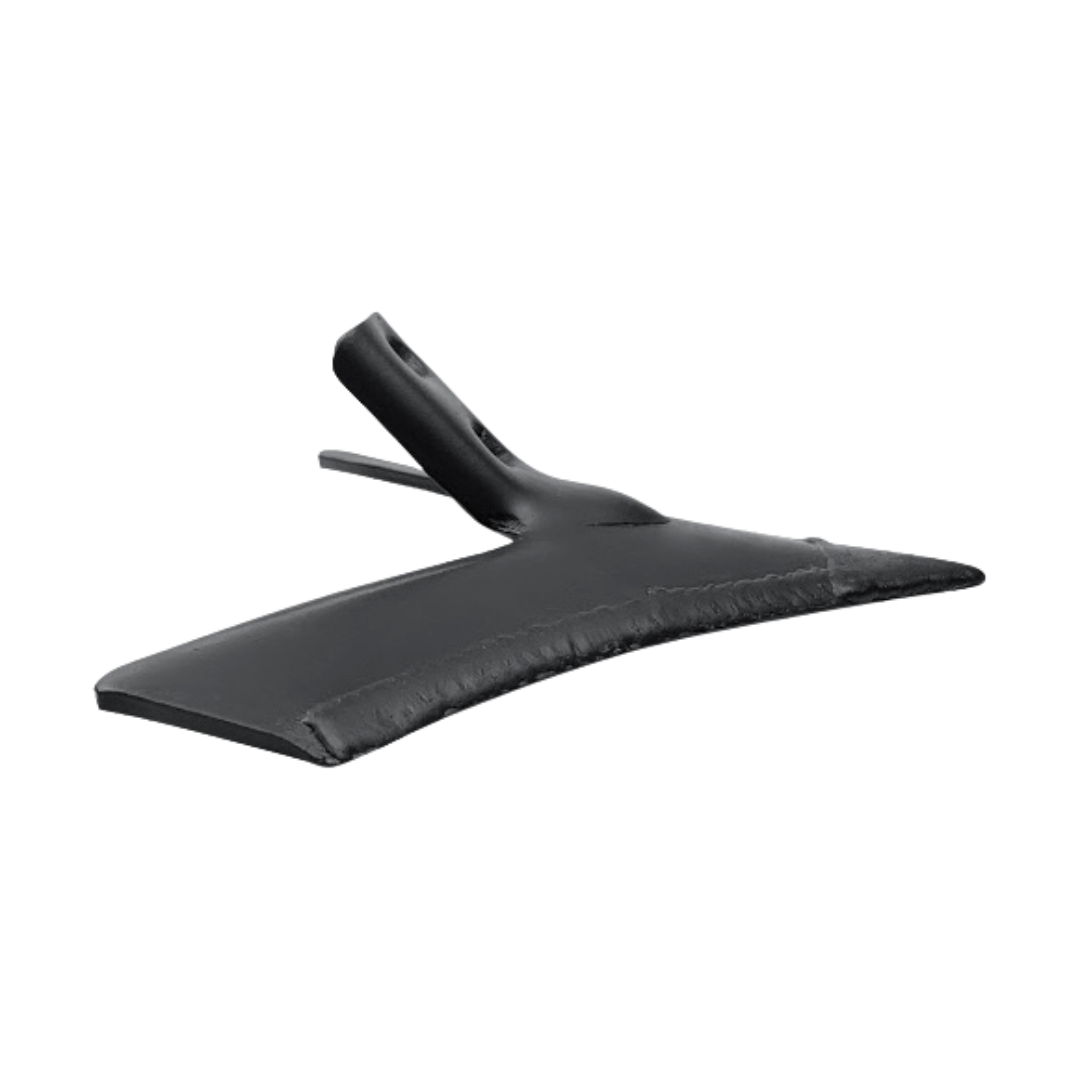
If you’re looking for an alternative to John Deere’s OEM Perma-Loc sweeps, Wearparts Raptor-Loc sweeps are the perfect alternative, providing heavy-duty performance that fits the John Deere spring-latch system with no need for an adapter.
The sweeps themselves are built to give farmers supreme performance, and are based on the design of our best-selling Raptor sweep. Key features include:
A curved wing profile
Offers a longer cutting edge within the same sweep footprint, reducing draft for lowered horsepower requirements and reduced fuel consumption while facilitating a higher working speed (optimal performance at 7-10mph).
An extended nose
Delivers advanced soil penetration, aggressively breaking up compaction and reducing wear on the blade.
A stay-wide wing
Wing ends are cut straight, parallel to the shank and each other, ensuring the cutting width remains consistent for the life of the sweep.
Lock-on stem
Designed to fit John Deere Perma-Loc with no need for an adapter – simply lock on and remove with a JD tool or the Wearparts one, supplied with every order.
Optional hardfacing
We can hardface these sweeps using the CMT process, which adds on average 30% extra material to the nose and leading edge of the sweep, extending the wearlife even in abrasive soil conditions.
Find a Wearparts dealer
Our new Raptor-Loc sweeps are available to order NOW from all good Wearparts dealers. Get a jump on your 2025 spring tillage and get your sweep game locked in now – or for further information and specific product questions, contactour knowledgeable sales team.
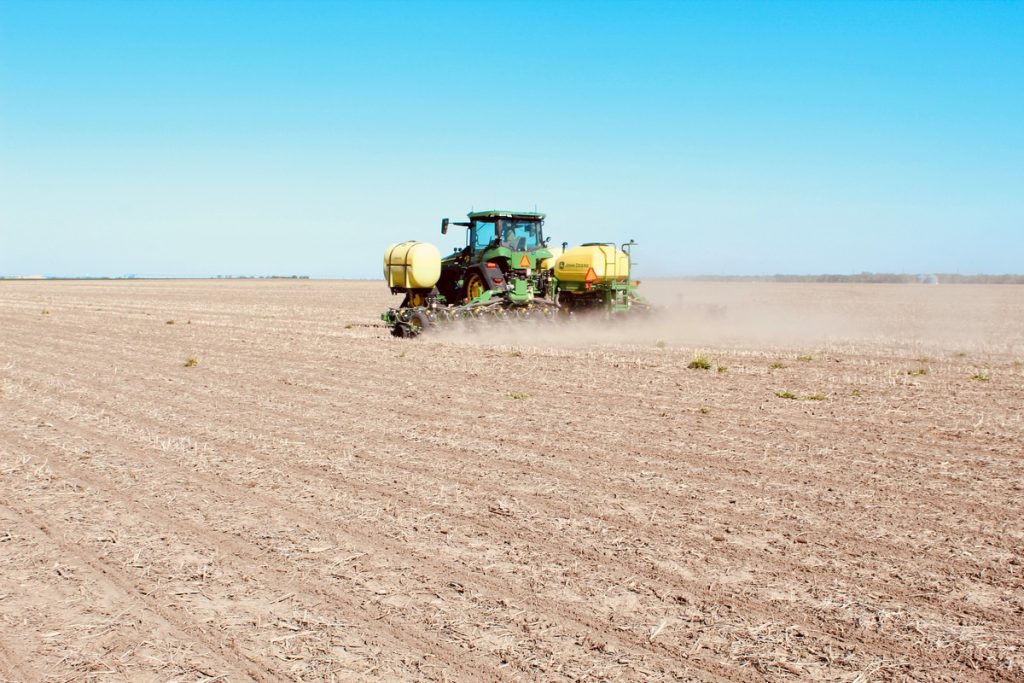
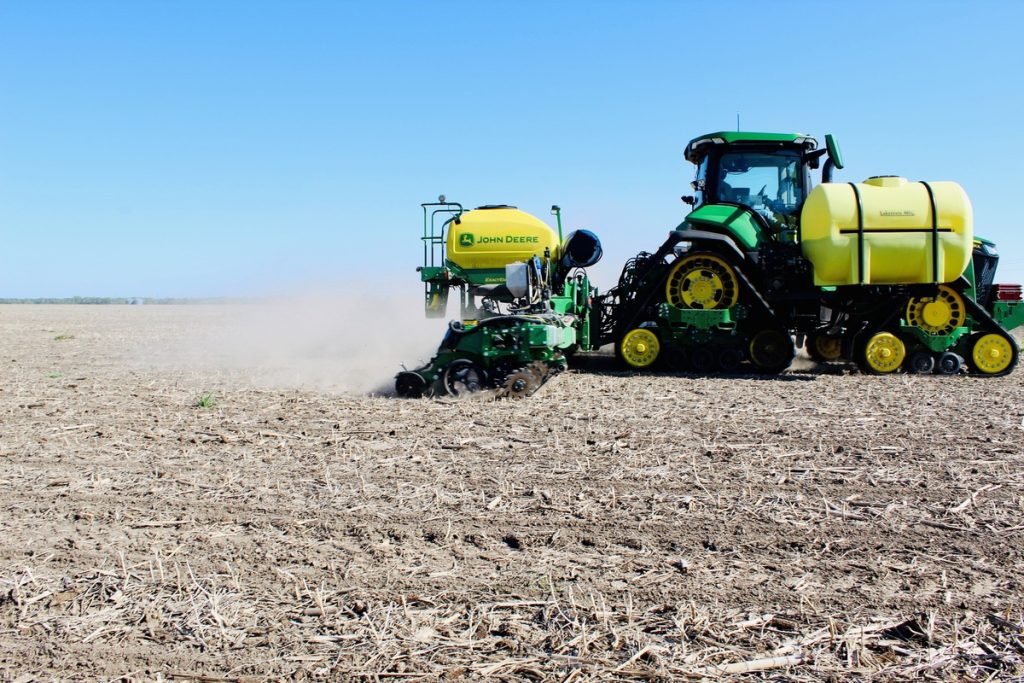
With the global population expected to increase by 2.2 billion by 2050, it’s estimated that farmers worldwide will need to increase food production by 70% to meet additional demand – but without more land mass to accommodate this growth, the industry is looking to precision farming practices for a solution.
Precision agriculture involves the use of modern technology and data gathering to effectively micromanage farming operations, enabling farmers to respond in real-time to variations in terrain, climate, and soil quality as a means of increasing yields.
In this blog, we’ll look at some of the technology around precision agriculture practices, and why it’s vital farmers choose premium quality implements to ensure the best possible return on their tech investment.
What technologies are used for precision agriculture?
Precision agriculture leverages a range of different technologies in order to enhance the efficiency of farming operations, with the ultimate goal of increasing crop yields from the same amount of land. Here’s a look at some of the key components:
Geolocation technology
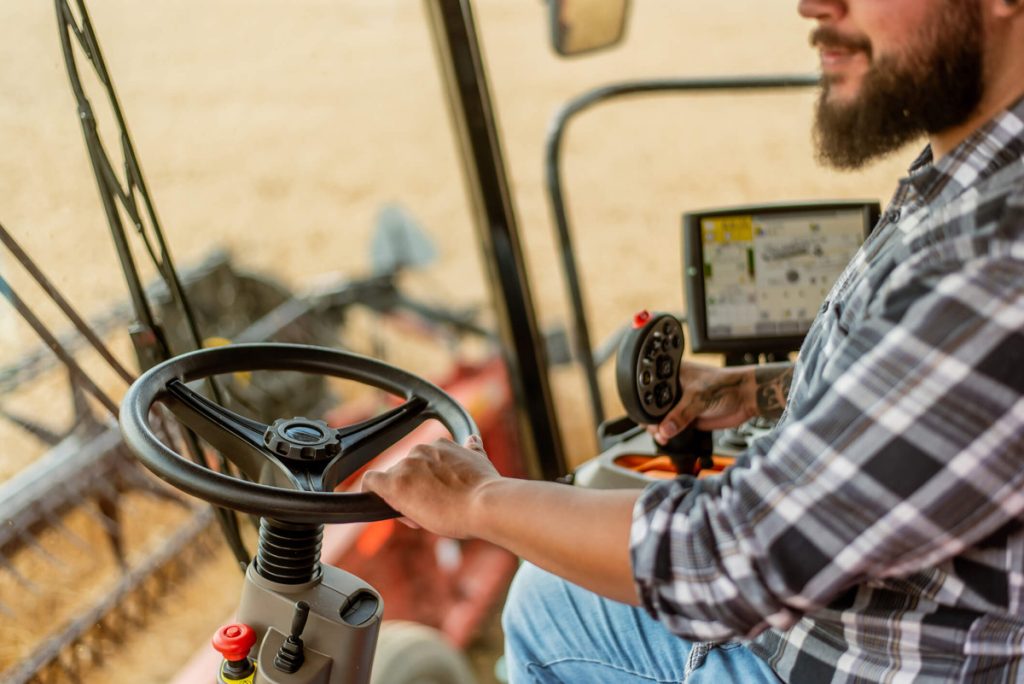
Precision ag relies heavily on Global Positioning System (GPS) technology and Geographic Information Systems (GIS) which allow for precise mapping and analysis of variations in field conditions and soil quality. GPS is used for accurate positioning and navigation of farming equipment so farmers can respond to different conditions in different locations using onboard computers in the tractor cab – for example, they might adjust the amount of fertilizer being dispensed if they know an area of the field is particularly lacking in nutrients.
Sensors and Monitors
Sensor technology can be used to monitor a wide range of environmental and soil conditions, including moisture levels, temperature, pH, and nutrient status. These sensors can be stationary in the field, handheld/manual, or mobile, attached to machinery or drones. They feed information back to a computer on the desktop or even directly to an onboard computer in the tractor cab.
Variable Rate Technology (VRT)
VRT enables farmers to vary the rate of application of inputs such as water, fertilizers, and pesticides depending on the specific needs of each area as determined by sensor data. This helps to optimize resource use and minimize waste.
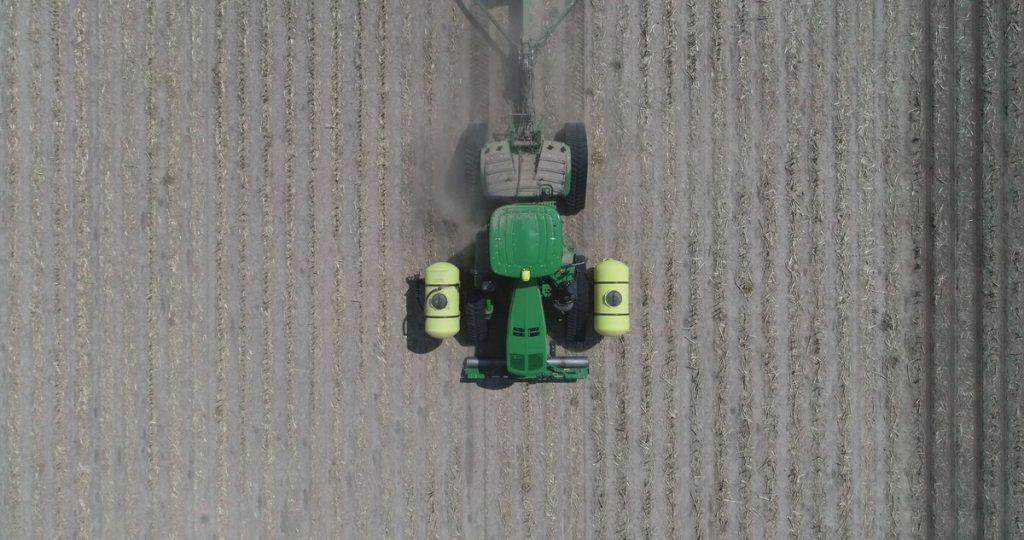
Drones
Drones equipped with cameras or sensors can provide detailed aerial assessments that help farmers evaluate crop health and stand uniformity, as well as identifying pest and disease outbreaks. This ‘birds-eye view’ is vital for spotting potential problems before they take hold, and also for understanding what’s working and what isn’t in your precision ag strategy for future reference and iteration.
Analytics Software
Sensors, drones, and other technologies are capable of collecting large amounts of insightful data that can help farmers unlock hidden potential in their farmland and farming practices – but first, they have to be able to analyze that data. Specific software programs exist that make this process simple and quick for busy farmers – they can predict crop yields, suggest optimal planting times, tell farmers when to fertilize or irrigate, and more.
Automated and Robotic Equipment
Farmers are increasingly turning to automated processes to help save them time and labor costs. This includes self-driving tractors, robotic harvesters, and automated irrigation systems. These technologies can leverage the power of data to make farms more productive too.
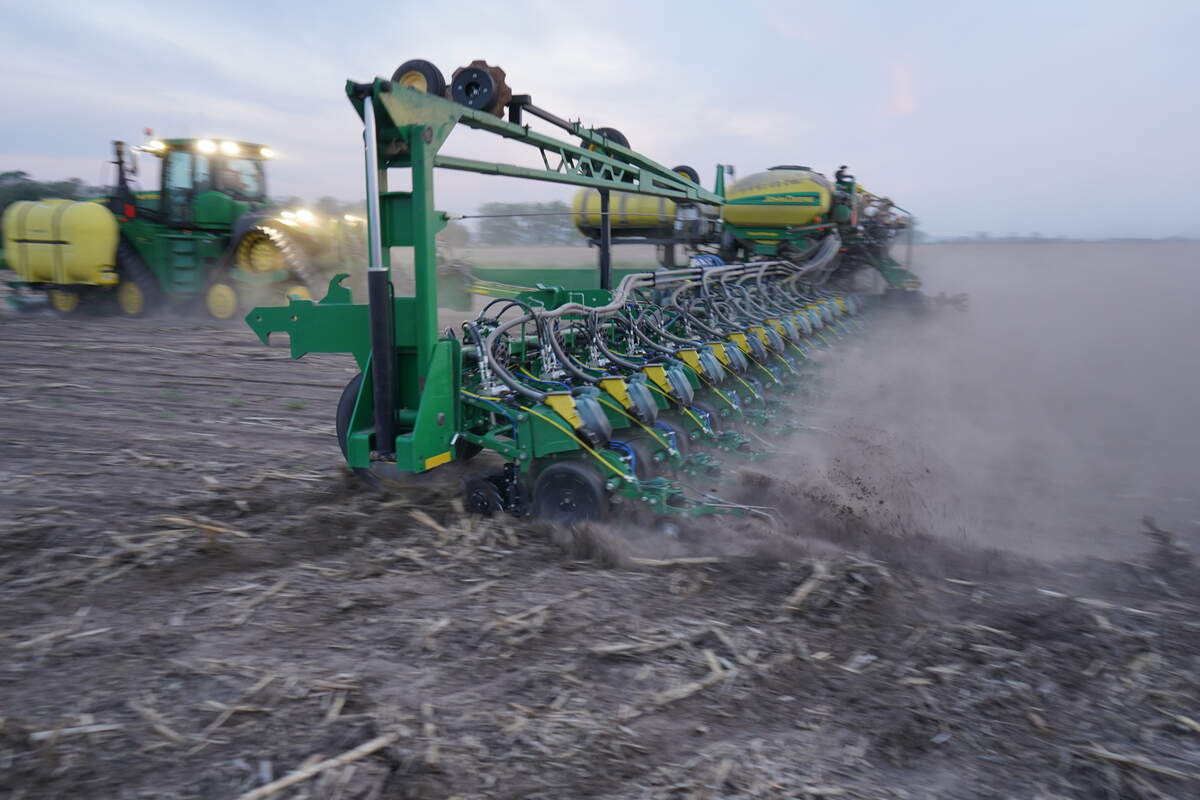
Precision Seeding Technology
Controls downforce, metering, seed depth & placement in order to achieve uniform emergence and maximum crop productivity
Are there drawbacks to precision agriculture?
Precision ag is at its most effective when all of the technologies mentioned above work together in harmony to empower farmers with knowledge, and the ability to act on it in the field.
However, one of the biggest drawbacks is the cost of investing in and implementing precision ag technology. For this reason, it is predominantly used by large-scale private and commercial farms with the financial resources to spend, and the most potential to gain.
With that said, smaller-scale farmers with smaller budgets can still benefit from the more affordable aspects of precision agriculture – for instance, many farms now use drone technology to monitor crop health, and the majority already have sensor technology and analytics software fitted as standard in their tractor cabs, to maximize efficiency in tillage and planting operations.
There is also now a rental market for precision ag technology, opening the door for growers to avail of the benefits without a huge capital investment.
Essential tools for precision agriculture
It goes without saying that all the sensors, computers, and automation in the world won’t make your farming practices more precise if you’re running sub-standard tillage and planting implements.
We can’t stress enough how vital it is, especially during planting time, to select disc openers, gauge wheels, and other components that can offer accurate, consistent performance for an extended period of time – otherwise, all the efficiency you gain from technology will potentially be lost to downtime, uneven seed placement, inconsistent input application and a multitude of other operational factors.
Here’s a look at some of the specific ways Wearparts components can support the objectives of precision agriculture:
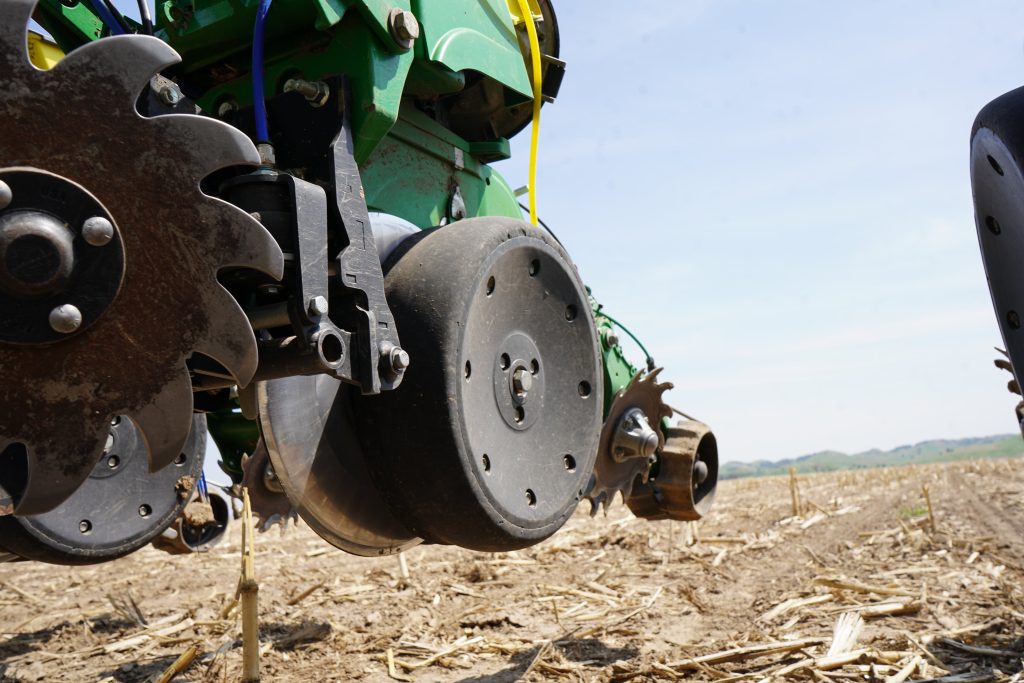
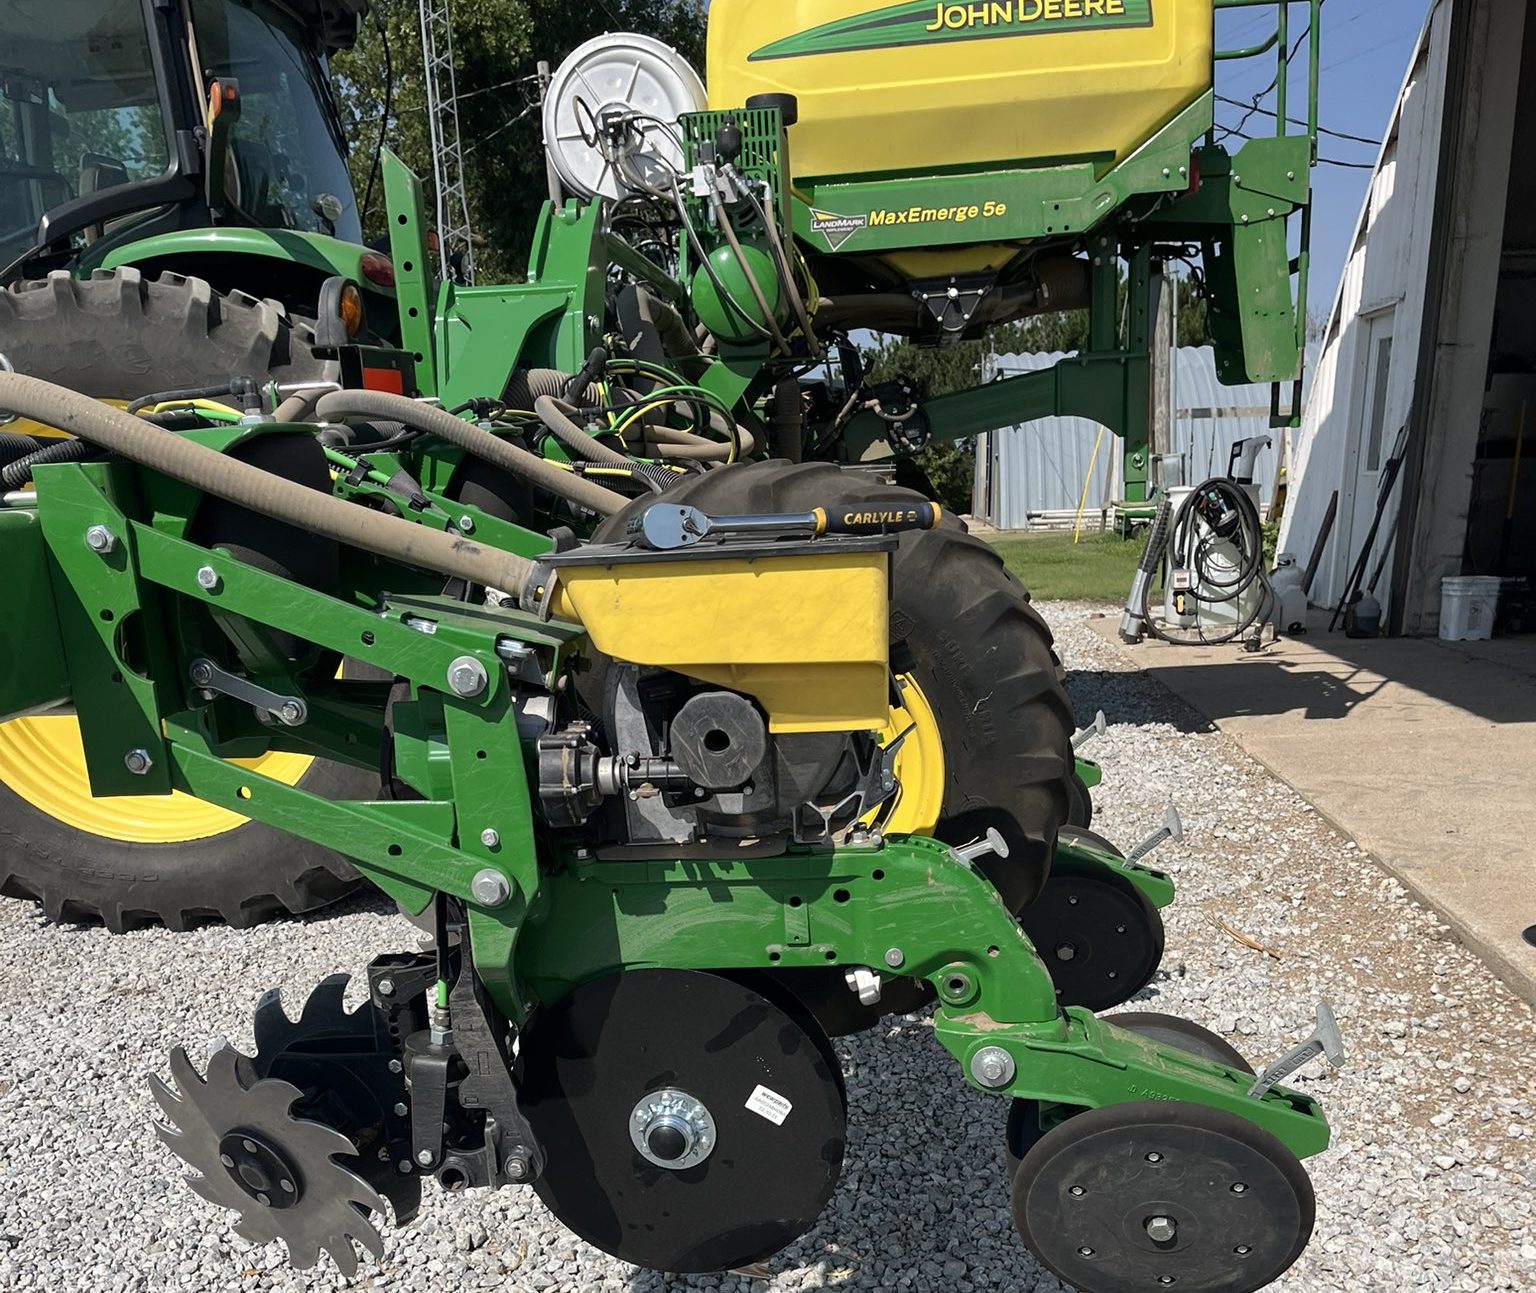
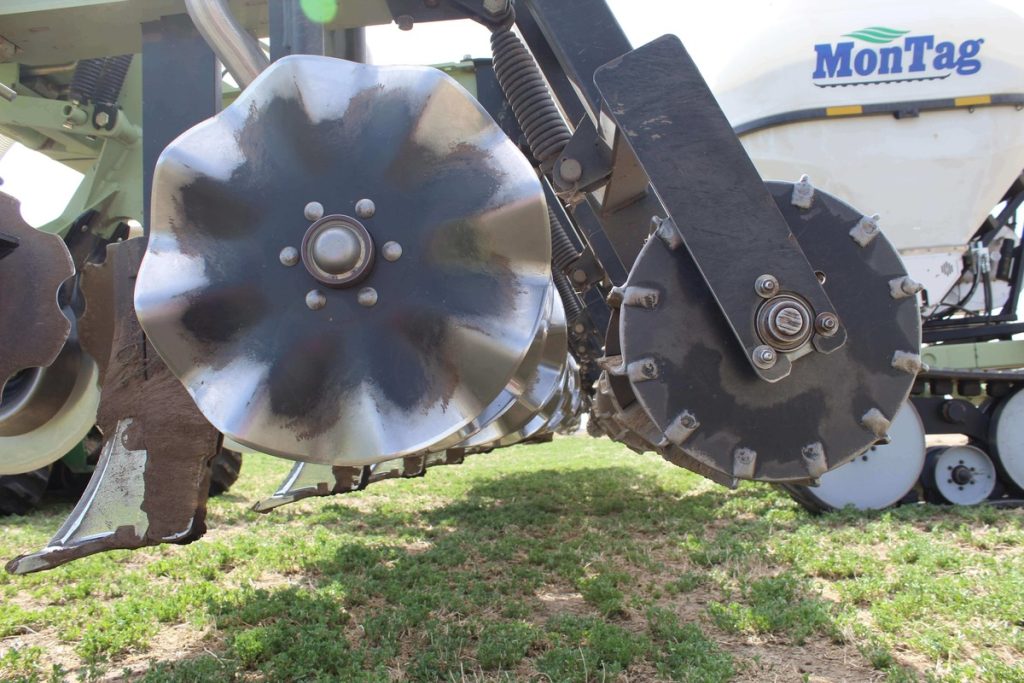
Ultra-precise seed openers
Seed openers have one vitally important job when it comes to precision planting – opening a clean, straight, and consistently v-shaped trench for the seed to drop into.
When the trench is precise, the seed will always fall into the bottom, which ensures optimal planting depth. If the trench varies in depth, if it wobbles from side to side, or if it’s contaminated with loose soil or residue, there is a real risk the seed will not land at the optimal depth, or that air pockets can form around it when the trench is closed. This in turn can lead to seeds rotting, slow germination, or failure to emerge at all.
For the seed opener to create a perfect trench it must have a perfectly consistent ‘pinch point’ where the two blades meet. We test 100% of our seed opener assemblies to ensure they meet our industry-leading standards on wobble and lope.
As a result, every blade that leaves our factory delivers a consistently accurate pinch point, with minimal need for extra shimming or adjustments. Not only that, our seed openers undergo a patented heat treatment process to enhance their sharpness and longevity, even in tough soil conditions.
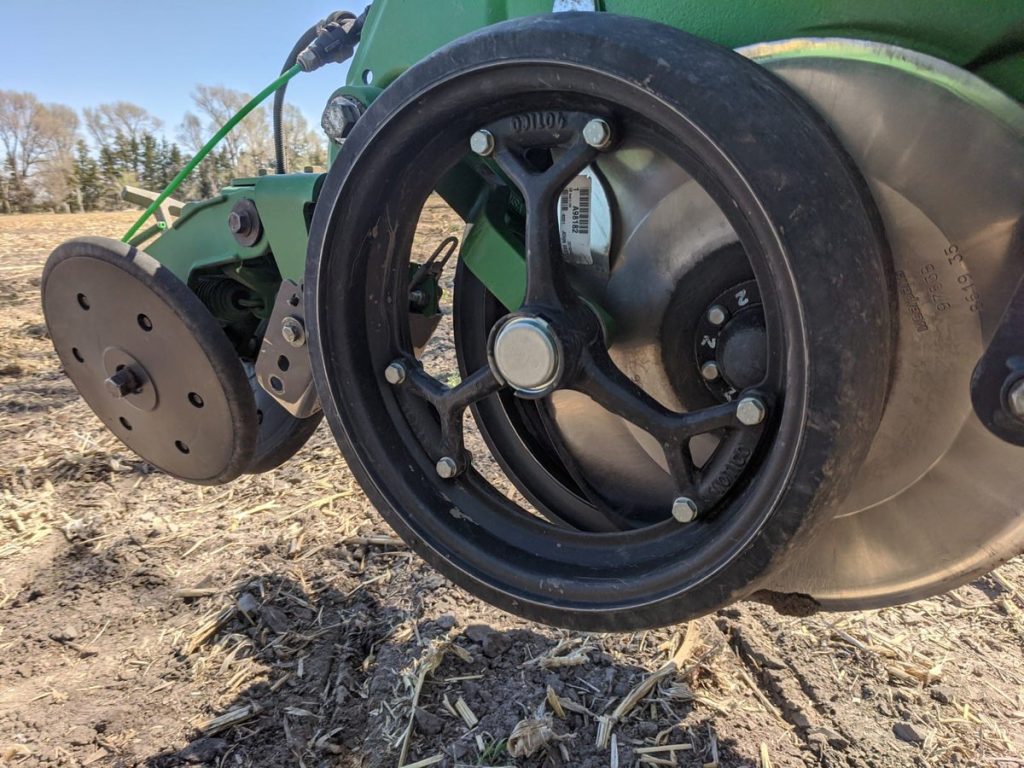
Premium gauge wheels
Gauge wheels are the unsung heroes of planting season and absolutely vital for giving advanced machinery and software the physical tools to optimize performance. As well as ensuring adequate, consistent seed depth, gauge wheels play an important role in trench stability and overall soil structure – read more about how our gauge wheels help farmers to plant more efficiently while preventing soil compaction.
Long-life tillage tools
You might think that precision agriculture doesn’t really apply to tillage operations – but you’d be wrong. Increasingly, farmers employing precision ag practices are looking to apply the principles of variable rate to their tillage operations as well, using tech to vary the depth, angle and intensity of tillage tools on the go.
It’s not hard to see how the time this saves could be easily eaten up if your disc blades, sweeps or other tillage tools are wearing out quickly and needing to be replaced every few thousand acres.
That’s why we innovate to ensure Wearparts tillage tools are among the toughest in the business, with a spec equal to or exceeding the leading OEM. We also offer custom hard-facing on selected ground-engaging components to make them last longer, even in compacted, rocky or abrasive soils.
Advanced fertilizer knives
Fertilizer application is a key input for farmers looking to maximize yields and in precision ag systems, the preference is usually to apply liquid or anhydrous fertilizers right at the point of need, i.e. under the soil as opposed to on the surface. This has a number of benefits in that it prevents runoff and subsequent contamination of waterways while making nutrients directly available to the root systems of newly germinated seedlings.
Wearparts offers fertilizer knives to suit just about every toolbar, terrain and fertilizer type, and our products are specifically engineered to deliver precision application acre after acre, working in tandem with sensor and automation technology to make sure the optimal amount of fertilizer is delivered to the optimal depth, every time.
The future of precision farming
There’s little doubt that precision agriculture technology will continue to evolve, with the potential for more automated and robotic technology in particular offering farmers the opportunity to reduce labor costs, thus making farms more productive AND more profitable.
Whatever the future holds, however, it’s unlikely we’ll see significant changes to the mechanical processes farmers currently use to prepare for, plant, nurture and harvest their crops.
With global OEMs like John Deere leading the way on the tech side, at Wearparts we’re committed to supporting farmers in a more practical way, through a commitment to quality, reliable components that offer superb compatibility with pioneering OEM technology while enhancing farming outcomes through increased precision and extended wear life.
Get in touch to learn more about our precision-engineered farming implements or find your nearest dealer here.
With economists predicting headwinds for agriculture in 2024 as a result of recent upward inflation and the looming threat of a global recession, it’s more important than ever for farmers to make smart choices that improve efficiency and protect profit margins.
At Wearparts, it’s always been our goal to supply aftermarket tillage and planting with enhanced precision and a longer wear life – and increasingly, farmers are recognising the benefits of investing in quality components capable of working harder for longer (spoiler alert: that doesn’t always mean the OEM).
Here’s a look at 5 ways we make sure our tillage and planting parts deliver precision, efficiency, and longevity for more profitable farming.
1. Patented Heat Treated Blades
To a non-farmer, a broken blade doesn’t sound like such a big deal – you just take the broken one off and replace it, right? But a broken seed opener or tillage blade can have fairly major implications depending on how soon you notice the breakage, how quickly you can get a replacement to the field – and what the weather is doing in the meantime.
Wearparts seed openers from Forges de Niaux feature a patented heat treatment that gives each blade three different zones of hardness – they’re harder at the edge for increased durability where the blade touches the soil, but softer and more flexible towards the center of the blade so it can still flex if it hits a rock.
As a result, farmers experience a much longer wear life – often double the time of their OEM blades – with no breakages and no unpredictable downtime.
2. Custom Hardfacing
For tillage operations, you need implements with the ability to aggressively cut through compacted earth, breaking up clods, tearing through weeds and incorporating trash depending on what you’re trying to achieve.
As a result, tillage implements typically encounter heavy wear and tear along the leading edge. Our custom hardfacing service means we can offer farmers enhanced durability on tools that are pulled through the subsoil, such as sweeps and fertilizer knives.
Hardfacing adds up to 30% more material to the leading edge using a cold welding process that prevents distortion, warping, and contamination of the base metal. The resulting implement is therefore heavier and stronger and capable of completing more acres before needing to be replaced.
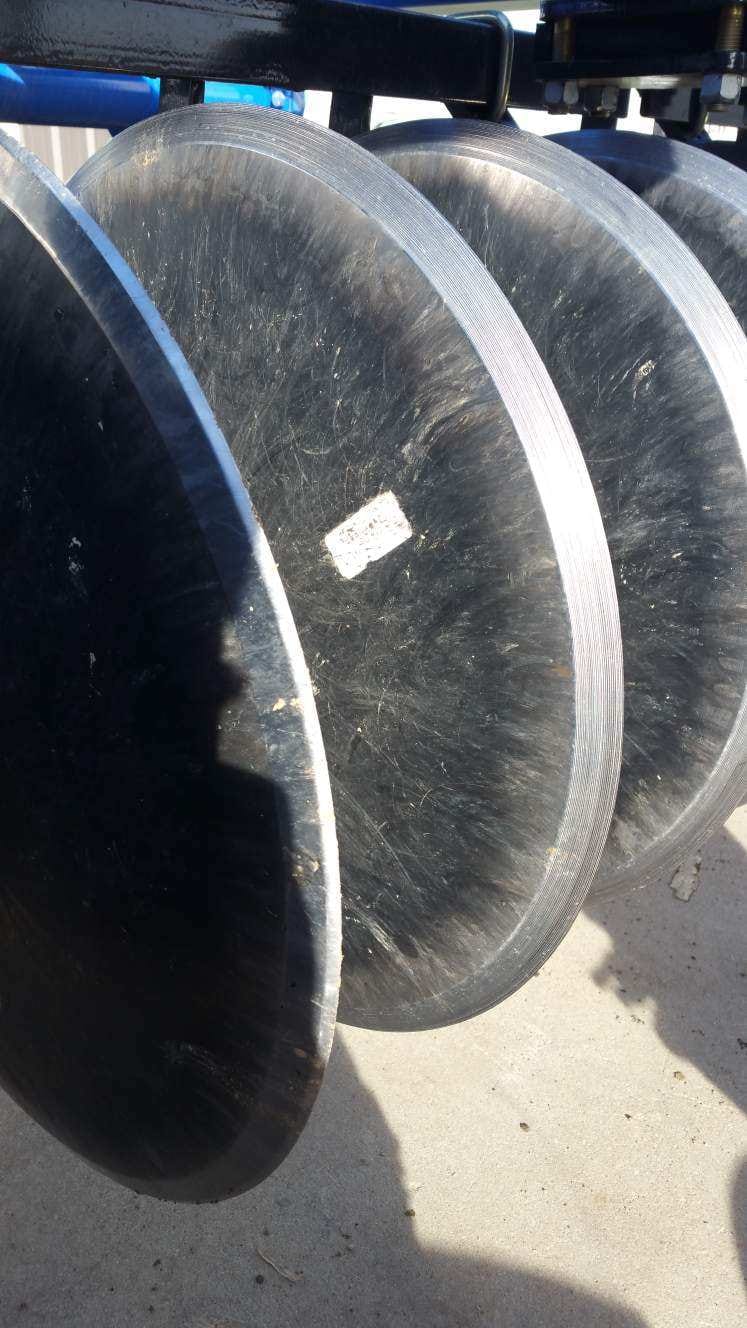
3. Extra Life Blades
We can’t hardface our disc blades for obvious reasons, but our Extra Life rollable blades offer similar benefits in terms of wear life. Typically, rollable blades aren’t made from boron steel because it’s not very malleable – but we’ve landed on a metallurgic composition that means our Extra Life blades have a high boron content for strength and durability, with enough malleability to facilitate the rolling process.
Rolling simply means that when the blade gets worn, it can be pressed between a set of mechanical rollers that squeeze it out to a thin, sharp edge again – restoring lost blade diameter and compressing the metal so that the cutting edge is even harder and sharper after rolling than it was before. This extends the life of the blade and gives the farmer additional cutting power.
4. Self-Sharpening Technology
All blades get dull over time – but with clever engineering, it’s possible to significantly extend the useful life of blades like seed openers while ensuring precision performance for longer.
The way a blade wears depends on how it’s made – specifically its hardness and bevel profile. Our Forges de Niaux blades are made to a unique Wearparts specification, so not only do they have that harder, heat treated edge, they also have a longer bevel – three-quarters of an inch as opposed to five-eighths.
That longer, shallower bevel means that the abrasive action of the blade turning through the soil sharpens the leading edge and ensures the pinch point remains intact for a clean, v-shaped trench. Of course, the blades will eventually wear out – but depending on soil conditions, we’ve seen our customers get double the acreage from a set of seed openers that they were previously getting from their OEM blades, and the average based on field tests is 30% longer life than the closest competitor blade.
5. Testing & Continuous Improvement
Testing isn’t something we do to our blades to physically extend their life, but it’s a hugely important part of what makes Wearparts blades stand apart from the competition.
We conduct extensive, in-house and field testing on our products in order to gather data and insights about how long they last, and how they wear. This enables us to make adjustments during the manufacturing process that can significantly improve the durability of our tillage and planting tools.
But the benefits of testing don’t stop there. Take our Guaranteed True™ promise, for example. It’s based on our commitment to testing 100% of our seed opener assemblies before they leave our warehouse. And we’re not talking about a quick check – we test to some of the strictest tolerances in the ag industry, specifically .050/1.27mm axial / .060/1.52mm radial for seed openers. The absence of wobble and lope in our blades means they’re super precise, but also that they wear more evenly, which ultimately extends their life.
Wearparts is different because we really care about farmers – as a family-run business, we know what it’s like when margins are tight so when you choose us, you’re choosing quality and integrity that’s built to make a tough job easier, and more profitable.
Across the Midwest, Great Plains and Great Lakes regions and into the southern US states, the arrival of March means that planting season is imminent – but an increasingly unpredictable climate means farmers are having to rely more on intuition and less on tradition when it comes to deciding the right time for planting.
So what are the right conditions for planting America’s commonly grown crops – and how risky is it to start planting earlier than usual?
In this blog, we’ll look at the ideal conditions for planting major crops like corn, soy, wheat, cotton and peanuts – when to plant depending on your region, the risks of planting crops early, and which soil conditions are needed to get seeds off to a flying start.
Corn
Where does corn grow best?
Corn thrives in warm, temperate climates and grows best in the famous ‘corn belt’ states – roughly covering Indiana, Illinois, Iowa, Missouri, eastern Nebraska and eastern Kansas – but it’s grown a lot more widely than this, ie. the Delta States.
What soil conditions does corn prefer?
Corn is a hungry crop and prefers a loamy, well-drained soil that is rich in organic matter. pH between 6.0 and 6.8 is ideal. If your soil lacks organic matter or is compacted, it’s advisable to deploy tools for residue incorporation and soil aeration to maximize the seed’s chances of germinating successfully. Consider cover crops in the off season to replenish nitrogen and prevent soil erosion.
Sandier soils can be planted earlier than heavier soils because they dry out quicker and therefore warm up faster in spring; however sandy soils also experience wider temperature fluctuations which can impact growth.
When should corn be planted?
In the Midwest, Great Plains and Lakes regions, corn planting typically begins in late April to early May once soil temperatures reach a minimum of 50°F at 2 inches deep. Further south, corn planting often begins earlier.
If the soil temperature is lower than 50°F, seeds cannot germinate and root development cannot take place. The longer an ungerminated seed is exposed to cold temperatures, the greater the risk of chilling injury to the seed which can result in deterioration and subsequent weakness in the emerging seedling, making it more vulnerable to pests and disease.
What are the risks of planting corn early?
The biggest risk of planting corn early is that the young plants are very vulnerable to frost, so even during a warmer than usual spring, it’s advisable to wait until the risk of frost has passed before planting.
It’s also advisable to plant on a day with a warming trend in the 3-5 day forecast and no rain for 24 hours after planting – this is because when a dry seed absorbs cold water, it can injure the seed, causing the same sort of problems you’ll typically see if the soil conditions are too cold.
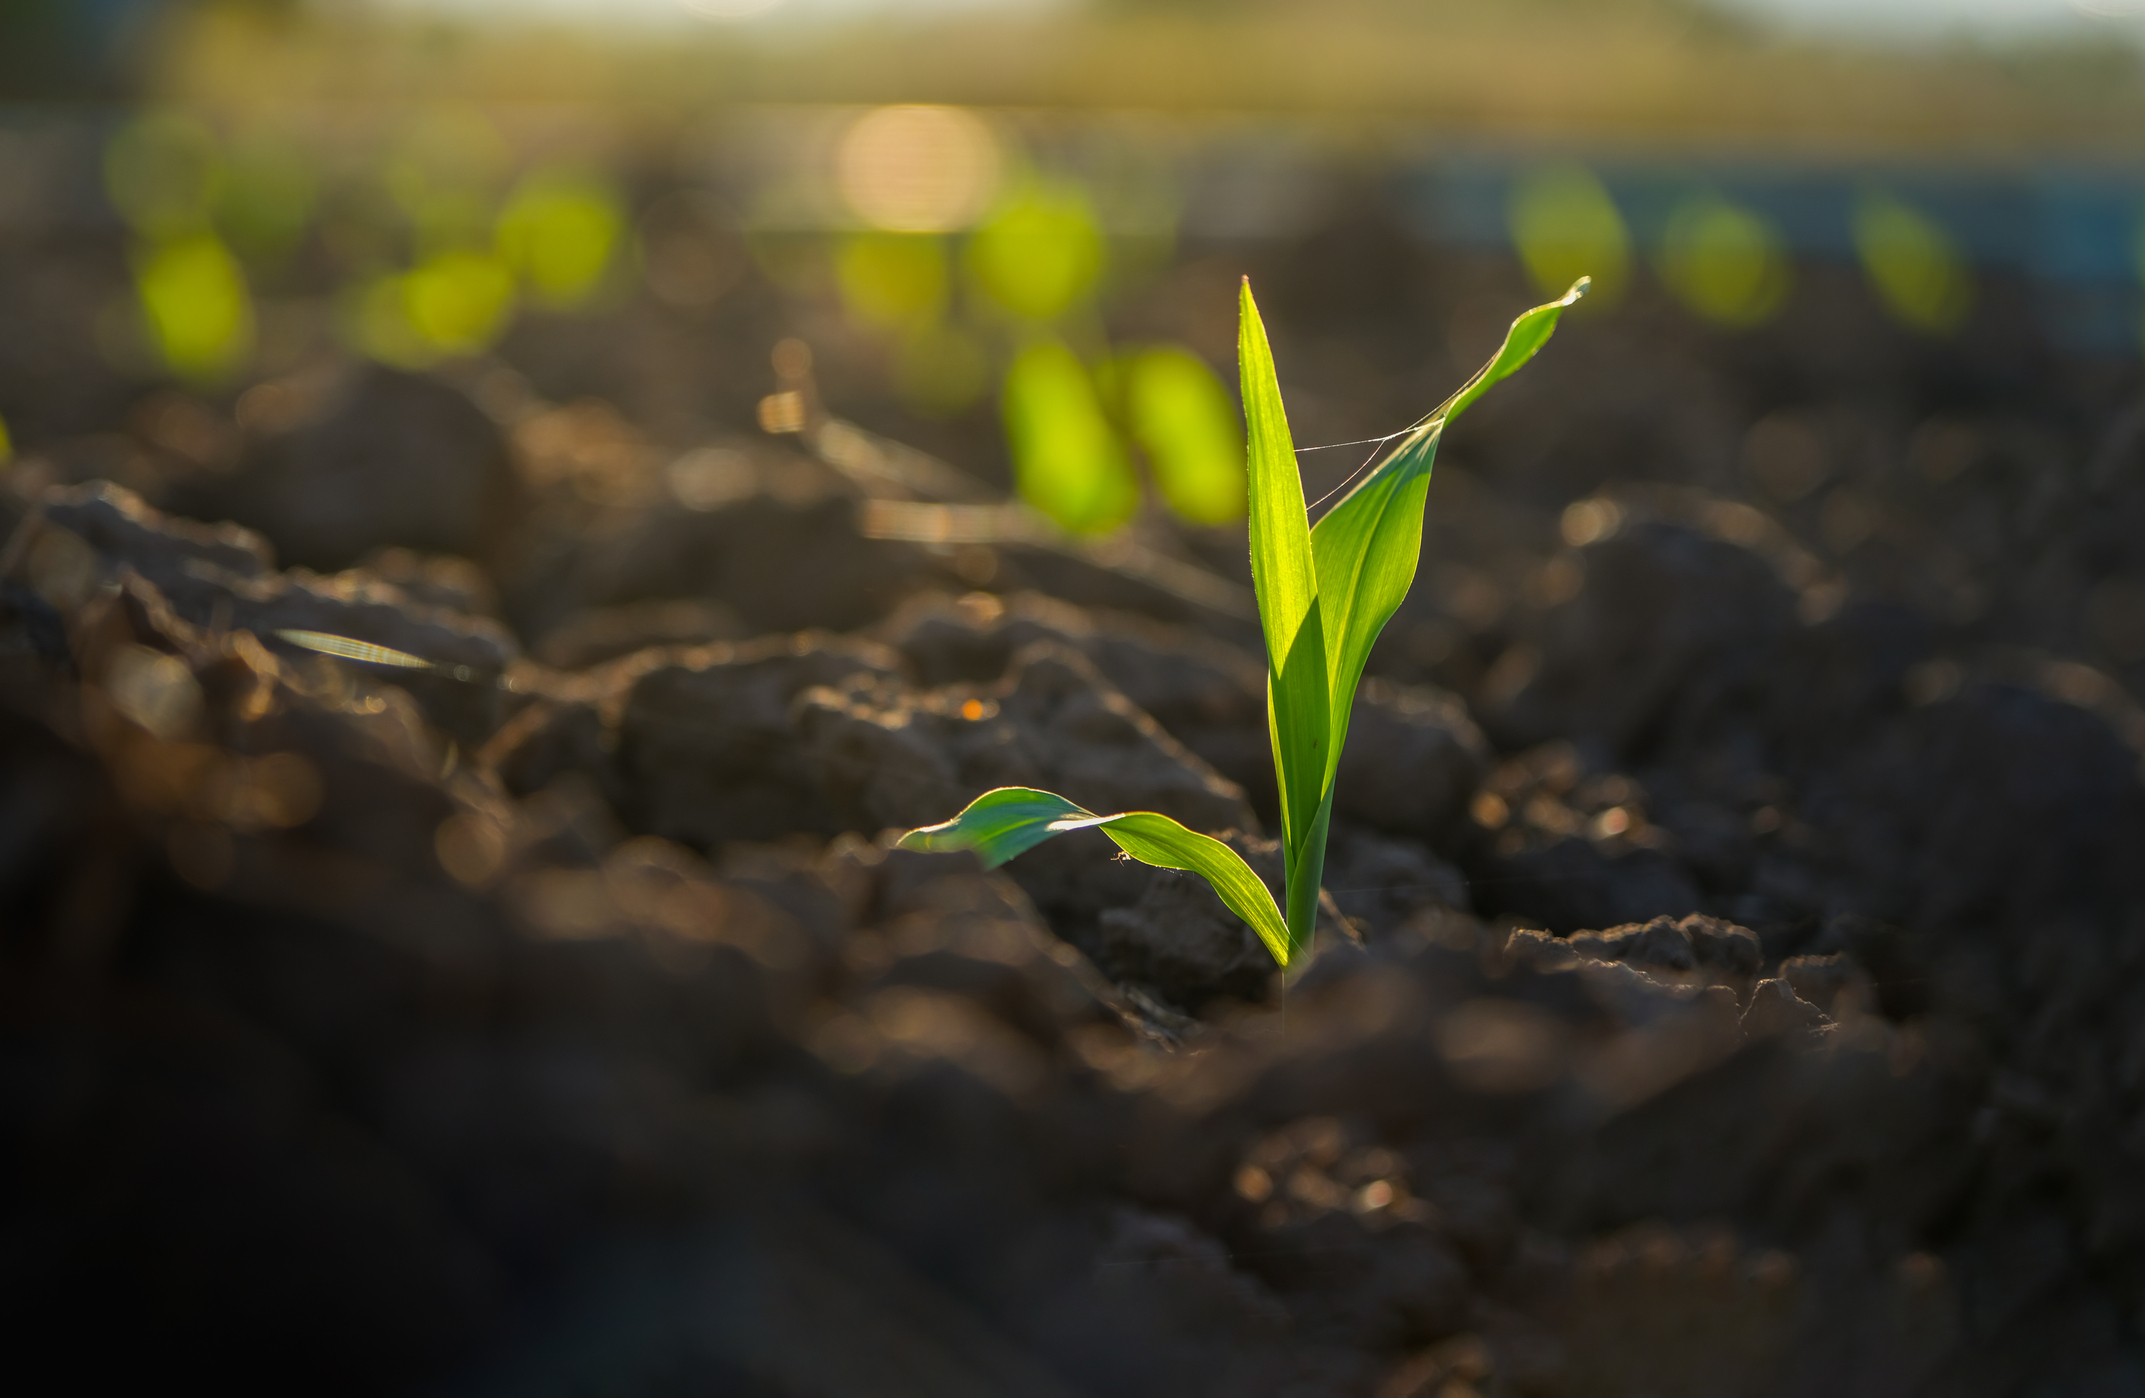
Even when the risk of frost has passed and average soil temperatures are optimal, beware of planting corn when there are wide swings in the soil temperature overall. Corn seedlings germinate more consistently and grow strongly when the soil temperature remains stable – large fluctuations can cause seed failure and stunted growth leading to uneven crop stands, which is the biggest predicating factor of lower yields at harvest.
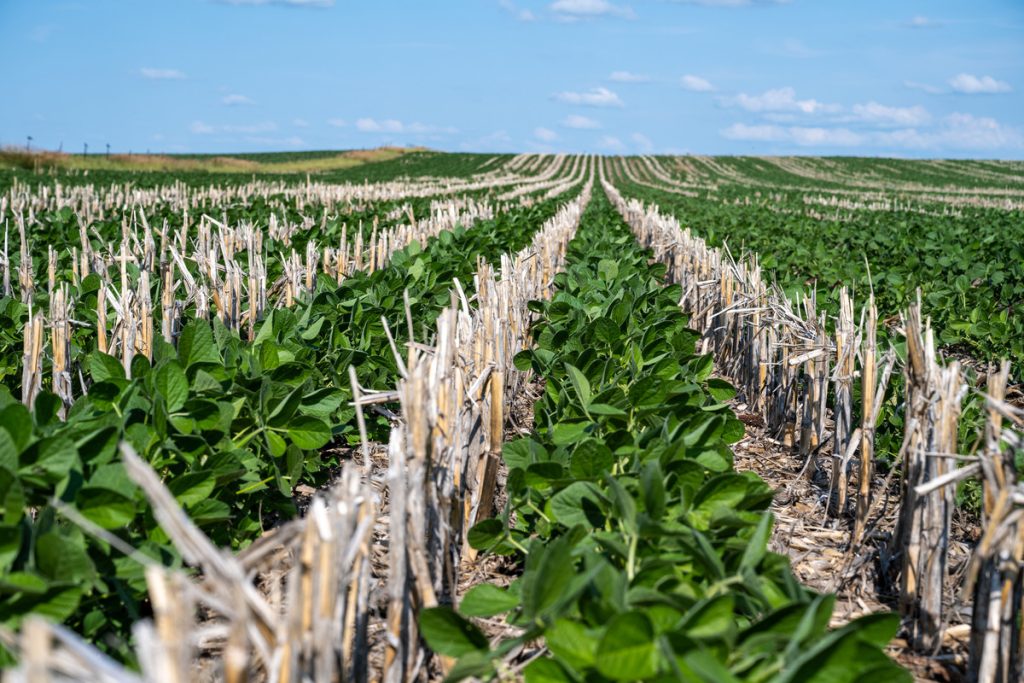
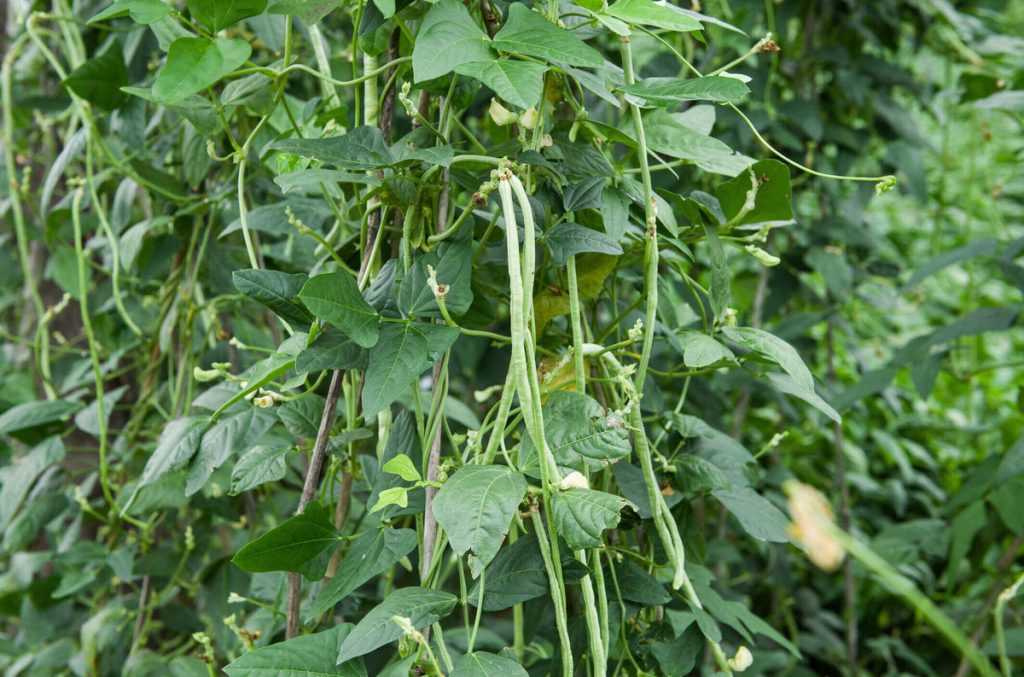
Soybeans
Where do soybeans grow best?
Soybeans grow well in the same sort of conditions as corn, and the bulk of the US soybean crop is grown in the same Midwestern states where warm soil temperatures and moderate rainfall promote successful growth of this important legume.
What soil conditions do soybeans prefer?
Soybeans prefer well-drained, fertile loamy soils with an ideal pH of 6.3 to 6.8. They need slightly warmer soil temperatures than corn and should be planted when the soil reaches a minimum of 55°F, typically a few weeks after corn.
As a legume, soybeans are nitrogen fixing and therefore are often grown in a rotation with corn, which benefits from the soil-enhancing properties of a soybean crop.
Soybean seedlings will struggle to compete with weeds for light, nutrients and water, especially once the young plants being to increase in size. Research suggests that competition from weeds when plants are small can have a big impact on crop yields later on, because the young plants put resources into growing tall in order to reach the light, rather than forming nodes. You can explore tools for mechanical weed management here.
When should soybeans be planted?
In more northerly regions, soybeans are typically planted a few weeks after corn in May or early June, once the soil temperature is consistently holding at 55°F or higher.
However, research shows that treated soybean seed can be sown earlier with less risk of seed injury due to cold – and that earlier sowing can have a positive effect on eventual crop yields. It’s thought that when soybeans are planted earlier, the period between planting and flowering is significantly extended – and this gives the plant a bigger window for vegetative growth and the development of nodes, which eventually become pods, leading to a greater crop yield even when factors such as emergence rate and stand uniformity stay the same.
What are the risks of planting soybeans early?
Like corn, soybean crops are vulnerable to the effects of cold and particularly frost, which can affect the seeds – which may germinate unevenly or not at all – and also the young plant, which can be stunted or even killed off by spells of cold weather.
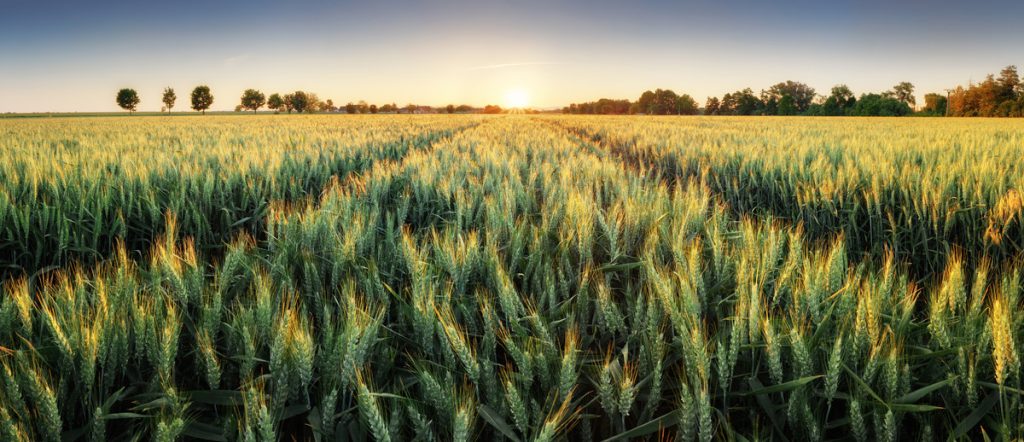
Spring Wheat
Where does spring wheat grow best?
Wheat is a cool weather crop that is most often sown in the US during the fall and harvested in the late spring or early summer of the following year. Spring wheat is sown in the spring and harvested in the fall, and as a result it is typically only grown at higher latitudes where summer temperatures are lower – primarily in North Dakota, Minnesota and Montana.
What soil conditions are needed for spring wheat?
Wheat adapts well to a wide range of soils but thrives best in loamy, fertile soils with good drainage – it doesn’t like wet conditions. Heavier and compacted soils will benefit from light tillage to promote soil aeration prior to planting.
When should spring wheat be planted?
Spring wheat benefits from sowing as early as possible, once soil temperatures are holding around 35°F and the 30-day forecast shows air temperatures consistently above freezing. In spring wheat states, this typically occurs in early April. Planting after mid-May is not advised unless average temperatures are significantly lower than usual.
Can you plant spring wheat too early?
Wheat is known as a tough crop because it keeps its growing point below the soil during early spring, which means it’s generally protected against frost until the plant is well-established. Therefore, farmers aim to get spring wheat in the ground as early as possible once the soil has become workable. The risk of an early spring is that the window for the earliest possible planting will be missed, especially if an early spring is followed by a warmer than average summer.
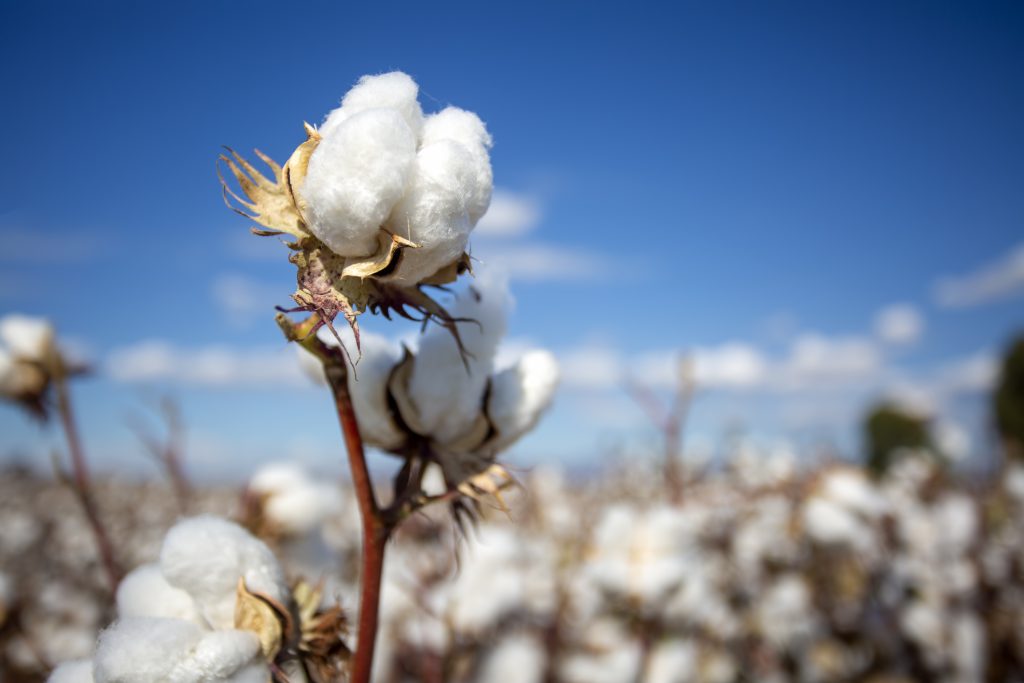
Cotton field (Turkey / Izmir). Agriculture concept photo.
Cotton requires a long, hot growing season and therefore is predominantly grown in the southern US, with Texas being the single largest producer, followed by Georgia, Mississippi and Arkansas.
What soil conditions does cotton require?
Cotton prefers a nutrient-rich soil that is well-aerated and free draining with a pH between 5.8 and 8.4 ideally. It is drought tolerant, but will benefit from irrigation during very dry spells. Heavy and waterlogged soils are not ideal for growing cotton.
Young cotton plants lack competitiveness and therefore it’s important to plant into a weed-free environment, and eliminate emerging weeds that might out-compete the crop until the plants are well-established. Check out tools for weed management here.
When is cotton usually planted?
The timing of cotton planting is important for rapid, uniform emergence of the young plants. This offers protection against common pests, such as thrips, and ensures the whole crop hits the various stages of cotton growth – squaring, flowering and open boll – at the same time.
Cotton should not be planted before soil temperatures hit a minimum of 60°F. The subsequent development of the plant is typically measured in heat units called DD60s – the amount of time the crop is exposed to 60-degree heat – instead of days. Calculating heat units allows for the accurate prediction of how quickly a crop will develop and for this reason, it’s important to monitor overnight low temperatures as well as daytime highs. As a rule of thumb, it takes around 50-60 heat units for a seed to emerge as a seedling, and ideally that plant would accumulate 6-10 units per day in the first week to get off to a good start. Learn more here.
What are the risks of planting too early?
Cotton plants are notoriously susceptible to adverse environmental conditions, so encouraging uniform emergence and rapid early season growth is not only critical to establishing a uniform stand, but also builds resilience to other stressors like pests, weeds and drought.
If cotton is planted too early and then exposed to colder soil temperatures (or cold water from rainfall) during the critical germination period, chilling injuries to the seeds can prevent germination altogether, or lead to poor root formation that will likely affect the vigor of that plant throughout its life cycle. Weak and slow-growing plants are more susceptible to insect damage and other diseases, and will reach maturity later than the healthy plants in the stand, leading to delays and inevitable losses at harvest.
Therefore it’s advisable to delay cotton planting until:
Soil temperature at 4-inch depth is 65° F or greater at 8am for at least three consecutive days.
The five-day outlook forecasts dry weather and a minimum of 26 DD60s.
Low temperatures are forecast to remain above 50°Ffor the following five days
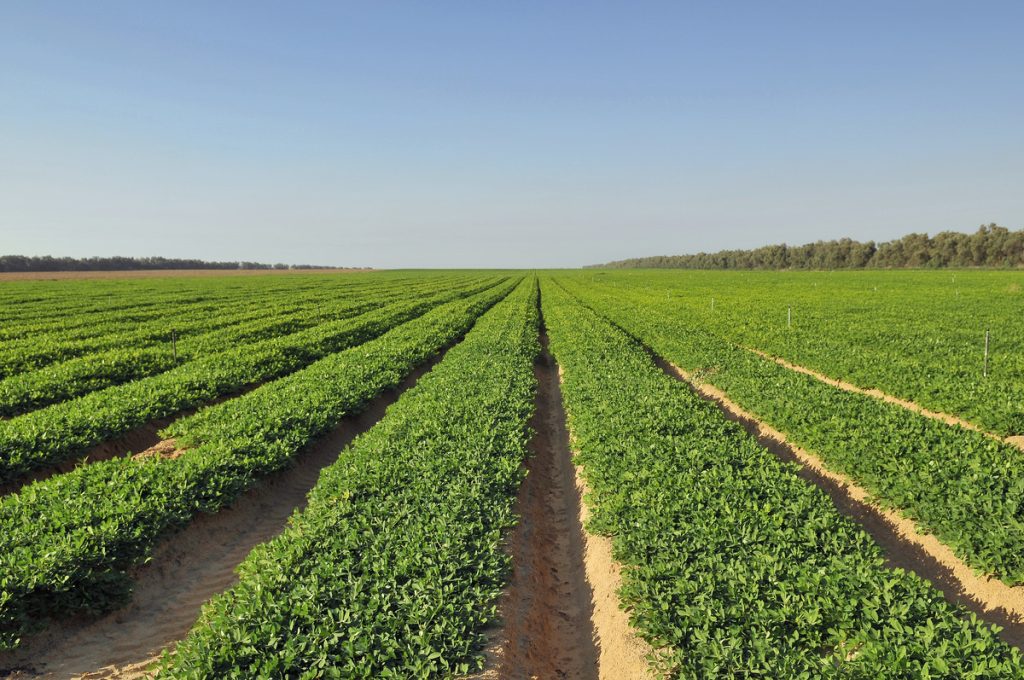
Peanuts
Where are peanuts typically grown in the US?
Like cotton, peanuts need a warm climate to grow well and in the US, the majority of peanuts are grown in six states – Georgia, Florida, Alabama, North Carolina, South Carolina and Texas.
What soil conditions do peanuts need?
Peanuts are a groundnut and therefore they prefer sandy, well-drained soils with a loose structure that allows the pods to develop easily underground. They are a legume, fixing their own nitrogen and therefore requiring less organic matter in the soil than other crops. A soil pH of 5.9 to 7 is ideal for peanut growing.
When should peanuts be planted?
Peanuts like a warm climate and planting should be delayed until after the risk of frost has passed, when soil temperatures are holding at a minimum of 65°F. In southern states, this is usually in later April or early May, but can sometimes be earlier.
Are there risks to planting peanuts too early?
The risk of planting peanuts too early is similar to other crops – germination cannot occur if the soil temperature is lower than 65°F and if seeds are exposed to cold, damp conditions while waiting for the soil to warm up, chilling injuries can occur that affect emergence and growth rates in the young crop.
It’s important to note that planting too late can also hamper peanut growth due to rising temperatures. If the soil gets too dry, seedlings won’t emerge – but irrigating the soil with cold water can cause damage to the seeds. Warmer conditions combined with immature plants also increases the risk of late peanut plantings being affected by fungal diseases like southern blight. Explore our range of peanut blades here.
Before you plant
Of course, understanding the right conditions and timings for planting a specific crop is just part of the preparation for spring planting. Many other factors can impact on emerging seedlings including soil compaction and seed placement.
At Wearparts, we provide a range of tillage and planting implements designed to give farmers maximum control over their planting processes in both no-till and conventional tillage systems, including advanced seed opener and gauge wheel technology for precision planting and reduced downtime. To find out more, get in touch!
Generally speaking, farmers fall into two camps when it comes to choosing seed openers for the upcoming planting season – the guy who sticks with what he knows because they work ‘well enough’, and the guy who’s on a never-ending quest for better.
If you won’t settle for ‘good enough’, then you’ve come to the right place – because at Wearparts we know from experience that all seed openers are not created equal.
In our conversations with farmers and ag dealers, we often hear that OEM blades, in particular, don’t live up to the hype associated with their name – common problems include a high rejection rate during preseason checks or premature wear and chipping out in the field.
Over the past decade, we’ve worked with manufacturers and farmers to deliver what we confidently believe are the best seed opener assemblies on the US market. So what makes a great seed opener – and why are Wearparts seed openers better? Let’s take a detailed look at our bestselling blades, and find out.
What makes a superior seed opener?
Premium quality blades start with premium quality steel – and our mission to address common seed opener problems experienced by US farmers started in Europe, with world-renowned French manufacturer, Forges de Niaux.
FDN’s famous ‘French disc’ has been developed based on more than 75 years of agricultural and engineering expertise, as well as real feedback from farmers, and they are known for their exacting standards when it comes to selecting the steel their disc blades are made from.
Patented heat treatment
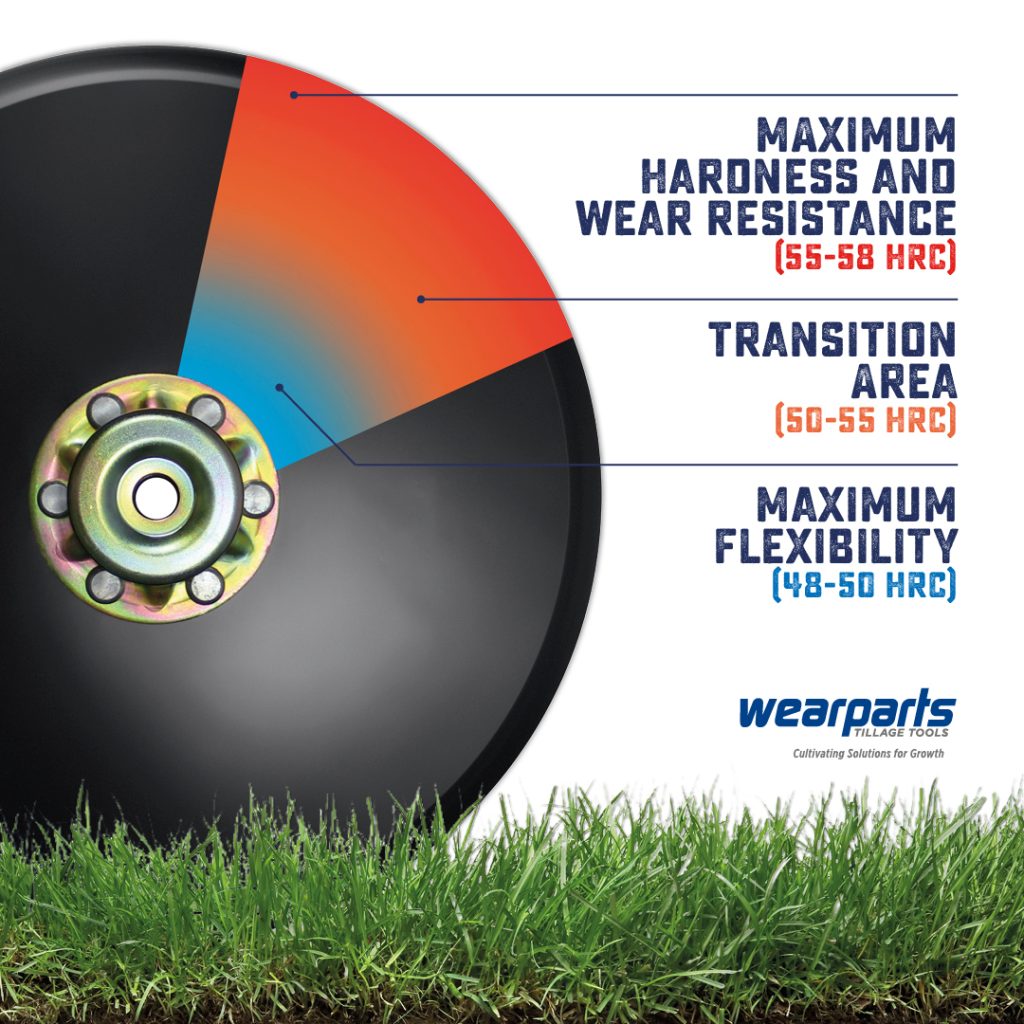
One of the key USPs of the FDN seed opener – the Niaux 200 – is the company’s patented heat treatment process, which gives the blade three defined zones of hardness/flexibility.
This breakthrough metallurgical technology came about after many years of research and testing and is the key reason Niaux blades are proven to last on average 30% longer in the field than any competing product. Here’s how it works:
The greatest heat concentration is applied near the edge of the blade, resulting in maximum hardness and wear resistance (55-58 HRC).
A slightly lower heat concentration is applied to the transition area on the face of the blade, resulting in a superb balance of hardness and flexibility (50-55 HRC) that enables the blade to cope with shocks and stresses without inhibiting performance.
In the center of the blade, heat concentration is lowered to reduce hardening and retain maximum flexibility (48-50 HRC), allowing the blades to bend so they can cope with extreme axial and radial loads without fracturing.
Self-sharpening seed openers
In addition to this advanced structural integrity, each blade features a longer bevel – ¾” as opposed to the standard 5/8” found on most OEM opener discs – and unique ‘self-sharpening’ technology that promotes supremely even wear even in challenging soil conditions, allowing the blade to get sharper, not duller, as it wears down.
Durable seed opener assembly
Having answered our customers’ requests for a sharper edge and a longer bevel, we turned our attention to the seed opener assembly itself. Farmers told us they wanted a larger, more robust hub with larger rivets, and that’s what we gave them – our Maximum Duty seed opener assemblies for John Deere feature a 5mm cast housing, with heavy-duty PEER bearings and 5/16” rivets for advanced load capacity and supreme durability.
Advanced seed opener testing
The final piece of the puzzle is precision – because you can have all the features you like on a seed opener, but if it doesn’t run true, it’s not worth the steel it’s made from. Wearparts seed openers are a cut above not just because of the advanced blade technology, or the carefully designed hub assembly, but also because we hold ourselves to the very highest standards in the industry for blade tolerances, and we test 100% of our seed openers before they leave our warehouse.
Guaranteed to run true
Our Guaranteed True® promise means our seed openers have to meet radial and axial tolerances that are typically half of that permitted by OEM manufacturers.
Each blade must achieve a minimum of .050/1.27mm axial / .060/1.52mm radial tolerance, and our tests show that a significant percentage pass our tests with half of that to spare.
As a result, Wearparts blades have virtually no wobble or lope, which means rejections during preseason testing are kept to an absolute minimum, and blade shimming takes a fraction of the time – so farmers can get on with the real work of getting those seeds safely in the ground come spring.
Competitively priced
Our Maximum Duty seed openers have a better specification than the John Deere OEM alternative, with a proven longer wear-life and our Guaranteed True® promise – but in terms of price, they stack up favorably, delivering even more cost-effectiveness for farmers.
What farmers say about our seed openers
Longer wear-life is what sets our seed openers apart, and this is emphasized by the feedback we get from farmers – we’ve had guys tell us they weren’t even getting one season out of their OEM openers, and now they’re getting two years from their Wearparts blades.
Watch Ottawa County farmer Darren Sanders explaining to Mark Franzen why he switched to Wearparts seed openers and the difference it’s made to his farming:
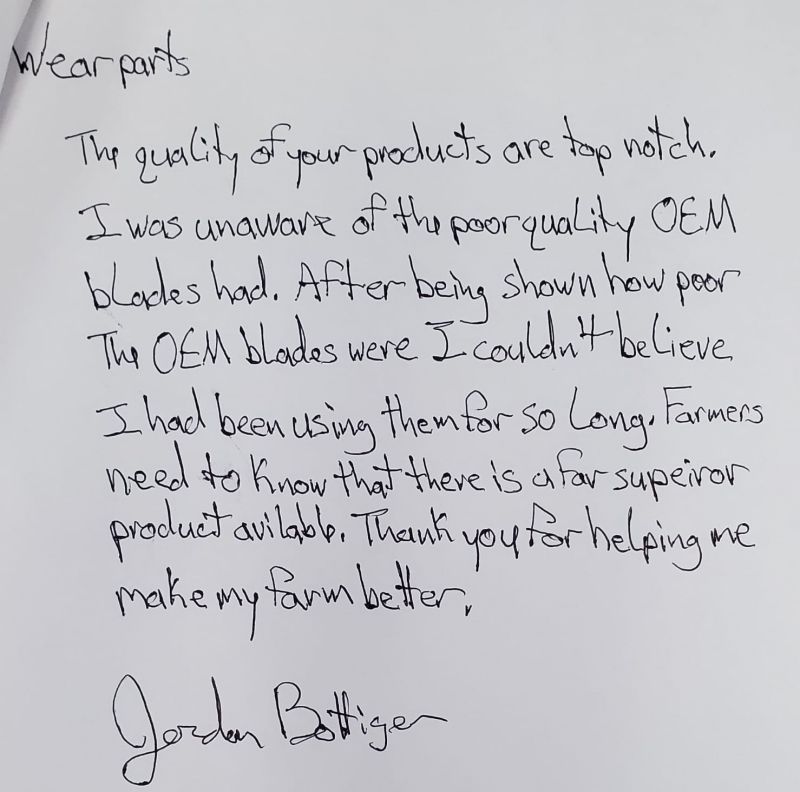
We’ve also had those risk-averse guys who always play safe with OEM tell us that their farming operations have been enhanced once they realized how much more efficient our seed openers are compared to what they’d been using for years – here’s what one farmer said: “After being shown how poor the OEM blades were, I couldn’t believe I had been using them for so long. Farmers need to know that there is a far superior product available. Thank you for helping me make my farm better.”
Need more information?
If you’re interested in learning more about Wearparts premium quality seed openers, or you’re ready to try them for yourself, find your nearest dealer from our nationwide network – or get in touch with our team for further information.
Research shows that while skips and doubles tend to cancel each other out across the entire crop, late emerging plants are the thing that causes the most variability in crop yields – and they can almost always be traced back to planter faults, specifically wear and tear to moving parts.
A report published by the University of Idaho in 2019 stated: “Uniform planting remains one of the most critical steps in setting the stage for successful crop management. In corn, for example, a yield advantage of up to 20 bu/ac can be expected due to effective planter calibration.
“Planter maintenance and calibration is one of the most straightforward and controllable of all crop production practices affecting farm profitability; every grower should fine-tune planting equipment annually to achieve the best plant stand.”
With this in mind, here are 10 checks you should be performing in preseason to help ensure better stand uniformity – and increased yields – this year:
Make sure the planter is level
It is essential to ensure the planter is level both front to back and side to side when in the field – not just a farm lane or yard. The drawbar and tongue should be level or slightly higher at the front than the back. This setup enables proper functioning of the parallel linkage and effective gathering by the closing wheels. Inadequate leveling can lead to poor closing and failed or delayed seed germination. Additionally, during the leveling process, it’s important to check tire pressure for accurate side-to-side leveling.
Check the row cleaners
Well-maintained floating row cleaners should turn freely and move up and down with ease. Stiff or jammed cleaners will fail to effectively remove residue ahead of the disc opener, which can have a detrimental effect on seed-to-soil contact. Check the row cleaners before you check the parallel arm linkages – give them a spin, and make sure bearings and bushings are tight. Adjust or replace as necessary.
Adjust the parallel arms
Parallel arms are crucial for maintaining the row unit’s correct position relative to the soil, so it’s vital to check for movement or wear that could lead to erratic seed placement. Lift each arm to a horizontal position and try to rock it up and down and side to side. Significant wear in the pins and bushings will lead to a lot of movement, which in turn will lead to chatter as the row unit moves through the field, causing inconsistent seed spacing. If in doubt, replace one set and compare with the adjacent arm linkages before deciding whether to replace the rest.
Inspect the disc openers
Sharp seed disc openers with minimal wobble and lope are essential for accurate and consistent seed placement. Discs typically need to be replaced when they lose a half inch of diameter, or when they become dull – whichever comes first. It’s also important to shim up your blades even if they don’t need to be replaced, ensuring the necessary contact point is being achieved as the blades turn – your planter or blade manufacturer will have information on the required specification.
Check seed tubes
Seed tubes are usually fitted with a protector or insert that guards against wear. Check the bottom end of the tube for excessive wear of the sidewall, looking for adequate thickness but also any deformity of the wall that could cause the seed to ricochet, resulting in uneven spacing. Replace any worn tubes.
Inspect bearings and hubs
Check your disc blade bearings to ensure the hubs are firmly attached to the disc with no loose bolts, lateral wear or play in the housing. Look for grease leaking out of the housing, which can indicate a loose attachment, or for any debris caught in the housing from last year. Spin the blades and listen for any grinding or squealing noises that might indicate worn-out bearings inside the hub.
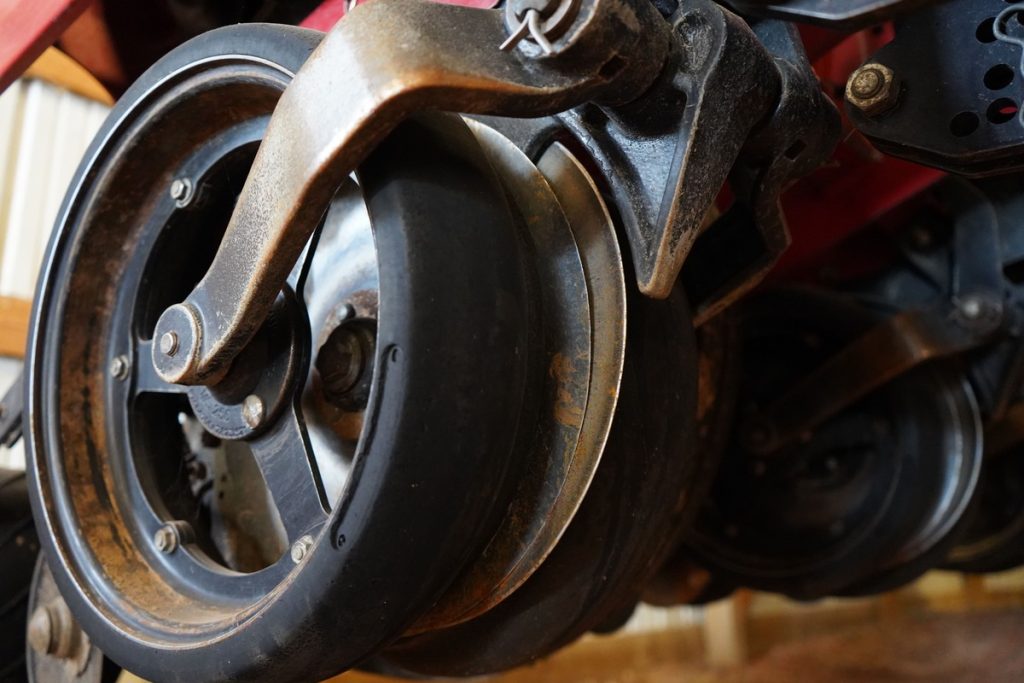
Give your gauge wheels a once over
Gauge wheel arms are extremely important for accurate seed placement so check that they are moving freely and not obstructed by debris or rust. Also ensure that bushings are not worn out, leading to excessive lateral movement in the gauge wheel arm. Check the wheel itself for wear to the rim or tire, and replace any cracked tires. Adjust to make sure there’s good contact between the gauge wheel and the disc opener, to make sure dry soil can’t get into the furrow. If you’ve run out of room to adjust the gauge wheel, it’s time to replace it!
Check seed meters for wear
Seed meters should be checked to ensure doubles and skips are kept to an absolute minimum. For finger pickup meters, it’s recommended to have them professionally tested and adjusted using a sample of the actual seed you’ll be planting for accurate calibration.
Center closing wheels
Closing wheels can easily go off center after a season of use, so you should inspect the wheel arms to ensure their catered and aligned before use. Make sure the wheel itself doesn’t have too much lateral wear, as this can affect its ability to gather soil back over the furrow. Make sure all bearings are in good condition and running smoothly. Consider whether the closing wheel you’re running is appropriate for the soil type.
Do a final visual inspection
Conduct a thorough walk-around of the planter to check for hydraulic leaks, cylinder issues, and wear on electrical connections and wiring. Inspect chains, remove any debris or dust to make sure you’re not overlooking any damage or rust, and make sure all moving parts are adequately lubricated.
If your preseason checks are revealing excessive wear on ground-engaging parts like seed openers and gauge wheels, it’s worth considering whether your current or OEM specification is up to the necessary standards for your soil type. Contact us today and learn how our advanced spec and quality construction can significantly extend the wear life of your components.
The festive season is a challenge no matter what you do for work or what your family situation is – the ‘magic’ of the season really boils down to a whole lot of expense, hard work and planning.
But for farming families, the craziness of Christmas is exacerbated by the fact that there’s no such thing as a ‘holiday’ when there are chores to be done and animals to be fed. It’s a unique situation that’s hard to comprehend unless you’ve lived it – and nobody lives it more vividly than a farmer’s wife!
Raising kids, pitching in on the farm, perhaps holding down a job at the same time AND pulling off a joyful festive season is a tall order and then some – so with tongues firmly in cheeks, we’ve put together a guide to help farm wives survive the holidays* – read on for tips!
*Disclaimer: This guide might not actually help at all. But it’s meant to make you laugh – and laughter makes everything better!
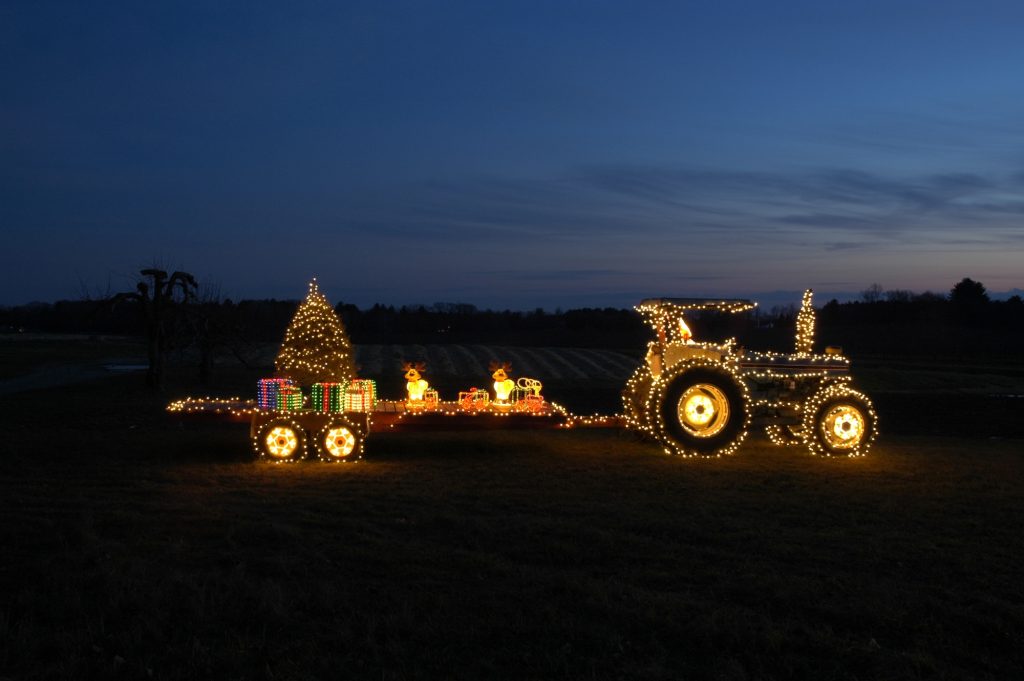
Get him to help with the decorating
If you’re waiting for the farmer in your life to start caring about trimming the tree or creating Instagram-worthy scenes inside the house, you can forget about it right now. Your farmer guy will happily keep the wood pile stocked, the hearth aglow and the refrigerator full of home-grown produce – but anything else inside the house isn’t even on his radar.
Outdoors, however, is a different story. A farmer’s home is his castle and he’s ALL about keeping up with the Joneses – if the Joneses have their place decked in lights and a fully decorated John Deere sitting out front. Any external decorating that involves the use of a cherrypicker or telehandler is right up his alley (even if he complains about it, he loves it really) so pick your battles wisely.
Don’t mess with the system
Forget about waking up early to tear open your stockings – on the farm, there won’t be a gift opened until the animals are fed, the troughs checked and the chores done. Try to mess with the system at your peril – frustrating as it can be to wait for the festivities to start until the morning farm jobs are done, it’s actually a great idea to get them out of the way early so you can relax (well, for an hour or so anyway).
The main problem with this festive farming routine is that kids can really resent having to wait until chores are done to open gifts – so a great tip is to make the work all part of the fun. Award points for the most chores completed or the fastest to finish, and let the winning kid open the first gift. If you’re feeling adventurous, you could even lay a festive treasure hunt to follow around the farm as they help with the chores.
Drop hints early and often
If you’ve ever unwrapped a gift from your farmer husband to discover a pair of work gloves, a penknife or new rubber boots, you’ll know how important it is to spell out the difference between a necessity (something you need) and a luxury (something you want!). Most farmers can’t tell the difference so if you have a particular gift in mind, you’re gonna have to drop some pretty hefty hints – and considering that even those might go in one ear and out the other, get tactical.
Start with his smartphone – a casual Google search now and again for that item you’ve been coveting will ensure he’s inundated with ads every time he tries to read AgWeb. Then get the kids on side – make sure they know what to tell him when he wonders aloud what mom would like to find under the tree. If all else fails, go straight to source. That jewellery store he always visits in a blind panic, right at the last minute? The sales assistant is your ally – tell her what you’d like him to choose and then start practicing your best ‘totally surprised’ face in the mirror.
How to extract him from the tractor for family dinners
The thing farmers love the most next to farming is eating – all that hard work creates an appetite. But getting your farmer to commit to a date and time for a family event can be more challenging than pinning down a politician. So how do you get him out of the tractor and into a chair at the head of the table?
First of all, know when to quit. If there’s something really important coming up (or if an emergency arises at the last minute) the farm will always take priority. Try to arrange events for times when you know things are likely to be quieter and be mindful of his daily routine for chores.
Next, give plenty of notice. Put it on the calendar, add it to his phone, write it on the bathroom mirror in lipstick if you have to. Remind early and often for the best chance of success.
Last but not least, make it irresistible. Biscuits and gravy like mama used to make? What farmer could pass that up? (Side note: If he shows up in overalls, say nothing.)
Master no-notice entertaining
Farming is one of the loneliest occupations – long hours spent in the tractor cab and working from home long before that was a thing means that farmers are often isolated from their peers, except for at key times like market days, harvest time – and Christmas! This is the one time of year when farming families will visit with neighbors, and spend a little time talking about the challenges they’ve faced together during the year.
This is a truly wonderful aspect of the farming community – but it’s not without challenges for a farmer’s wife. You have to make like a boy scout and BE PREPARED for unexpected visitors at any time of day. Nobody’s expecting a Martha Steward-style buffet lunch but to make spur-of-the-moment entertaining easier, it’s worth stocking the freezer with finger foods and if you don’t already have an air fryer, understand that this piece of kitchen equipment will change your life in much the same way that a set of Wearparts seed openers will change your husband’s!
Capitalize on quality time
You don’t need us to tell you that life on the farm is relentlessly busy, often stressful and occasionally just plain hard. It’s also filled with moments of pure joy, gratitude for a life on the land, and great satisfaction.
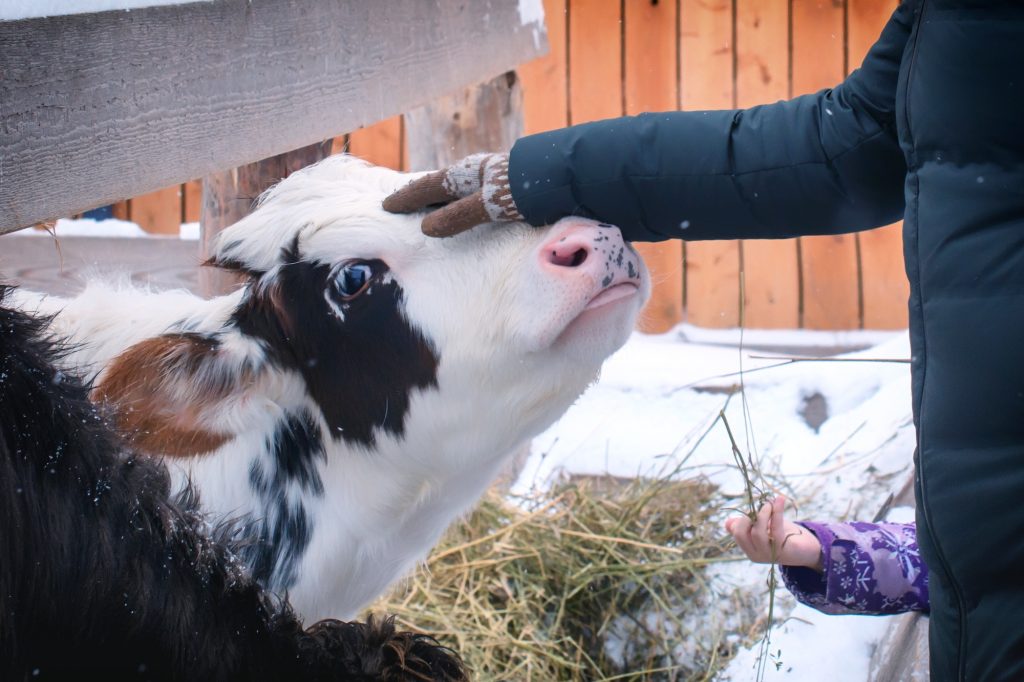
On the farm, the festive season may not look like a Hallmark card – and that’s OK. What’s important is to enjoy the small moments of calm reflection, to truly be present with family and friends, even if it’s just for an afternoon, and to remember that even when you’re outside feeding cows in the snow or breaking ice on water troughs, there’s so much to be thankful for. And if all else fails, there’s always gin – they don’t call it mother’s helper for nothing!
Season’s greetings from Wearparts
We’d like to take this opportunity to say thank you to the farming families that make up 97% of the US agriculture industry – without you, the festive season would look very different for all of us. We wish you the happiest of holidays, and look forward to working with you in 2024!
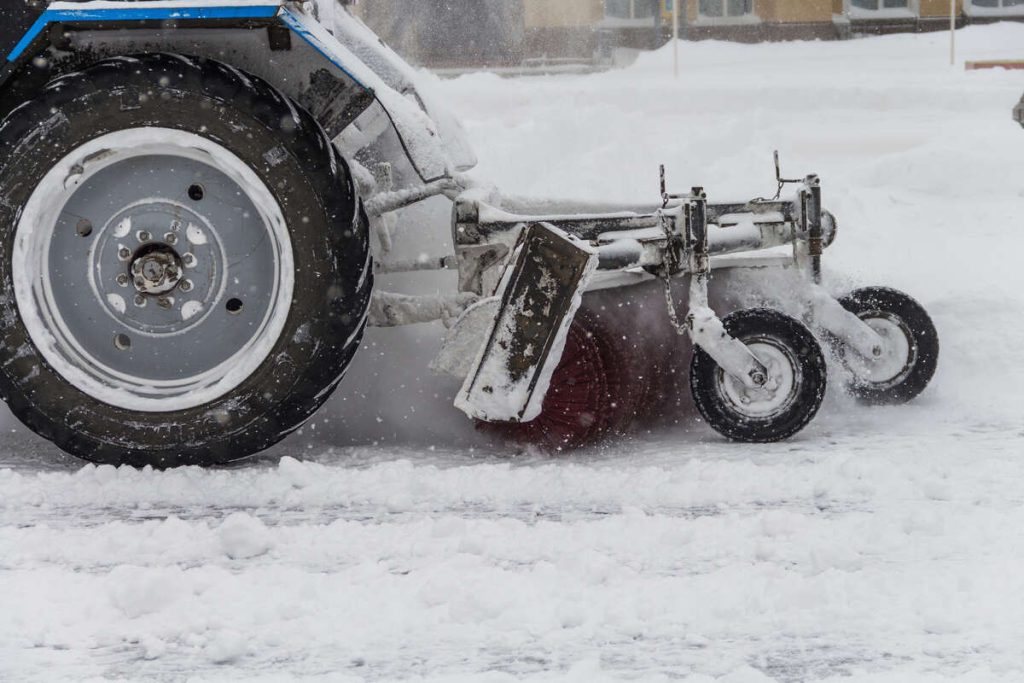
If mild fall weather is lulling you into a false sense of security, be warned: winter in the US corn belt often arrives fast. As temperatures prepare to plunge, it’s a good time to get ahead on winterizing machinery and equipment.
A little effort now can pay dividends come the spring – not just by making sure your machinery is primed and ready for action when planting season starts, but by helping you avoid unnecessary downtime and costs. Let’s take a look at some priority tasks you should be completing before the winter freeze arrives.
Clean and store farm machinery
Dried on mud, crop residues and other debris accumulated during harvest, fall tillage and other farming operations should now be cleaned off of machines that won’t be used until the spring. You might wonder what’s the harm in leaving dry residue alone – but mud and chaff can trap moisture on surfaces that speeds up corrosion, and also prevents you from properly inspecting your equipment to ensure it’s in good condition.
A good wash down in the late fall might seem like a vanity project but it’s actually just good farm sense, helping you nip rust issues in the bud and extending the lifespan of your equipment.
Inspect engine compartments, belts and pulleys to make sure they’re clear of any plant residue that could catch fire when the machine is started up again in spring.
Once cleaned, ideally planters, harrows, chisel plows and other equipment that isn’t needed over winter should be stored in a weatherproof and rodent-proof barn to minimize the risk of damage occurring during idle periods. If space is an issue, consider using custom tarp to offer some protection from the elements.
Look out for lubrication
Cold temperatures increase the viscosity of lubricants as well as causing metals to shrink or constrict. As a result, moving parts that are not adequately lubricated before winter sets in can seize up completely in cold weather, leading to unnecessary downtime and sometimes even expensive parts replacements to get them moving again.
Prevent this from happening by carrying out a lubrication check on all your farm equipment in the late fall – change to a lower viscosity engine oil if you live in a particularly cold region, apply grease where required, and replace sealed components like bearing hubs if you suspect they’ve reached the end of their useful life. This will ensure your machinery is ready to roll when the temperature starts to rise again.
Coolant, fuel and other fluid checks
Winterizing fluids is important for machinery that will be stored in the colder months but also for machines you’ll continue to use in winter.
Check the antifreeze levels in the cooling system and also test the freeze point of the fluids to ensure the correct water to antifreeze ratio – vital to stop engines from freezing up in cold weather but also for making sure that water doesn’t corrode the engine interior when the machine is sitting idle.
Engine powered equipment that won’t be used in winter should be stored with a full fuel tank – this stops condensation from forming during cold spells, which can contaminate the fuel with water when there’s a thaw.
Hydraulic fluids, transmission and engine oil should all be changed to a product with appropriate cold weather viscosity – run the machine for a short period after any fluid change to ensure the new fluid is circulated into the system.
Winter battery care
Idle batteries will discharge at a rate of 1% per day – and even faster in freezing weather – due to parasitic drain. This natural process can also lead to sulfation of the battery which means that it can’t be recharged due to a buildup of sulfur on its lead plates.
Maintain battery health by disconnecting and/or removing batteries and storing them in a warmer location – ideally keeping them charged using a smart charger that can detect when a top-up is required. If this isn’t possible, aim to start and run your machinery on a regular basis to prevent the battery from discharging too much.
Winter tire maintenance
After a long season in the field, there’s a good chance your vehicle tires are showing signs of wear or a loss of pressure – so now is a great time to inspect, replace or re-pressurize tires. Underinflated tired will result in rapid wear and sidewall damage while overinflation can increase the risk of perishing, blowouts and soil compaction.
Of course, if you’ll be using a snow plow or blower, you need to make sure your tires have adequate tread to grip in tricky conditions – don’t forget to make sure snow chains and other equipment is ready to go.
Essential electrical checks for farm vehicles
Checking vehicle electrics before winter sets in is another essential maintenance task – not least because darker, shorter days depend on headlights and illuminated instruments being in full working order.
For other equipment that will be stored over winter, it’s a good idea to make sure all bulbs and electrical connections are functional and safe to reduce the risk of electrical fires and ensure you can hit the ground running when spring planting rolls around.
Maintaining tillage & planting parts
Before you store equipment away for winter, check that all wear parts – discs, blades, tines etc – are in good condition with enough life remaining to get you through the upcoming season. Check the alignment on coulters and chisels so that when you do bring this equipment back into use, you don’t have to waste valuable time on these checks and adjustments – once the sun comes out in spring, you’ll be good to go!
Don’t forget that our Maximum Duty seed opener blades carry our ‘Guaranteed True®’ promise – we test every assembly before it leaves our warehouse so you don’t have to.
Spare Parts Inventory
Even with the best maintenance and preparation in the world, breakdowns will happen. Winter is the ideal time to make sure you have supplies of replacement parts for your equipment so that if you do hit a bump in spring, you can quickly and easily carry out any necessary repairs and get back to work quickly.
Our Spring Preseason Promo runs from fall through New Year each year and offers farmers the chance to stock up on essentials for spring planting at discounted prices.
Enhance efficiency next spring
Regular maintenance combined with selecting the best quality tillage and planting parts you can afford is a tried-and-true way to enhance agronomic efficiency at any time of year.
As fall arrives across the US, the Midwest and other crop-producing states are preparing for harvest and thinking ahead to the winter months – which means sowing winter wheat, and also cover crops.
Research shows that cover crop adoption in the US has increased dramatically over the last decade, with 2021 levels at four time what they were in 2011 – but overall, cover crop adoption remains low at just 7.2% of available cropland.
The recent increase in cover crop planting has been attributed to federal and state incentives for farmers – for example, the USDA’s Environmental Quality Incentives Program, which invested over $14 billion in conservation practices from 2010 to 2020.
But with many farmers still choosing not to plant cover crops despite their potential benefits for the soil, we’re taking a closer look at an ancient farming practice that is coming back into fashion today.
What is a cover crop?
A cover crop is any crop that is planted in between ‘cash crops’ with the main goal of protecting or nourishing the soil. Unlike cash crops, cover crops do not get harvested or sold – they are terminated at a specific point in their growing cycle and typically incorporated back into the soil either mechanically or naturally, although some are used as forage for animals. Cover crops can also be referred to as ‘green manure’. Ancient Chinese and Greek manuscripts suggest that the use of green manure has been around for thousands of years.
What are the benefits of cover cropping?
Planting a cover crop has numerous benefits for the soil and therefore, for future yields when cover crops are followed by cash crops like corn or soybeans. Here’s a look at the key benefits:
1. Prevention of soil erosion
In all but the southern states, winter weather typically brings with it harsh conditions involving wind, rain, snow and ice that can wreak havoc on exposed soil. A 2022 study by the University of Massachusetts Amherst found that farms in the US breadbasket have lost on average 2mm of soil per year since the land was settled 160 years ago – that adds up to 57.6 billion metric tons of soil.
Cover crops act as protection that prevents erosion – surface vegetation prevents soil being lifted by wind or washed away by surface runoff, while root structures bind the top layer of soil together and absorb excess water, reducing the risk of waterlogging.
2. Enhanced soil fertility
Cover crops are designed to be incorporated into the soil after they are terminated – either by being mechanically chopped and tilled in, or simply being left to decompose on the surface. Either way, they add much-needed organic matter to the soil which can enhance its ability to retain moisture and nutrients.
It’s common to use nitrogen fixing crops such as legumes as cover crops. Nitrogen fixing plants have roots that are colonized by organisms that can trap and store atmospheric nitrogen. When plowed into the earth, these plants are excellent at replacing the nitrogen that is removed by many cash crops, such as corn.
3. Weed management
Following harvest, it’s incredible how quickly weeds can colonize a field. The difference between allowing weeds to cover the soil and deliberately planting a cover crop is that the farmer can control the outcome ahead of spring planting.
While many weed species can drain the soil of nitrogen and other nutrients, as well as being extremely difficult to get rid of once established, cover crops are specifically selected because they’re easy to manage and good for the soil.
By their very definition, cover crops provide excellent soil coverage which prevents weed seeds from germinating – meaning that in spring, there’s less work to do to get the main crop in the ground.
What are the challenges of cover cropping?
Like any planting cycle, cover cropping involves additional work and demands that farmers pay even closer attention to the timing of their planting and harvesting cycles in order to get the maximum benefit of a cover crop.
Cover crop seeds also cost money, and some farmers may feel that the benefits can be matched by applying artificial fertilizers, especially if they live in an area where soil erosion is less of a problem. Cover cropping may also incur additional costs for farm labor, fuel and equipment.
A big barrier to the use of cover cropping is lack of knowledge and perceived risks. Although this method has been around for generations, it has fallen out of favor in the last century and therefore farmers may not feel confident in trying something that is new to them and their land.
What are the main types of cover crop in the US?
There are three main groups of plants that are typically used as cover crops in the US:
Type
Examples
Benefits
Grasses
Rye Barley Sorghum hybrids (sudangrass)
Fast growing Easy to manage residues Can be used as forage Fibrous roots bind the soil
Legumes
White/Crimson Clover Cowpeas Hairy Vetch Alfalfa
Can fix nitrogen from the air Taproots improve compacted soil Good organic matter Can be used as forage
Broadleaf non-legumes
Brassicas Radishes Mustard Buckwheat
Good for improving soil structure Store soil nitrogen Can be used as forage Can deter pests
Which cover crop should I plant?
The type of cover crop selected will depend on the soil type and environmental conditions, but also on the type of cash crop the farmer wishes to grow next.
For example, grass cover crops are often used where soil erosion is a problem – for example in locations where heavy wind and rain is a problem – and where the subsequent crop requires a good soil structure and little weed competition, such as corn and soybeans.
Corn and soybeans are also fairly demanding on soil nutrients, so a farmer who is less worried about soil erosion and more worried about fertilizer costs might opt to plant legumes over winter before putting in his spring corn or soybeans. Legumes are also ideal cover prior to vegetable crops like peppers and tomatoes, which need a lot of nutrients.
Broadleaf non-legumes are often used as cover on mixed farms where they are a useful source of forage for livestock, but they also have disease and pest reducing properties that make them a useful cover crop prior to the planting of tender vegetables including lettuce.
What happens to cover crops in spring?
Prior to planting of the main cash crop, cover crops are typically ‘terminated’. This can be done by mowing or tilling, use of herbicides or sometimes simply by turning livestock into the field where they will eat the crop and fertilize the soil with their manure. Some cover crops will die back naturally when the coldest winter weather arrives, and can easily be tilled into the soil before planting season begins in spring.
Termination of cover crops is timed carefully to ensure the plants have achieved optimal maturity – where they have accumulated enough organic matter to enrich the soil, and usually before they go to seed.
Tools for the task include vertical tillage blades, high speed compact discs and coulter blades. The type of equipment used will depend on the cover crop – fibrous grasses typically demand a more aggressive approach and will decompose more slowly than legumes, so the approach to residue management may be different. Whatever your requirements, Wearparts can offer a quality alternative to OEM parts, with options to suit all machinery brands and soil types.
More information on cover crops
For more information about cover crops and available incentive schemes in your area, visit the USDA website. For advice on tillage tools to enhance your crop rotation, manage residues and tackle soil quality challenges, get in touch with Wearparts directly or find your nearest Wearparts dealer.
Farmers have long known that healthy soil makes for healthier and more abundant crops. This is important because of our need to produce enough food globally for a growing population, within a limited land mass.
But food production isn’t the only thing motivating an increased focus on soil health. Increasingly, we’re learning about the soil’s ability to capture and sequester carbon, making it one of the most significant prospective tools in the fight to slow global warming.
So how does it work – how does soil capture and hold onto carbon? And how can farmers meet growing demand for crops while still protecting this delicate natural process? Let’s take a look.
What is carbon?
Carbon is the fourth most abundant chemical element in the universe. It’s the building block for life as we know it, because it has the ability to form complex molecules like proteins and DNA. Earth is a ‘closed system’ when it comes to carbon – we have a fixed amount, that never changes.
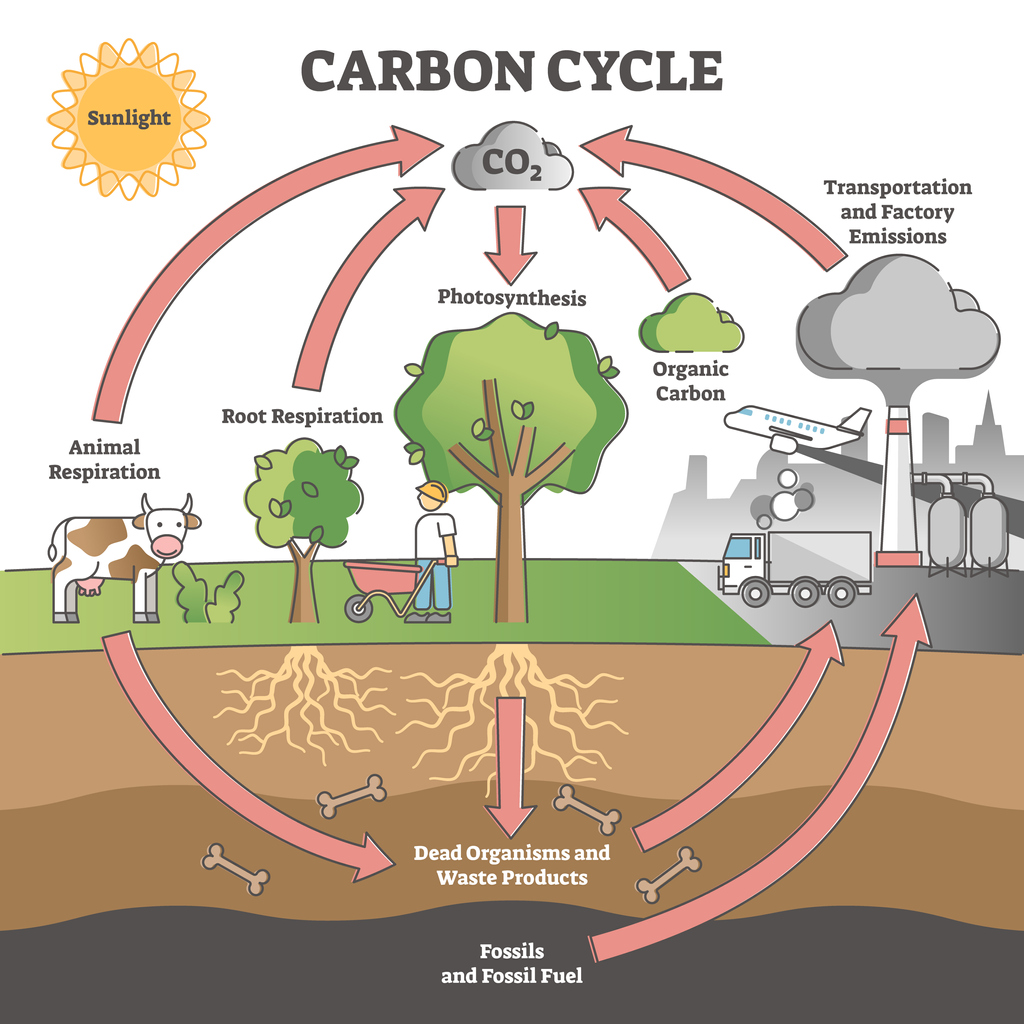
How is carbon stored and released?
Most carbon on Earth is stored in the atmosphere and in rock, but a lot is also stored in living matter including live organisms and vegetation. Plants and other organisms are always exchanging carbon with the atmosphere – this is called the carbon cycle.
Carbon dioxide (CO2) in the atmosphere is absorbed by plants as they photosynthesise. This carbon is then stored in the leaves, trunks and roots of the plants or trees. Living things eat the plants, and convert them into energy in a process called respiration, which generates CO2 as a waste product – this can be exhaled during breathing, or expelled in the form of other C02-based gases like methane, and goes back into the atmosphere.
When plants and other organisms die, the carbon they were made of is released as they decompose, and becomes part of the soil. Decomposed vegetable matter from plants can eventually, after very long periods of time, be transformed by immense pressure into rocks and even fossil fuels, like coal.
When we dig up or burn these fuels, large amounts of carbon get released into the atmosphere. Carbon is also released when we remove vegetation, when we burn trees for fuel, and when we till the soil.
Why is carbon bad?
In short, it isn’t. Without carbon, life on earth couldn’t exist. Carbon dioxide in our atmosphere acts like insulation, retaining heat from the sun so that Earth doesn’t get too cold. But too much carbon dioxide in the atmosphere intensifies this warming effect.
Scientists estimate that since humans started burning fossil fuels during the industrial revolution, the average surface temperature on earth has risen by 1.8°F. They are concerned that too much warming could have serious consequences for Earth such as a rise in sea levels, habitat loss and extreme weather patterns that could affect farming and food supplies.
Under the terms of the Paris Climate Agreement, the global goal is to reduce carbon emissions and keep the average surface temperatures at no more than 3.7°F above pre-industrial levels.
How does the soil trap (sequester) carbon?
Many natural environments like forests, wetlands, peatlands and grasslands are referred to by scientists as ‘carbon sinks’ because they trap and store huge amounts of carbon deep underground.
During photosynthesis, plants absorb carbon dioxide from the air. They use sunlight and special cells called chloroplasts to convert it into glucose, which they use to help them grow, and oxygen, which they release into the atmosphere. The carbon molecules remain stored inside the plant’s structures and when the plant decays, they are typically transferred to the soil.
As plant lifecycles continue, old plants die and new ones germinate, feeding off the decaying plant matter in the soil. In the upper levels, some carbon will always be exchanged between the soil and the plants or the atmosphere, but if the soil itself is left undisturbed, the stored carbon eventually percolates down to lower and lower levels where it can be locked away or sequestered for much longer.
Does carbon make soil more fertile?
Yes. Carbon is the main component of soil organic matter and helps give soil its structure, water retention capacity, and fertility. Soils rich in organic matter can support complex ecosystems including fungi and micro-organisms that are vital for strong, healthy crops. These soils will have a defined structure that allows them to absorb and retain moisture, and move nutrients around effectively. As well as supporting strong plant growth, this means that carbon-rich soils are less prone to flooding, wind erosion and other forms of degradation.
Carbon & no-till farming
Increased understanding of how the soil traps carbon and why this can be beneficial for farmers has led to a rise in the popularity of conservation tillage, particularly no-till.
For generations, farmers believed that the best way to keep soil healthy and get good yields was to churn it up before each planting to make it very friable, and apply lots of fertilizers – but in recent times, that thinking has begun to change. It’s becoming accepted that while fertilizers may always be needed to support intensive farming regimes, less tillage helps the soil to retain these nutrients as well as moisture.
What is no-till farming?
No-till farming is the gold standard of conservation tillage because, as the name suggests, it’s built on the principle of not tilling the soil. In no-till, the previous crop residue is left in place to decompose and a system of crop and potentially livestock rotation is used to manage soil nutrition in addition to the application of fertilizers.
During planting, seed openers are used to cut a trench right through the previous year’s trash, into which the seed is planted and covered over with as little soil disturbance as possible. This means that as much of the carbon as possible contained in the soil and in the plant matter is left in place, offering the greatest opportunity for long-term carbon sequestration. Here are some benefits of no-till for farmers and the environment:
Soil structure is preserved
Plant roots, pores and capillaries in the soil structure are preserved so that the soil can more easily move moisture and nutrients around. Fertilizers and rainwater are absorbed more readily, reducing the risk of soil degradation or erosion even in intensive farming cycles.
Micro-organisms flourish
Soil is full of micro-organisms from insects and worms down to microscopic fungi and bacteria that can be beneficial for crops. When we don’t turn the soil over as in conventional tillage systems, these organisms can thrive – ensuring crops grow strongly, and capturing even more carbon in the soil.
Water is conserved
One of the biggest benefits of no-till is that it prevents loss of moisture from the soil. Even when surface layers appear dry and cracked, in no-till systems you typically find that the subsoil stays moist for much longer than in conventional systems. This can make crops much more resilient to drought.
Agronomic efficiency
Farmers running no-till systems can save significantly on fuel because they don’t till or cultivate the soil before planting or during the growing season. They also save money on tillage parts and machinery. No-till farming is a very time-efficient way of working, although it does require some careful thought and planning to make the system work effectively.
Other conservation tillage methods like strip-till, ridge-till and mulch-till are less effective at retaining soil structure and preventing carbon release, but they do help to slow the process down which has benefits for farm yields and the environment alike.
Looking for tools for your conservation tillage system?
Wearparts offers a wide range of tillage and planting parts compatible with all popular machinery brands and designed to give your no-till or conservation tillage system the edge. Discover 30% longer wearlife and guarantees against breakage for efficient planting and less downtime – find a dealer today!