weareparts logo

1-888-4-BLADES (425-2337)

FREE SHIPPING ON Qualifying Orders

Gauge Wheels: Planting’s season’s supporting act

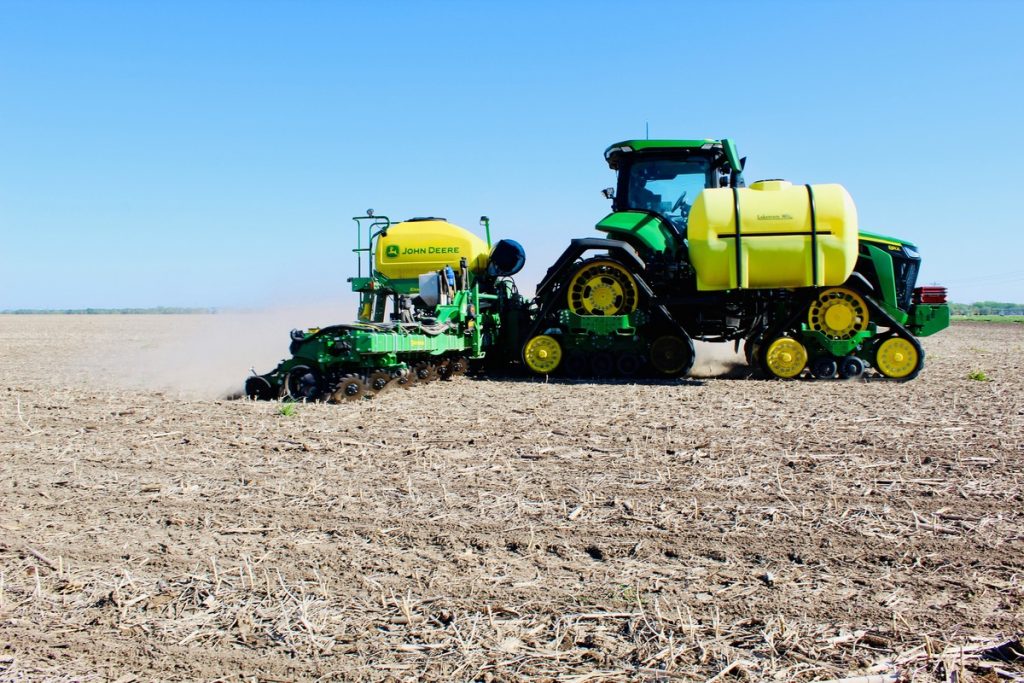
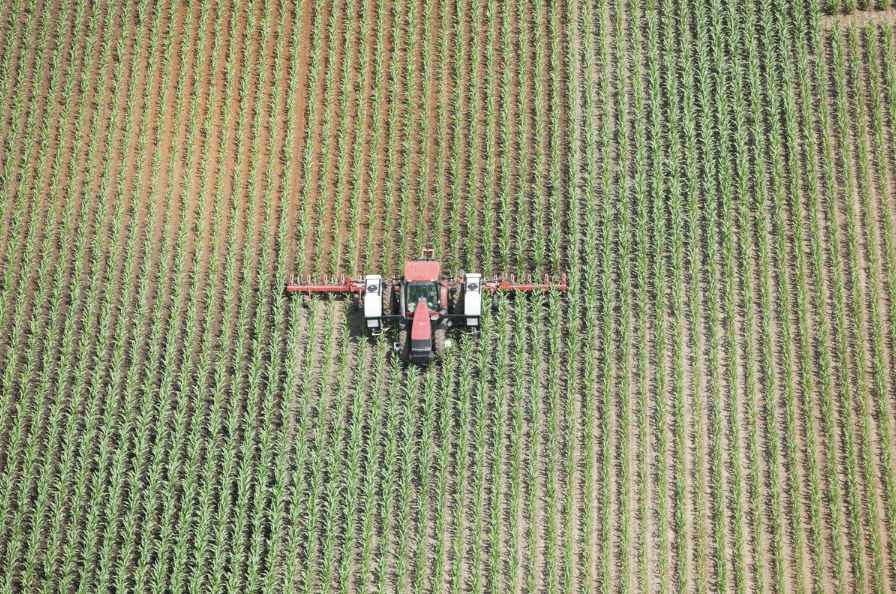
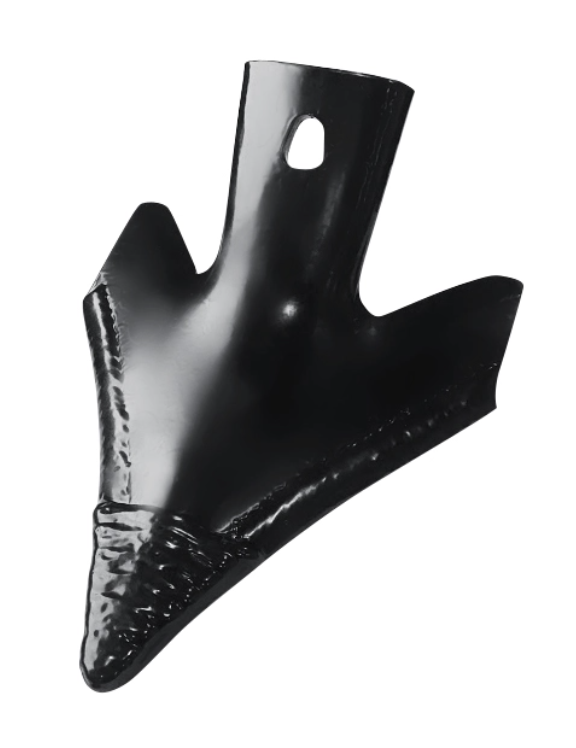
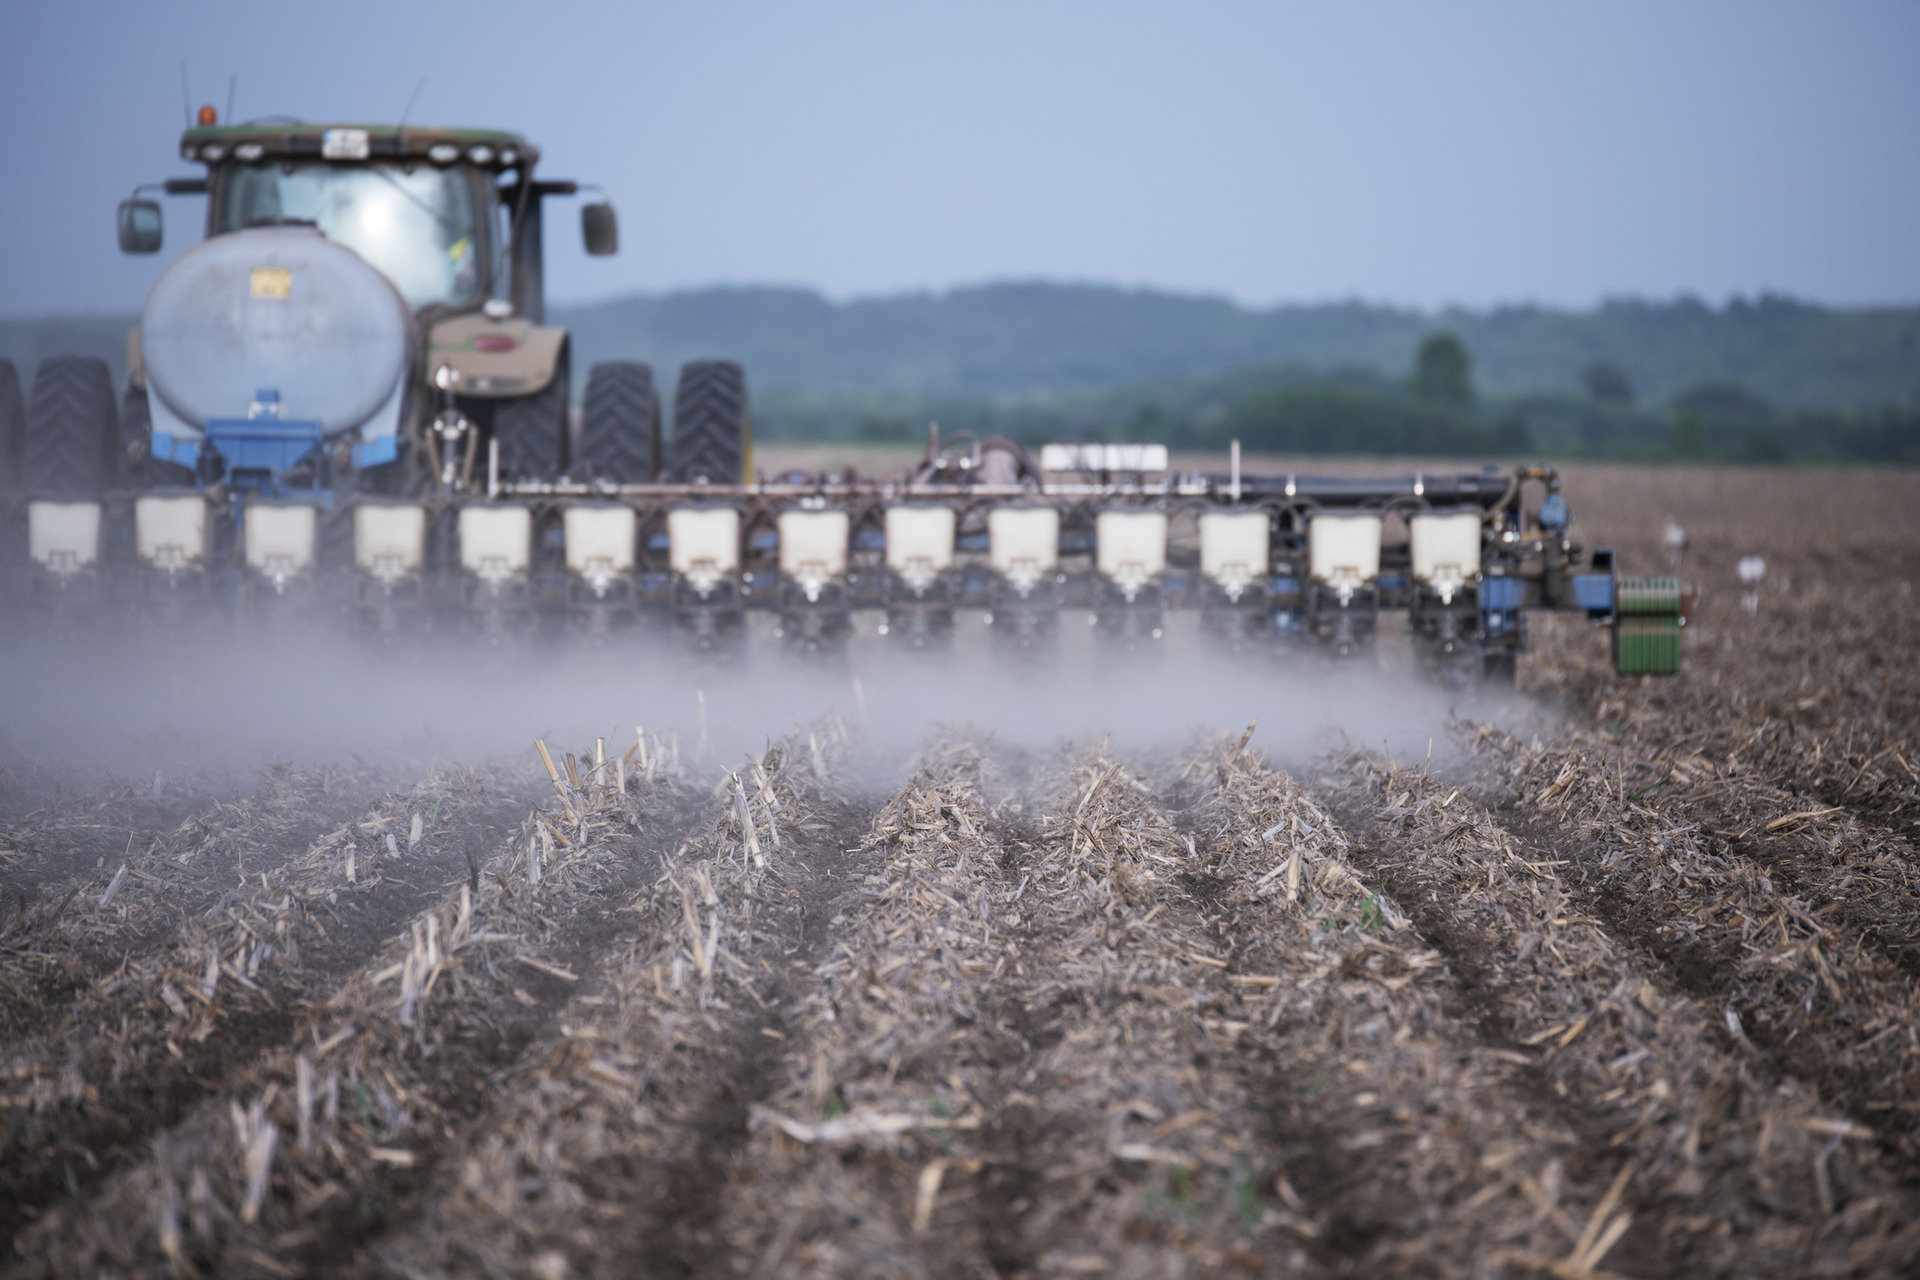
If planting season was a rock concert, seed opener blades would be the stars of the show.  But just as a rock star is nothing without the band, so seed opener blades rely on a supporting act – gauge wheels – to do their job.

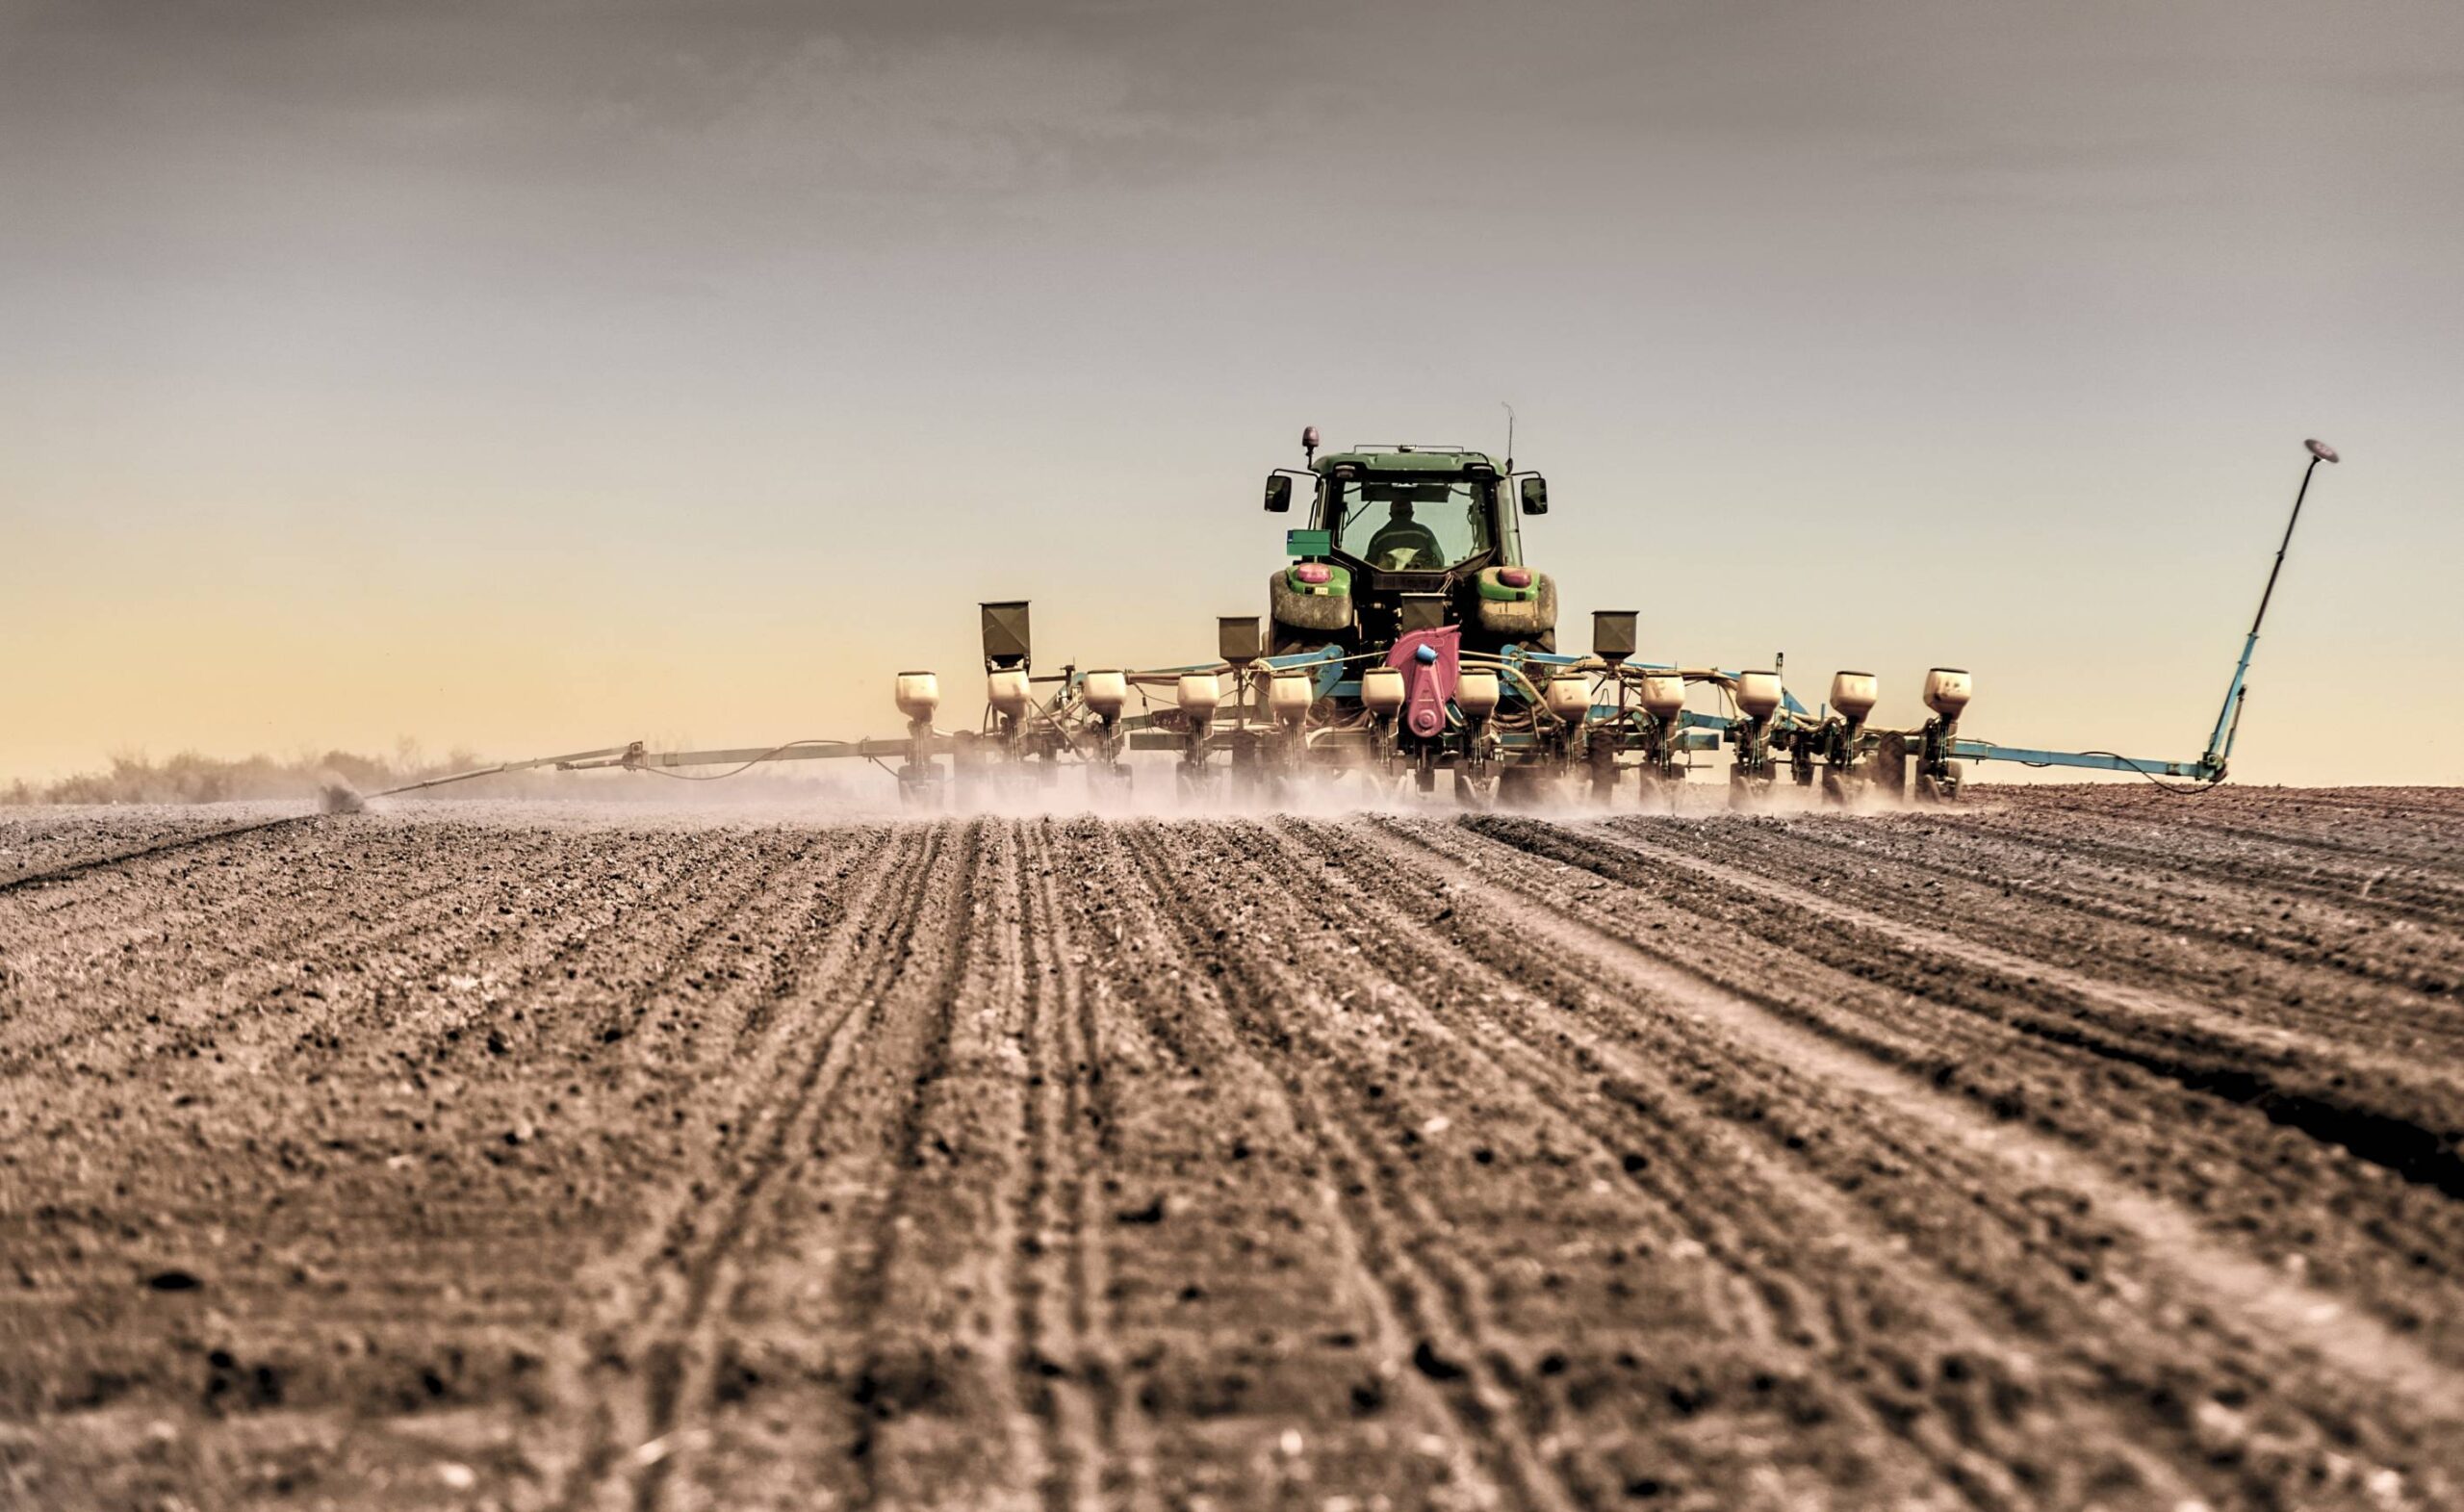
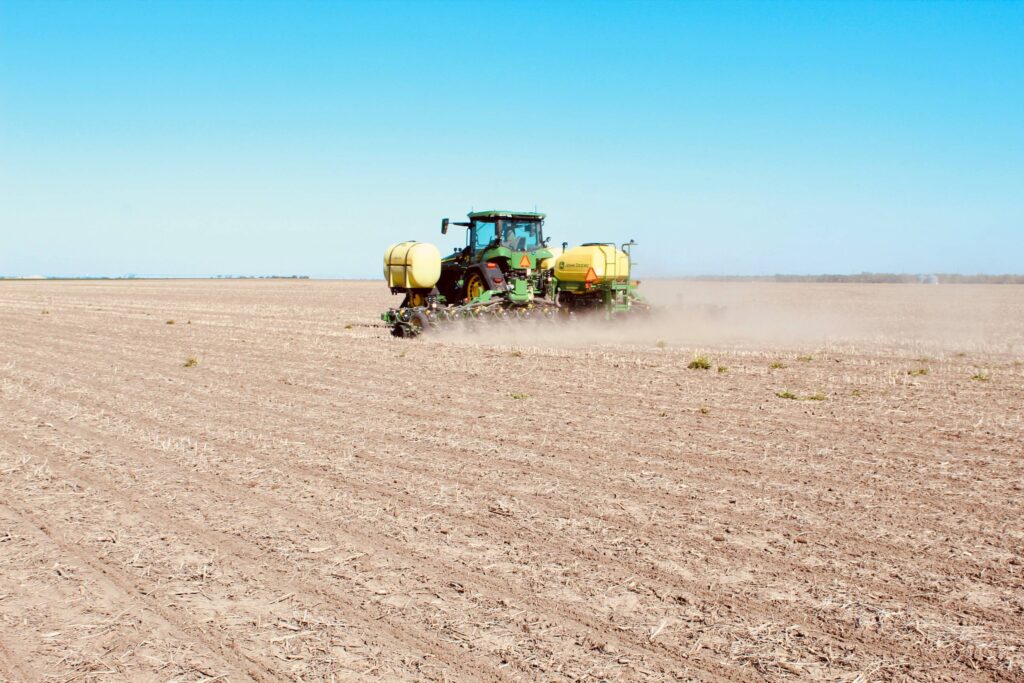
The seed opener and the gauge wheel work in tandem to open a furrow at the correct depth, leaving enough soil in the right place for the closing wheel to place back over the seed.  The specification of your gauge wheels will depend largely on which planter you’re running – but factors such as soil moisture, tillage system and even crop type can all inform your decision about which gauge wheel to choose.

Here’s a look at some of the options available on gauge wheels, and the factors to consider when making a choice.

image of tractor planting

Gauge wheel placement

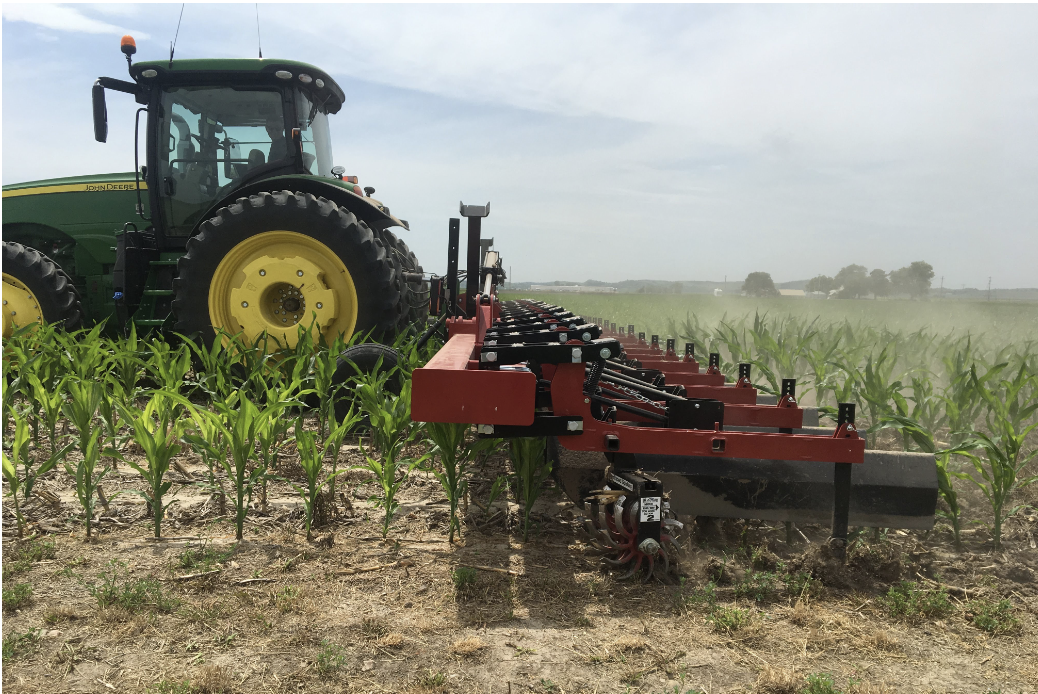
The vast majority of planters have the gauge wheel positioned right next to the seed opener blade – and for good reason.  This is the closest practical point to where the seed drops, and therefore the point at which you can achieve the most precise depth control, which has a direct impact on soil contact and seed germination. 

Locating the gauge wheel alongside the blade also prevents soil from being thrown out of the furrow by the opener blades. This is important in no-till systems where minimal soil disturbance is the name of the game, and is also vital for successfully closing the furrow, since the close wheel can’t replace soil that is thrown too far from the furrow.  It’s also important if your soil is prone to waterlogging, since moving too much soil out of the furrow can lead to depressions in the surface that collect water and can cause seeds to rot.

Soil compaction

The function of the gauge wheel is to hold down the sidewall of the furrow that naturally wants to rise up as the seed blade passes through.  This results in a clean furrow that facilitates precise seed placement, and enough soil to effectively close it again.  But an unwanted side effect of this is compaction of the sidewall, which can in itself cause problems with seed-to-soil contact, resulting in restricted root growth, poor emergence, and lost yield potential.

Some manufacturers – such as Case – have attempted to get around the problem with design tweaks to their machinery.  The Case IH gauge wheel uses a Reduced Inner Diameter (RID) tire with a unique relief profile that leaves space for the soil to bulge upwards along the edge of the furrow, while still retaining a clean furrow profile.  The system works thanks to a ‘seed boot’ that runs along inside the furrow itself, preventing the loose soil from collapsing inwards before the seed is placed.
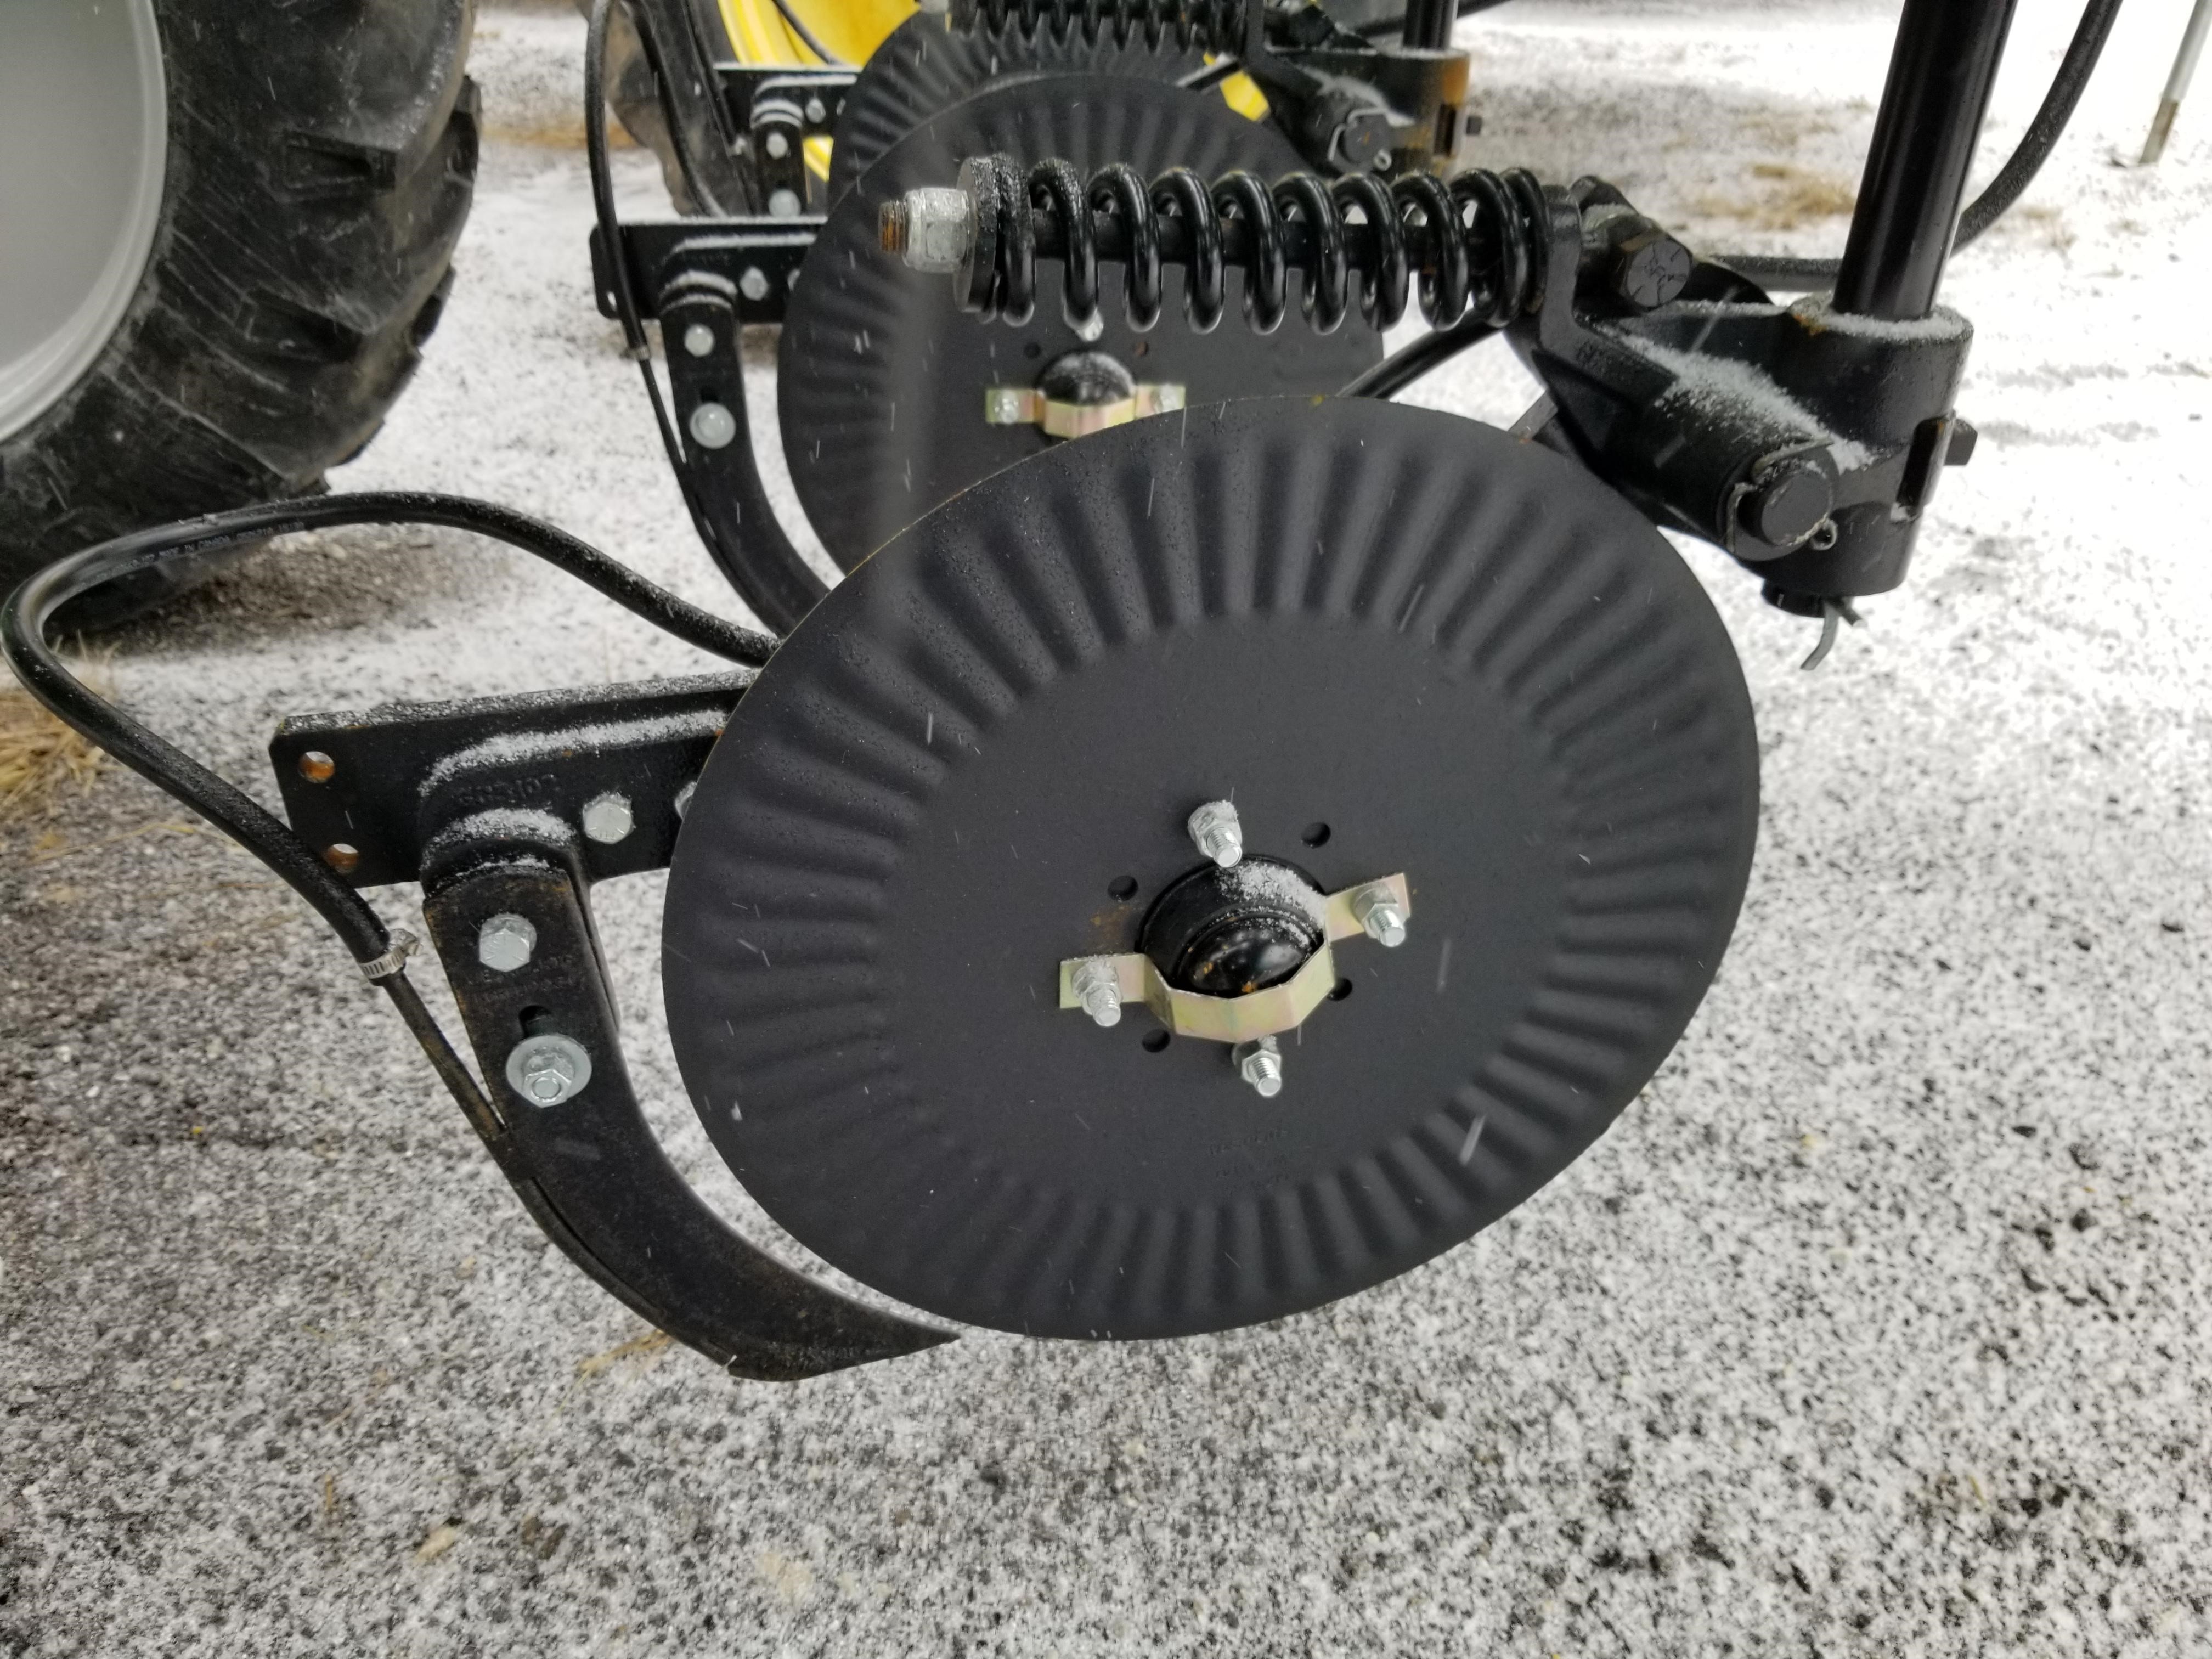
image of baby corn

Choosing a width

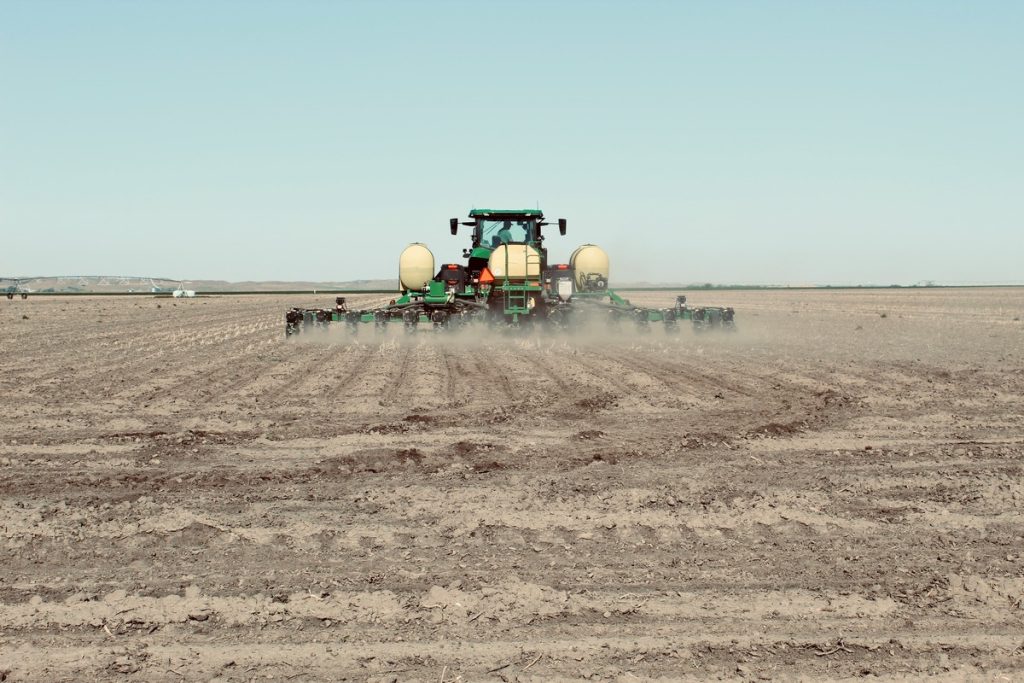
Gauge wheels are available in a range of widths, typically 2.5”, 3” and 4.5”, with the latter being the most common.  The width you choose depends on the importance of depth versus compaction – the narrower the wheel, the more depth you’ll achieve since the wheel is less prone to obstruction by trash or clumps of soil.  

2.5-inch wheels are typically run on twin row planters because there isn’t room for a wider wheel.  3-inch wheels tend to be used in strip or ridge till systems, where they help to achieve a good balance between depth and soil compaction – but there’s an increasing movement towards their use in no-till systems too because of their ability to run smoothly through trash.

Gauge wheels over 4 inches in diameter are most commonly used in conventional tillage systems, but in no-till they’re an ideal choice on heavy soils where plugging is an issue.  They serve to keep the row unit out of the ground and maintain consistent depth.
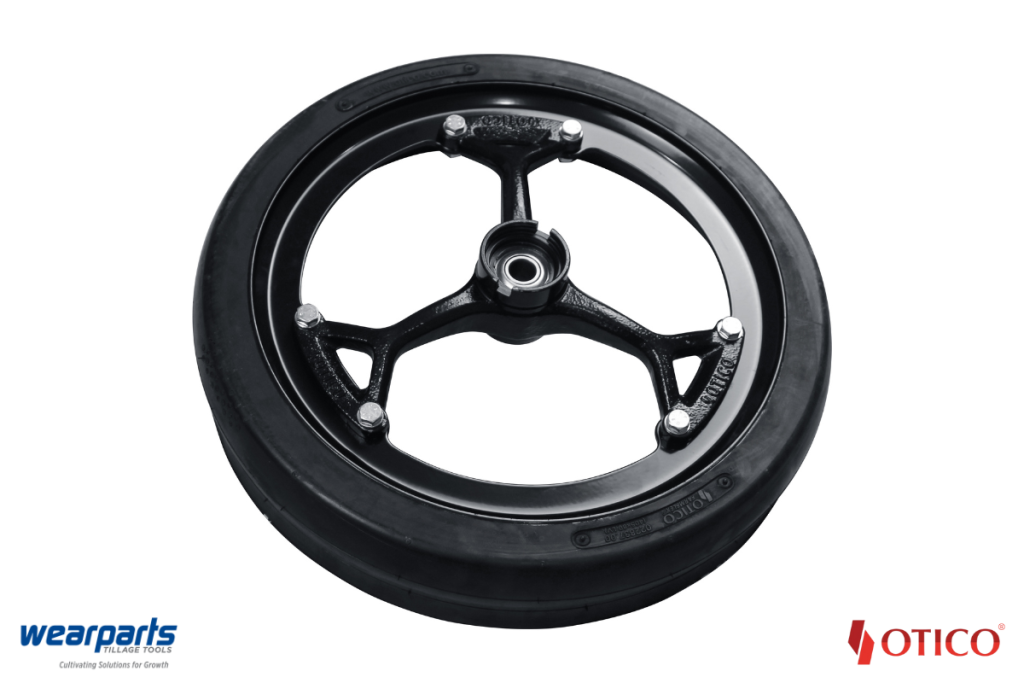
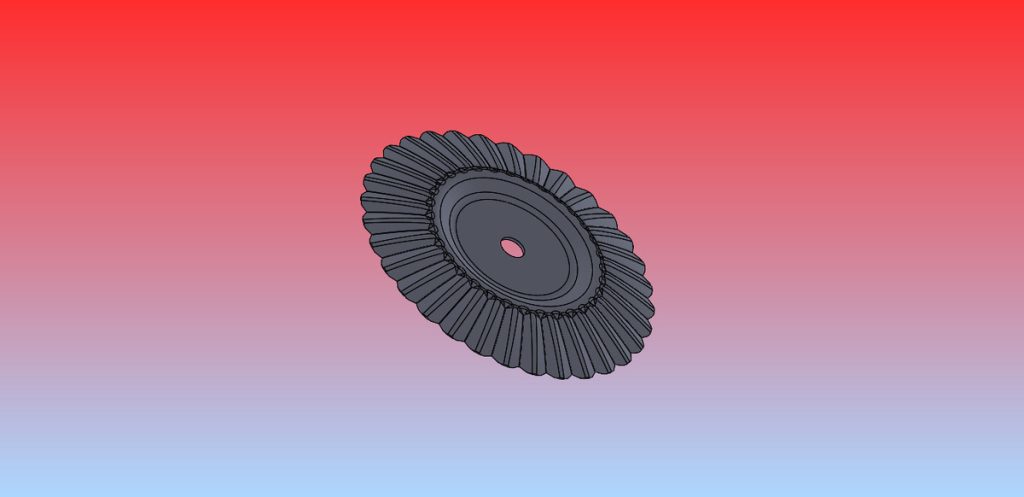
image of wearparts otico gauge wheel 1

Spoked or solid?

Gauge wheels come in both solid and spoked profiles and the choice really comes down to soil conditions, farming system – and personal preference.  The idea of spoked gauge wheels is that mud and residue can escape between the spokes so they don’t get clogged up, and also so that it’s easier to clean out any debris that gets lodged between the seed disc and the gauge wheel.  However, in no till systems – particularly corn fields – the leftover corn stalks and other trash can end up getting tangled in the spokes, leading some farmers, especially those in drier climates, to opt for a solid wheel profile.  

image of wearparts otico gauge wheel 2

Which tires?

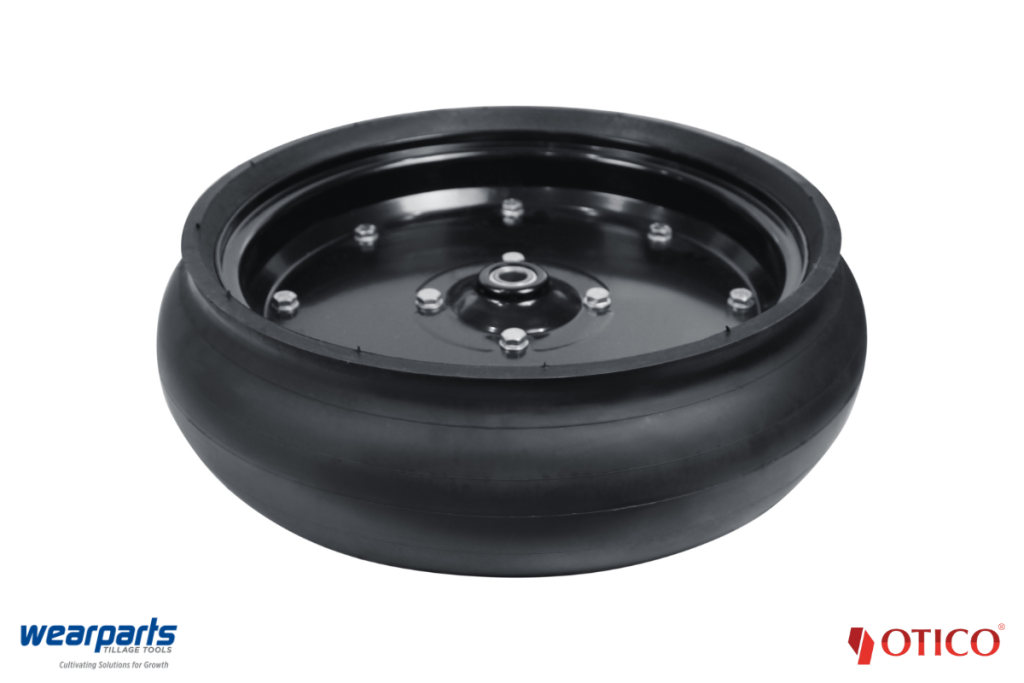
Gauge wheel tires always have a convex profile to reduce drag and therefore increase agronomic efficiency. They have traditionally been made of rubber, which has a key benefit – its flexibility allows the tire to easily shed mud and debris as it moves along.

But rubber tires struggle to stand up to the extreme wear they encounter in conservation tillage system – especially no-till, where corn stalks can shred up a tire like nobody’s business.  For this reason, polyurethane tires are becoming more popular for gauge wheels.  Polyurethane wheels retain their lips for much longer which results in a superior furrow – but they can also be heavy and hard, leading to increased soil compaction, and the risk of the tire bouncing over an uneven surface, leading to inconsistent depth.  In addition, polyurethane wheels don’t shed mud easily so they are prone to plugging.

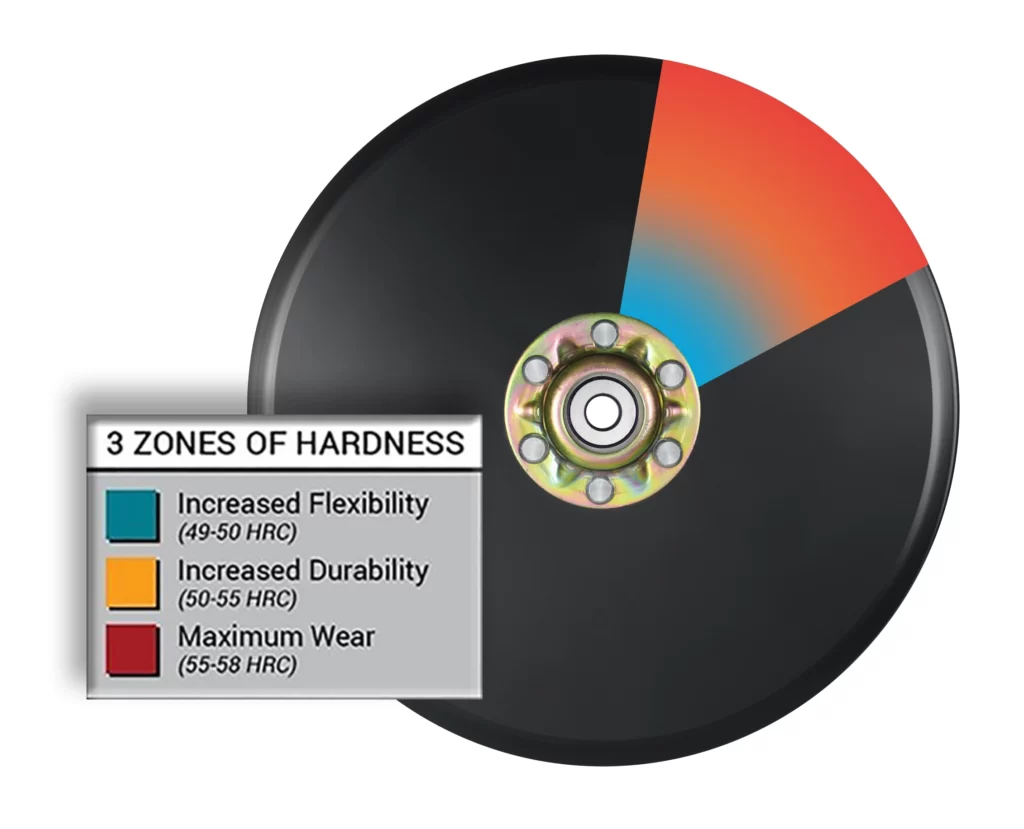
The solution?  Rubber semi-hollow tires like the FarmFlex range by Otico, available from Wearparts.   These tires are manufactured from rubber and are hollow like a normal tire, but the proportions have been altered to deliver superior performance.  The void in the centre is just big enough to give the tire that necessary flex, while the rubber is thick enough to be puncture-proof and deliver that long-wearing, semi-rigid lip.  Superior shock absorption ensure consistent planting and crucially, less wear and tear on your planter.  Tire profiles vary by machine, and FarmFlex has options to fit them all – including the RID option for the Case IH planter.

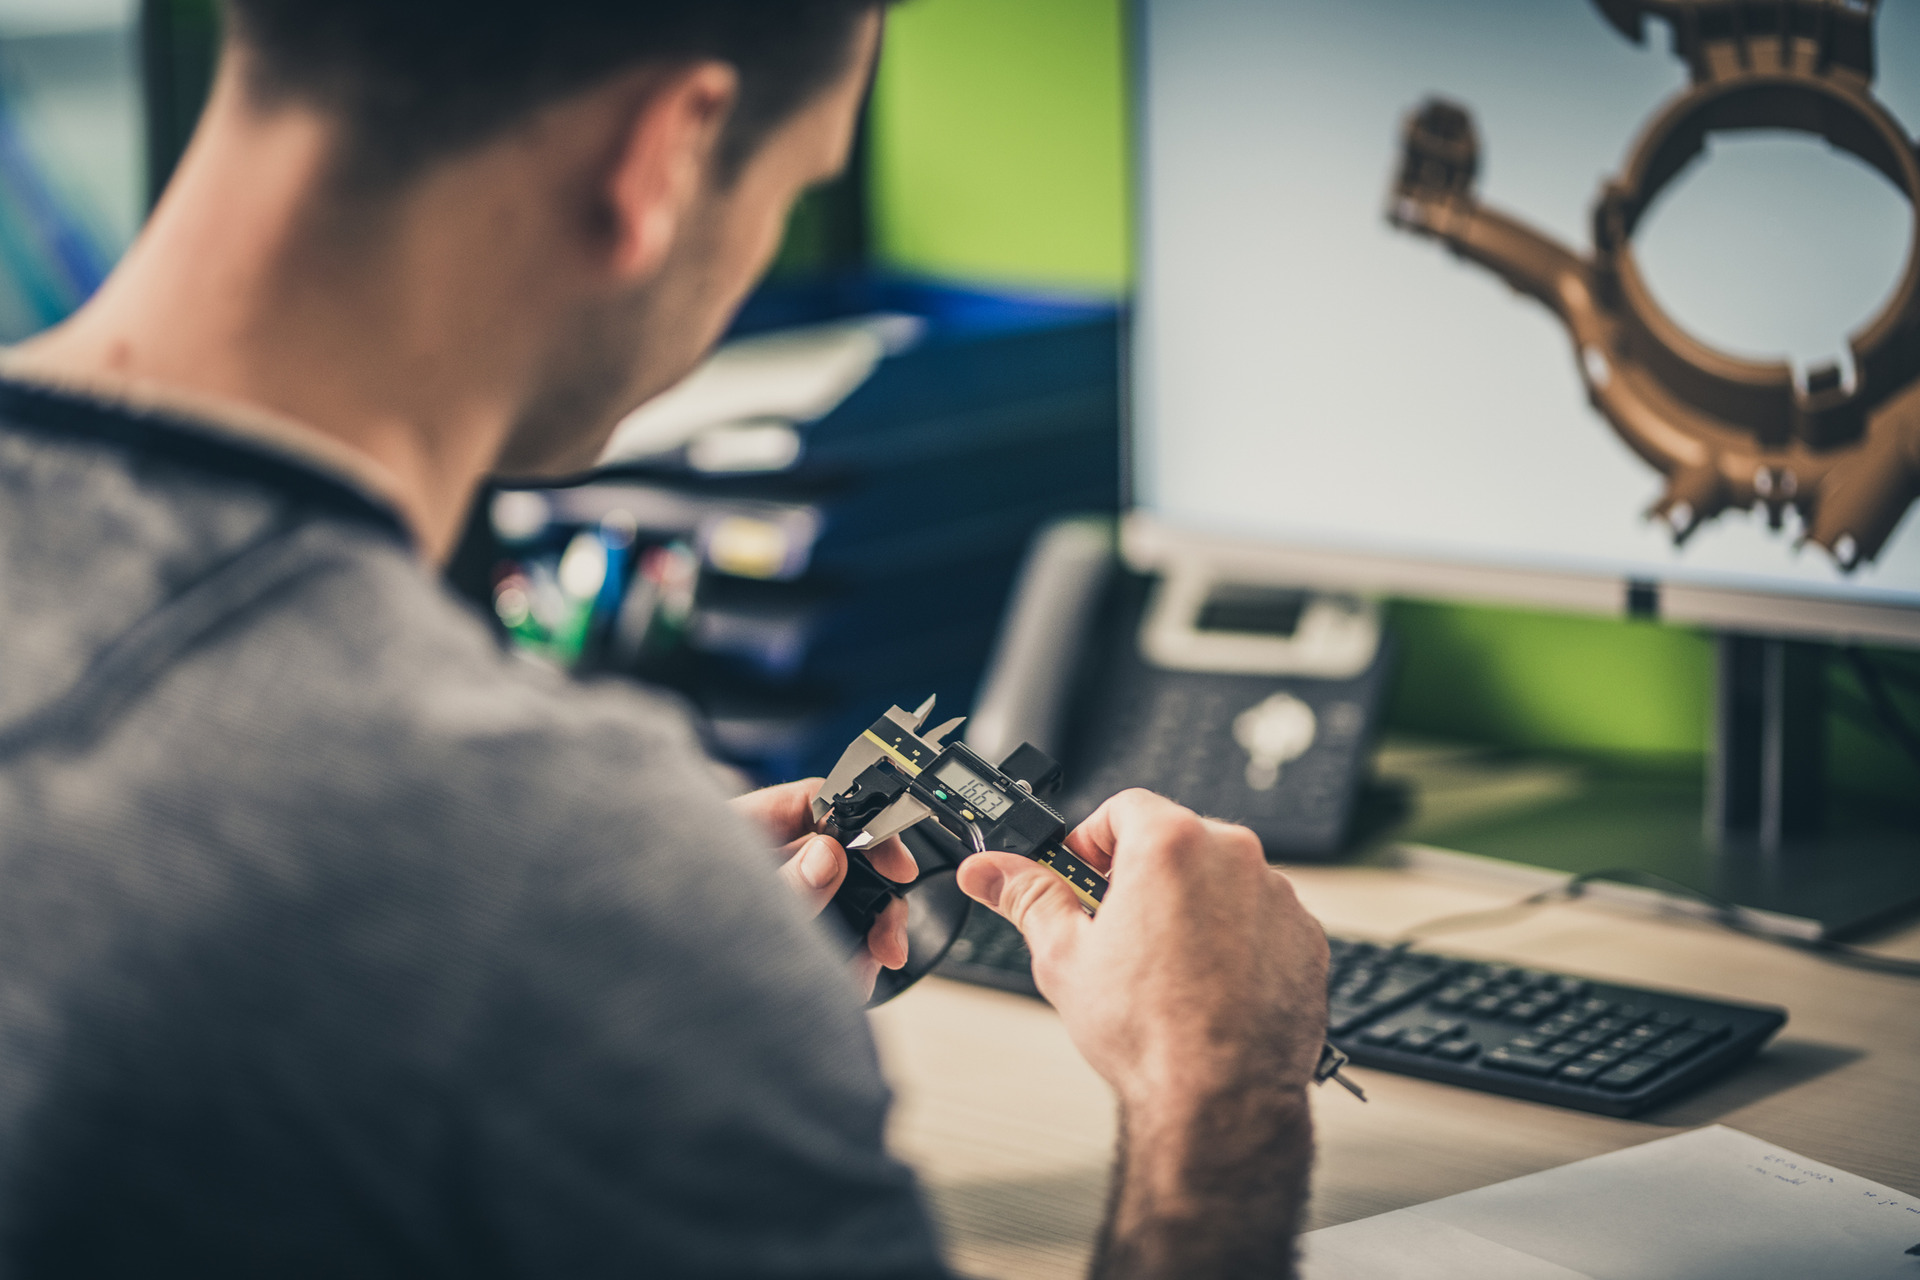
For more advice on which gauge wheels are best for a specific planter or how you can tackle particular in-field challenges, contact our knowledgeable sales team.

How farmer feedback informs our product innovation process

If necessity is the mother of invention, it follows that when it comes to knowing what tools farmers need to get the job done, nobody knows better than farmers themselves.

Almost every piece of farm machinery we use today can trace its roots back to an implement that was designed by a guy looking to solve a problem on his own land – because when you see the problem close up, you’re best placed to develop a solution.

That’s why our customers – ag dealers and the farmers they serve – are integral to the NPD process here at Wearparts.  Where OEM manufacturers are focused on the big, ‘one size fits all’ solutions, as an independent business we’ve got the agility and the grassroots knowledge to respond to the specific challenges farmers are facing in a much more intuitive way.

Inspired by experience

Take our seed opener assemblies, for example.  The points of difference between OEM openers from different manufacturers are negligible – but after attending a workshop with a group of farmers, we learned that most conventional assemblies were coming up short on some key factors: hardness, bearing size, sharpness and bevel length.

So we took this information to our NPD department, and the result is our unique seed opener assembly, developed in conjunction with French company, Forges de Niaux.  

Our seed openers look the same as most – but look closer and you’ll find we’ve used an innovative heat treatment process that delivers a harder edge while retaining flexibility through the center; a longer bevel that stays sharp for longer; and a larger bearing and rivet.  What this adds up to is precise performance, a longer wearlife in the field, and less costly downtime for the farmer.  The differences are subtle, but in a game of fine margins, they can add up to significant uplift in a farmer’s bottom line.

Innovating for excellence

This NPD process isn’t unique to our seed opener blades.  We’re always listening to farmers and thinking about ways we can improve or update our products to better meet the challenges they face, in an industry that gets more competitive every year.

At any given moment, we’ll have a number of products at various stages in our NPD process, which starts with our sales team gathering feedback from customers and culminates in the launch of a new tillage or planting tool.

For obvious reasons, we can’t develop a new product every time we get a query or some feedback from a customer – but over time, we’re able to build up a clear picture of where there is a need, based on the volume of requests for a specific product adaptation or new solution.  

Our sales team are out on the ground right across the USA, listening carefully to what dealers and farmers are saying about our products and about our competitors, so once we’ve established there’s a need for something new or different, we move to the next stage of the process.

wearparts NPD engineering image

Advanced agronomics

We start by scoping out the design and product engineering parameters, as well as the commercial side.  Do we need to develop something new from scratch, or can we adapt an existing product?  What will it cost to make?  What do we need to sell it for – and how do the costs stack up for the farmer in terms of cost per acre?  Only when we’re sure that it makes agronomic sense will we proceed to actually develop the concept.

This process begins in our engineering department where, following a product request from the sales team, our designers begin by creating a CAD drawing and/or a 3D model of the product.  Once they’re happy with this, they submit it to the preferred manufacturing vendor – we use vendors across Europe, North and South America and some in the Far East – for one or more prototypes to be made.

Once we receive the prototype/s at our headquarters in Gothenburg, Nebraska, we proceed to carry out fitment and field tests.  The fitment tests are to ensure that the prototype/s are fit for purpose – that it fits the intended machine, and that it moves freely, interacting with any other components as it should.  Once we’re confident that the product works ‘on paper’, it’s time for the real test – in the field!

wearparts NPD image showing tractor moving across a field

Field tested, farmer trusted

We carry out field tests to establish the precision, effectiveness and wearlife of all our ground-engaging components, comparing them against data from our own similar products where available as well as comparing directly with competitor products where appropriate.  

This process quickly shows up where any adjustments need to be made on the design and manufacturing side.  Prototypes may travel back and forth to the manufacturer a number of times until we’re completely satisfied with the performance and specification.  As a result, the time frame for our NPD process varies significantly from product to product – it can take up to a year or more to bring a product from concept to market-ready component.

Once we’re satisfied that the new product meets our stringent requirements on performance, wearlife and value for money, we place our first batch order, and recurring purchase orders thereafter.  All product is received into our Nebraska HQ and quality checked before it’s stored in our warehouse ready for shipping to our nationwide dealer network.

We want your feedback

Whether you’re a farmer or an ag dealer, if you’ve got an idea for a new product or a modification to our existing range that would save you time and money, we want to hear from you!  Get in touch to add your feedback to our database, and shape the future of tillage and planting with Wearparts.

Fertilizer Knife 101

Growing food crops is the most nutrient-intensive of all farming practices, requiring optimal soil conditions in order to achieve the high yields farmers need to make their businesses profitable.

Before the invention of man-made fertilizers, farmers used natural methods – such as crop rotation, rotational grazing and manure spreading – to return nutrients to the soil. But as the intensity of crop farming has increased, farmers have become more and more reliant on man-made fertilizers in order to stay competitive.

Conservation tillage represents an effort to limit that reliance by incorporating some of those traditional, natural soil conditioning methods into a modern-day commercial farming model. By leaving crop residues in place and not disturbing the soil too much, natural microbial activity can restore some goodness. But it’s not enough on its own, and so farmers have had to seek out methods of soil conditioning that align with their desire to preserve the soil structure as much as possible – hence the invention of fertilizer knives!

What is a fertilizer knife?

A fertilizer knife is a non-rotary tool that is used to inject in a dry, liquid or anhydrous (vapor) fertilizer into the field. There are many different types of fertilizer knives available, offering the farmer many options in terms of depth, soil disturbance and cost per acre. These include front and back-swept styles, central and side application models, and profile/tip variations. Choosing the correct knife for your farm depends on soil type, the toolbar being used, the planned crop and its nutrient needs, the type of fertilizer being applied and the level of moisture in the soil.

Why use fertilizer knives?

Fertilizer knives are the preferred method for fertilizer application for many different reasons. By putting the fertilizer directly into the ground, you avoid issues with runoff on sloped sites, dilution due to rainfall, or evaporation of liquid product into the air. Fertilizer applied to the soil surface takes time to penetrate to the depth where it can be effectively used by germinating seeds and later, crop roots – but applying the fertilizer at depth ensures these nutrients are immediately available to the young plants.

Using fertilizer knives also creates optimal conditions for seed germination by breaking and lifting the compaction layer without turning over the soil surface.

How are fertilizer knives used?

Fertilizer knives can be fitted to a toolbar or cultivator in either a bolt-on or auto-locking format. The farmer can have a cultivator with the same number of shanks at the same spacing as his planter or an odd number of rows depending on the application. Even rows mean that the fertilized furrows will eventually align with the seeding furrows during planting season for optimal results. The tip of the fertilizer knife penetrates the soil and the foot then fractures and lifts the compacted layer to create an aerated furrow. A tube to the rear of the knife shank delivers fertilizer into the furrow, and then a wedge-shaped closing mechanism that catches the edge of the furrow and closes the soil over.

Which knife is used for which fertilizer type?

Besides what fits your specific machine and soil type, you’ll need to select the right knife for the type of fertilizer you want to apply. Anhydrous ammonia (NH3) for example, needs to be applied deeper than other fertilizers because of its hazardous nature – you don’t want it escaping into the air, so you need a knife that penetrates to a depth of 8 or more inches. A narrower tube also ensures more accurate and safe application.

For liquid fertilizer, application is at a similar depth, but a wider tube will be required. For dry fertilizer, an even wider tube is needed but a shallower depth is optimal – a backswept knife may be preferable if soil conditions allow. Knives may also be equipped with two different tubes for simultaneous application of more than one fertilizer type, or for the addition of fungicidal and insecticidal treatments.

Wearparts Fertilizer Knives

We carry fertilizer knives to fit all types of applications, with alternatives to almost every branded blade on the market including Wako, Wiese and more.

We offer tube sizes of 3/8” OD & ½” OD, thick walled tubes for increased life; chrome tubes available on most knife models. Dual tube knives also available. Foot profiles of the narrow 3/8” wide to a mole style knife with a 1-7/8” wide foot piece are available. Optional chrome inserts are available on almost every knife for longer life and durability. Sealers are also available. Our NPD department is currently in the process of developing knives for anhydrous and backswept specifications – stay tuned for details on these and more product innovations coming soon at Wearparts!

As with all our products, you can expect high quality manufacturing and a durable, fit-for-purpose product at a competitive price. We currently have excellent stock levels, with immediate shipping available on many of our fertilizer knives. To find out more or to inquire about becoming a dealer, get in touch!

**we have all coulter options available for fertilizer knife systems as well**

Fertilizer applicator outfitted with Wearparts fertilizer knives and coulter blades

Farm stress and mental health in the holidays

It’s the most wonderful time of the year – but what if it isn’t?

Farmers are at the centre of everything our nation holds dear about the festive season. The snowy countryside scenes, the cosy farmhouse kitchens, the mountains of delicious, home-cooked produce.

But the reality of Christmas on the farm can be a whole lot bleaker than the nostalgic, greetings-card image we’re all familiar with.

Falling right in the middle of winter, on the eve of taxation season, the festive season brings with it a unique set of practical and financial challenges for farmers.

Long, dark days and cold temperatures can make outdoor work seem more arduous than usual. Bad weather can cause problems with machinery and equipment, while livestock are more prone to sickness during the winter months. Bills rise as the farm’s energy demands increase, and incomes are stretched thin by the cost of buying gifts and hosting family gatherings.

By the very nature of their job, farmers tend to suffer more from social isolation than people who work in ‘normal’ jobs. Add to this the usual tensions – the family fall-outs, the empty chair around the dinner table – and it’s no wonder that farmers are more prone to stress and mental health problems, especially during the festive season.

Farmers are in crisis

Research shows that farmers in the US are at greater risk of suicide than any other occupation, with a rate 1.5 times the average. This frightening statistic has prompted a movement to do more about mental health among farming communities – we’ve linked to some organizations that can help at the bottom of this blog.

As part of those communities, there are things we can all do to try and ease the burden on our farming colleagues and their families over the festive season, and all year round. There are also some important self-help steps farmers can take to look after their mental health. Here are some tips and ideas to try:

1. Reach out to your farmer friends

Social isolation is a major contributing factor in farm stress and poor mental health among farmers. Farm workers are perceived as ‘gruff and tough’, able to work without rest or complaint all year round – but this is a harmful stereotype that can prevent struggling farmers from reaching out for help. While the physical work of farming means you might not see your farming buddies very often, technology means it’s easier than ever to check in. Talking about the challenges you’re facing doesn’t just lighten the load for you – it encourages others to voice their concerns and stresses too. So drop the tough guy act and send a message, pick up the phone – or better still, grab a beer and a chance to talk as often as you can.

2. Prioritise downtime

When it comes to hard work, farmers have nothing to learn. Working from sun up to sun down in all weathers, and turning your hand to any task just comes with the territory. But one thing farmers are terrible at is taking time off – and yet this is crucial for mental wellbeing.

Of course, we’re not suggesting a week in the Florida Keys. Farm work is relentless and hiring help is expensive. But recognizing that downtime is a vital investment in your health, your family and ultimately, the security of your business, is an important first step. Try to ringfence times in the week when you are ‘off’, and don’t tackle jobs during these times unless absolutely necessary. Make time to have dinner with the family. Prepare in advance of the festive season so that work can take a back seat on key dates. And don’t be afraid to ask for help – family and friends will be happy to pitch in if it means getting to spend quality time with you on special family days.

3. Get support with finances

Farmers are some of the best bookkeepers around. You’re undoubtedly accustomed to managing finances, keeping on top of bills and taxes and planning ahead for rainy days. You’re probably also intensely private about your farm finances and reluctant to ask for help if money is becoming a source of stress.

But a problem shared is a problem halved – and in the current financial climate, there’s no shame in admitting that you need some extra help. There are many professional organizations out there who are trained to help with complex financial issues including farm financial analysis, tax and succession planning, debt analysis and credit mediation. These organizations can help you come up with a plan to maximize profitability, manage credit/debt and spread the cost of overheads more efficiently. Speaking to a professional can go a long way towards easing the mental load, helping you to sleep easy at night.

4. You are what you eat

Mental wellbeing and physical health go hand in hand. Taking care of your body is one of the most powerful things you can do to stay resilient in the face of mental challenges. It goes without saying that you get enough exercise and spend plenty of time outdoors – but factors like diet could be impacting on your health.

Eating well for a farmer means getting plenty of nutrient dense food, rich in the protein your body needs to sustain activity for long periods of time. Lean meat and low-fat dairy, fresh fruit and vegetables and a good amount of pulses and legumes are a great basis. Staying hydrated throughout the day is important even in winter – and watch your alcohol consumption. Drinking to relax or to be able to sleep is common among farmers but carries risks for your mental and physical health.

5. Get enough sleep

Burnout culture in farming is a thing just as it is in many other office-based professions. But there are no prizes for running on the least amount of sleep – and in fact, not getting enough puts you at significant risk of accident and injury as well as depression. Most adults need 7-8 hours sleep per night on average to function well cognitively and emotionally during the day. If you find yourself forgetting things, feeling ‘foggy’ or experiencing low mood, lack of sleep could be the cause. Good sleep hygiene is vital for getting enough shuteye – allowing time to wind down before bed, avoiding too much screen time in the evenings, reducing your caffeine intake and avoiding alcohol can all help you to get a better quality sleep.

Don’t suffer in silence

If you or someone you know is in crisis, it’s important to reach out for professional support. Don’t suffer in silence – here are some helpline numbers:

  • Farm Aid Hotline, 800-FARM-AID (327-6243) Monday-Friday 9-5pm ET
  • National Suicide Prevention Lifeline, 800-273-TALK (8255) 24/7
  • MidWest AgriStress Helpline, call or text 833-897-2474, 24/7

Why choose Wearparts?

For crop farmers, replacement tillage and planting parts are essential. By their very nature, ground-engaging components on farm machinery such as cultivators and planters get worn down over time, and need to be replaced.

But what to replace them with isn’t so clear cut. Most agricultural dealers will carry a mix of OEM and aftermarket parts – and in many cases, OEM is the most expensive of the two, which leads farmers to believe that they are also better quality.

But the choice isn’t always a binary one. Wearparts replacement tillage and planting parts are not OEM parts, but neither are they a cheaper alternative. What’s more, Wearparts is more than just a brand name created to lend authenticity to a range of inferior aftermarket parts.

We’re smaller than the big guys, but just like the John Deeres of this world, we have an authentic reputation, built on expertise and trust. So whether you’re a farmer or an ag dealer, if you’re wondering why you should do business with Wearparts, here are six great reasons:

1. Quality

We’ll be absolutely straight with you; generally speaking, our products are not cheaper than their OEM equivalents. In some cases, you may even find they are more expensive. This is because we use only specialist global manufacturers to make high quality products from the best quality materials, always.

We source the majority of our replacement tillage parts in Europe and South America before assembling them here in the USA, and we test 100% of them before they are shipped out of our warehouses in Nebraska and Georgia. We also have some of the most stringent tolerances in the ag industry – typically half that of our competitors. If a product doesn’t pass our test, it doesn’t leave the warehouse.

We modify a significant percentage of our products in-house, delivering on average 10% MORE material and a 30% longer wearlife, which ultimately reduces downtime and cost per acre in the field.

2. Service

Our roots in the farming industry run deep, which means we have first-hand experience of the challenges farmers and ag dealers face. Our specialized team has a strong agricultural pedigree and a geographically-tailored approach – so whether you’re growing peanuts in California or cotton in Texas, we’ve got the knowledge and the components to meet your needs.

3. Innovation

The ag industry never stands still, and with every passing year, the challenges farmers face are evolving. Wearparts is committed to keeping pace with industry change so that we can meet our customers where they are – whether that means taking steps to overcome supply chain issues, or meeting the challenges posed by climate change.

We go the extra mile to source the latest innovations – such as our French-manufactured seed opener blades made using pioneering forging techniques that give them variable hardness and flexibility along their radius, for increased precision and reduced risk of breakage. Where innovation doesn’t already exist, we create it – adapting specifications based on direct feedback from our customers to deliver optimum performance and precision, every time.

4. Trust

OEM parts come with a trusted reputation baked in, but when it comes to getting support on the ground, global brands often lack the responsiveness and agility farmers and ag dealers need. At Wearparts, we pride ourselves on down-to-earth, easy to access customer service so our customers can always access support and expertise when they need it. Whether you’ve got a technical query or you need to source a specific part in a hurry, all you need to do is pick up the phone!

5. Convenience

Tillage waits for no man, right? Because farming isn’t a 9-5, we’ve built a comprehensive and convenient service that means you won’t have to wait around to get hold of our replacement tillage parts when you need them. Our secure supply chain means we rarely experience low stock or delays, and with warehouses in Nebraska and Georgia, we’re ideally placed to serve all of the lower states, with rapid shipping and no minimum order quantity.

Ready to experience the Wearparts difference for yourself? Get in touch to become a dealer, or find your nearest Wearparts dealer here.

What is CMT hardfacing?

A key advantage of choosing Wearparts as your preferred supplier of replacement tillage parts is that all our products are assembled and tested right here in Nebraska.

While our tillage parts are manufactured around the world – mostly in Europe and South America – everything comes to our HQ to receive final sign-off before we distribute to our dealer network. This also means we are able to offer additional services, like modifications, on many of our most popular product lines.

One of the main modification services we offer is CMT hardfacing – a welding process that is completed by our in-house team of specialist welders, and can significantly extend the wear life of ground-contact components.

But what exactly is CMT hardfacing? What are the benefits, and how does it differ from conventional welding? Let’s take a closer look.

How is CMT welding different?

The CMT process uses much of the same equipment as conventional welding and essentially ‘looks’ the same – but there’s a key difference. Conventional welding uses an electrical arc to generate heat. The arc is created by a short circuit that occurs when the electrode comes in contact with the metal, causing it to melt. The process produces continuous heat that builds as the weld is carried out.

CMT welding is different because it uses an alternating AC/DC current that retracts the wire electrode when a short circuit occurs. This occurs in a pulsing rhythm which means the weld has time to cool before each drop is placed, which makes the process smoother and less messy. It also means that the majority of the heat remains within the electrode, instead of transferring to the base metal being welded. Using this process to protect the base metal from excessive heat removes the risk that it will become diluted with the filler metal from the melting electrode, which could affect its inherent properties and make it weak. It also eliminates the risk of warping and distortion that can occur when metal is heated to extremes. This means that the CMT process is much better adapted for welding thin metal.

What are the benefits of CMT welding?

CMT welding has some clear benefits both during the process itself and in the finished weld.

Because the process allows for much more precise placement of the filler metal, there’s no need to worry about spatter. This makes it an ideal process for application in hard-to-reach places, or where spatter might damage surrounding components.

CMT delivers a very smooth, uniform-looking weld which, as well as being more aesthetically pleasing than the bumpy surface of a conventional weld, has some additional benefits for products such as our replacement tillage parts. The clean edge of a CMT weld is smooth and thin, which means products like sweeps, ripper points and coulter wheels remain sharp and precise while also being much longer wearing.

Finally, the CMT process helps to guarantee the strength of the finished product. At lower temperatures, the base metal doesn’t become diluted by the weld wire as it melts, which often happens in conventional welding, effectively turning the welded metal into an alloy, which is much harder but has lower tensile strength. As a result, the welded portion can be brittle and more prone to breakage. CMT keeps dilution to a minimum so the base metal remains inherently strong and flexible, which in the case of our replacement tillage parts, means a much-reduced risk of breakage in the field.

To find out more about our CMT hardfacing service, get in touch!

Get the most from your planter this season

Planting season is just around the corner which means just about every crop farmer in the US right now will be thinking about how they can mitigate for the unknown and secure a good yield.

The truth is, you can’t predict what the weather or the market is going to do in 2023 – but there ARE things you can control, and that starts with the fundamentals of successful seed planting and germination.

Ensuring your planter is in the best condition, and selecting the right ground engaging components for your crop and soil type, are two steps every farmer can take to increase the chances of success this growing season – especially in no-till systems, where soil conditions can have a big impact on the performance of your planter.

Although digital technology has a big part to play in managing the performance of machinery these days, there’s no substitute for a hands-on approach to maintaining and adjusting your setup for the best possible results. Let’s take a look at some essential planter maintenance tasks you should be performing in advance of the planting season, and the details you should be paying attention to as the season gets underway.

General planter maintenance

Just like you wouldn’t set off on a long drive without checking your car for things like oil, water and tire pressure or treads, you’d be crazy to bring your planter out of a year-long storage and head straight to the field.

Pre-season, it’s vital to give your planter a complete once-over, checking for broken or worn components and ensuring that all moving parts are well lubricated. Key things to check include the bearings and mechanisms on row cleaners, and the bushings on the parallel arm linkage. Move the row unit up and down and side to side manually, to check if there’s too much movement that could cause inconsistent depth or seed spacing, and replace any worn parts.

You should also check for wear on the bottom of your seed tubes. Sometimes the disc opener comes into contact with the bottom of the seed tube, causing wear. This can result in inconsistent seed spacing or worst case, in seeds not being able to drop out of the seed tube at all.

Disc opener 101

Seed disc openers are arguably the most vital component of any planter because they are responsible for opening the furrow that will be the seed’s home for the next 8+ months. However, your disc openers don’t work in isolation – they rely on the frame weight of the planter itself to push them into the soil, and on the gauge and press wheels to ensure the correct depth, soil contact and eventual closure of the furrow.

Assessing soil conditions and physically checking the correct contact on your disc openers with the soil it VITAL – it’s not uncommon in dry conditions to see a planter riding up on the disc opener blades instead of on the gauge wheels, resulting in a furrow that is too shallow for the seed to access the correct moisture and nutrient levels for germination and strong growth.

Downward spring pressure may need to be increased in drier surface soil for adequate soil contact and to help bring moisture up to the seed. Pressure should be decreased after rainfall to avoid compacting soil around the seed.

Choosing the right blade

As for the seed opener itself, there are some important steps to consider when selecting a blade, and adjusting it for optimal performance on your machine.

Choosing the correct blade thickness is key for efficient planting and reduced cost per acre. Seed disc openers are generally available from 3 to 4.5mm thick, and farmers will differ in their opinion according to which is optimal. Since seed openers work in pairs, thicker blades will require more downward force to penetrate the soil. Thinner blades penetrate more easily, but lack rigidity and can be prone to warping or breaking.

Most farmers will agree that a thicker blade with a longer bevel delivers optimal performance in terms of precision and wear life. A shorter bevel – especially on a thicker blade – will result in the blades becoming blunt more quickly, which increases downtime and cost per acre. Worn beveled edges on seed opener discs also tend to let soil and residue into the furrow, which can impact on germination and ultimately on yield. A longer bevel increases wear life and ensures that blades stay sharper for longer.

Why choose Wearparts seed openers?

Wearparts seed opener blades have been developed in response to feedback from farmers about what they need from a seed opener, and have a number of unique features. They’re heat treated, which results in three zones of hardness – harder close to the cutting edge, and softer near the hub. This allows for greater flexibility, which facilitates better furrow closure and reduced chance of breakage. Our blades also have a larger hub, and a longer bevel for increased wear life. We test all of our seed opener assemblies in-house, and our tolerances are tighter than anything else on the market – which means we can guarantee that Wearparts seed opener assemblies will always run true.

Adjusting your Wearparts seed openers

The final thing to make sure of is that your seed disc openers are properly adjusted. Seed disc blades are designed to touch at the point of contact with the soil. In this moment, the two blades act as one to give a precise, V-shaped furrow with a clean bottom. If the blades do not touch, they’ll create a ‘W’ shaped furrow with potential to leave an air pocket around the seed when the trench is closed.

The blades should touch consistently along a certain amount of their circumference – this varies according to blade thickness, but typically 1.5-2 inches is optimal. You can check the contact distance by placing two business cards into the gap between the blades – one in front, and one in back. Push them down until they stick in the contact zone, then measure the distance between the two cards – check out this video for a how-to.

Don’t forget that even if your blades are straight and true, with sharp edges and a good contact zone, they will still wear down over time. Once a blade has lost a half inch in diameter, it’s time to replace it.

To find out more about Wearparts seed openers or to access support with planter problems, get in touch with our expert team.