weareparts logo

1-888-4-BLADES (425-2337)

FREE SHIPPING ON Qualifying Orders

Crop rotation and how it benefits the soil

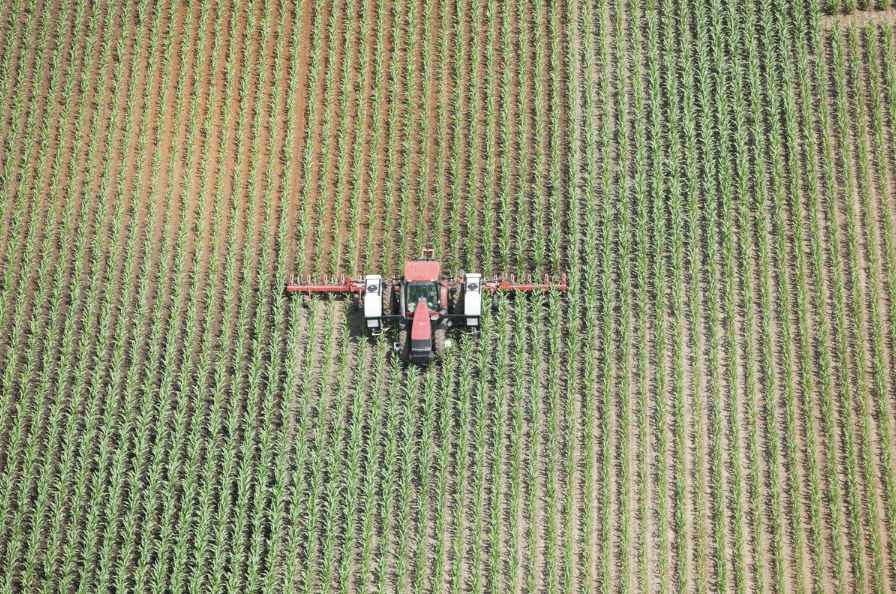
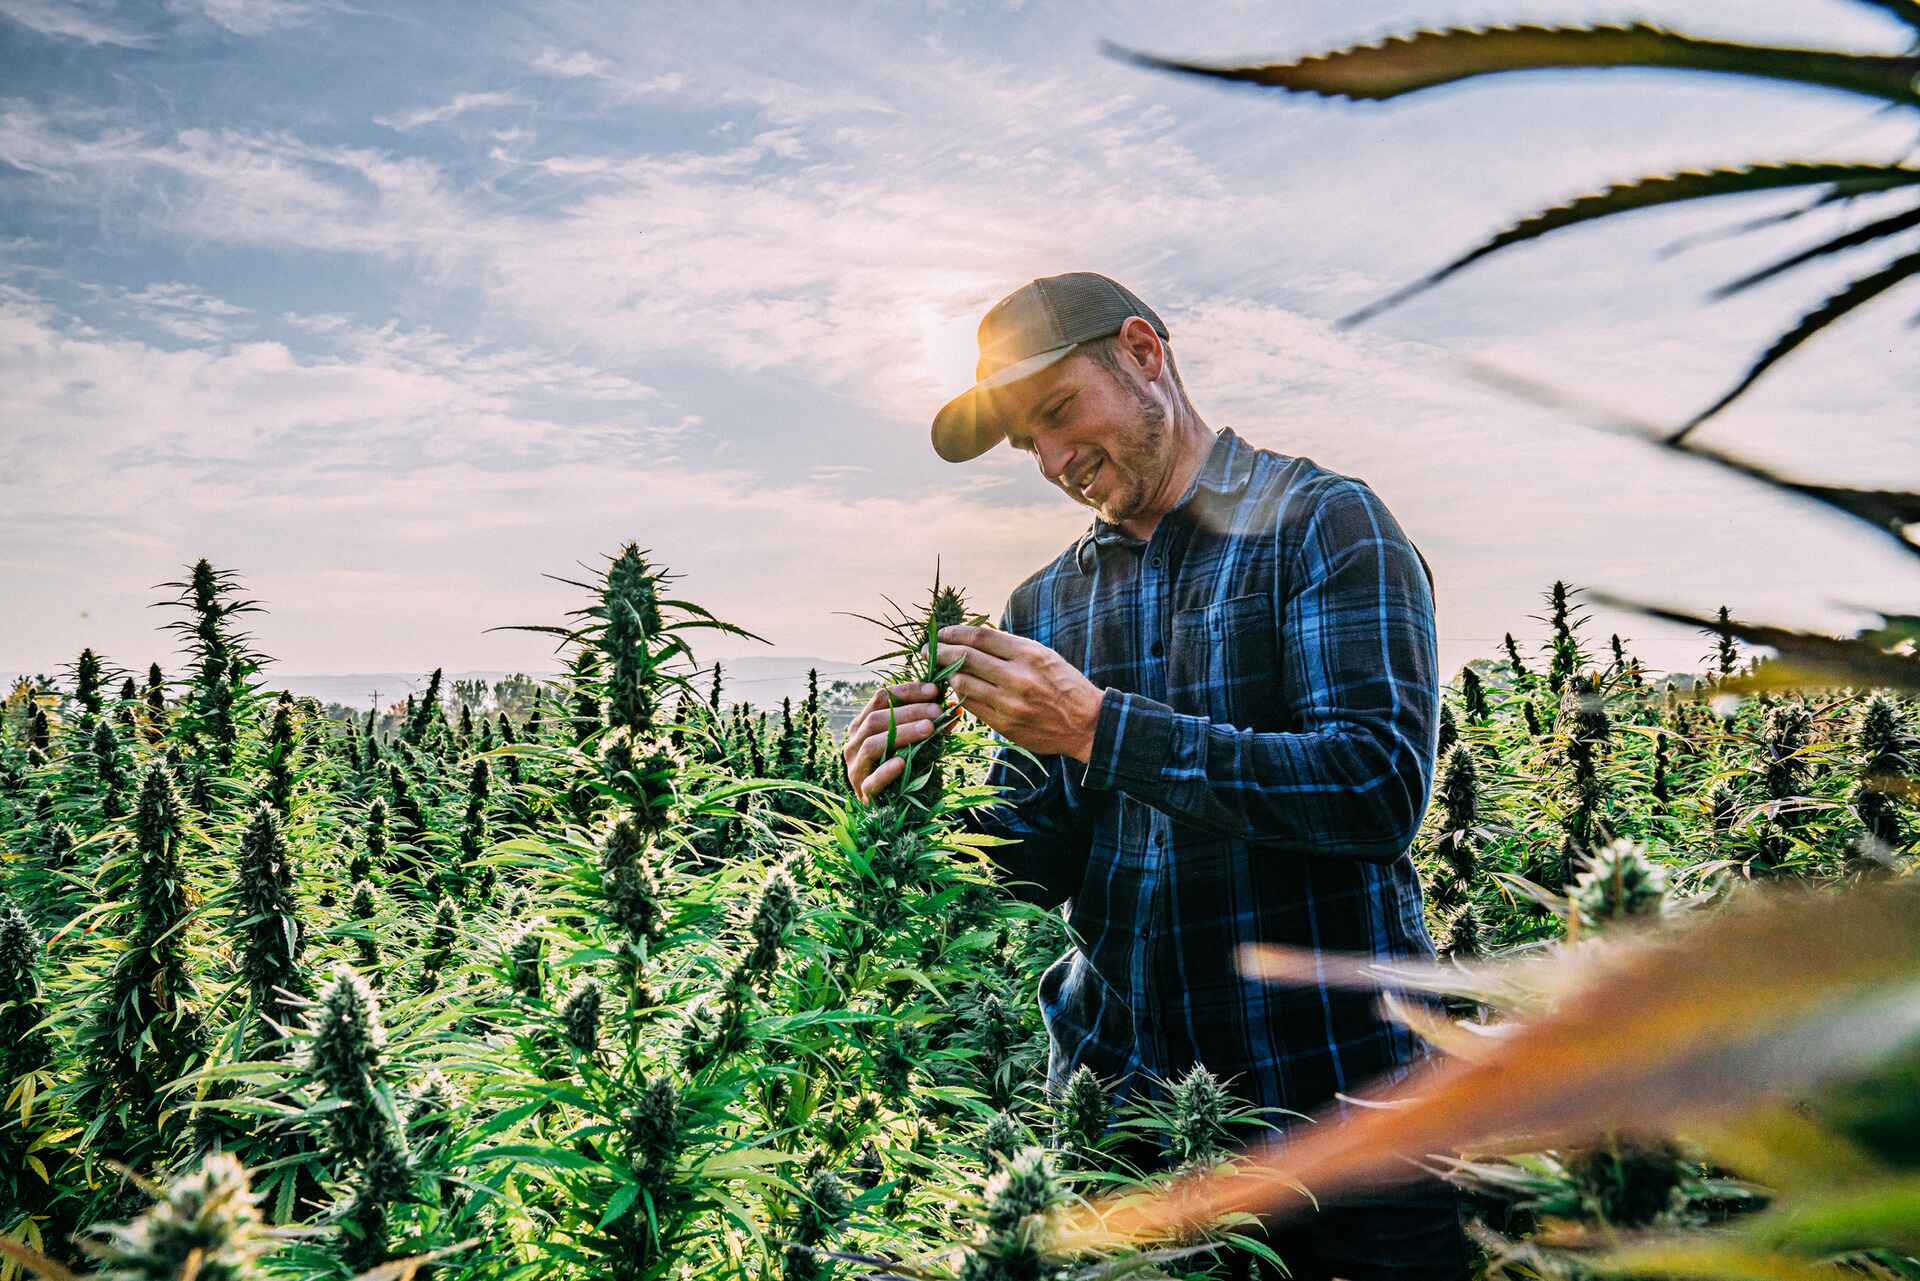
Maintaining soil fertility is a never-ending challenge for farmers, who are tasked with feeding a growing population using the same (or even less) land mass every year – and crop rotation is just one strategy farmers can deploy to keep their lands fertile.

For decades, it was thought that artificial fertilizers were an easy solution to soil degradation – after all, what could be simpler than just applying a man-made product to replace what nature lacks?  

But as we’ve learned more about more about soil, it’s become clear that artificial fertilizers aren’t a cure-all for nutrient depletion, and that their overuse can actually have a negative effect on soil quality as well as the wider environment.

Crop rotation is a natural method of soil enrichment that works with the soil ecosystem to preserve structure, encourage biodiversity and fix nitrogen and other nutrients.  Let’s take a look and how and why farmers do it.

What is crop rotation?

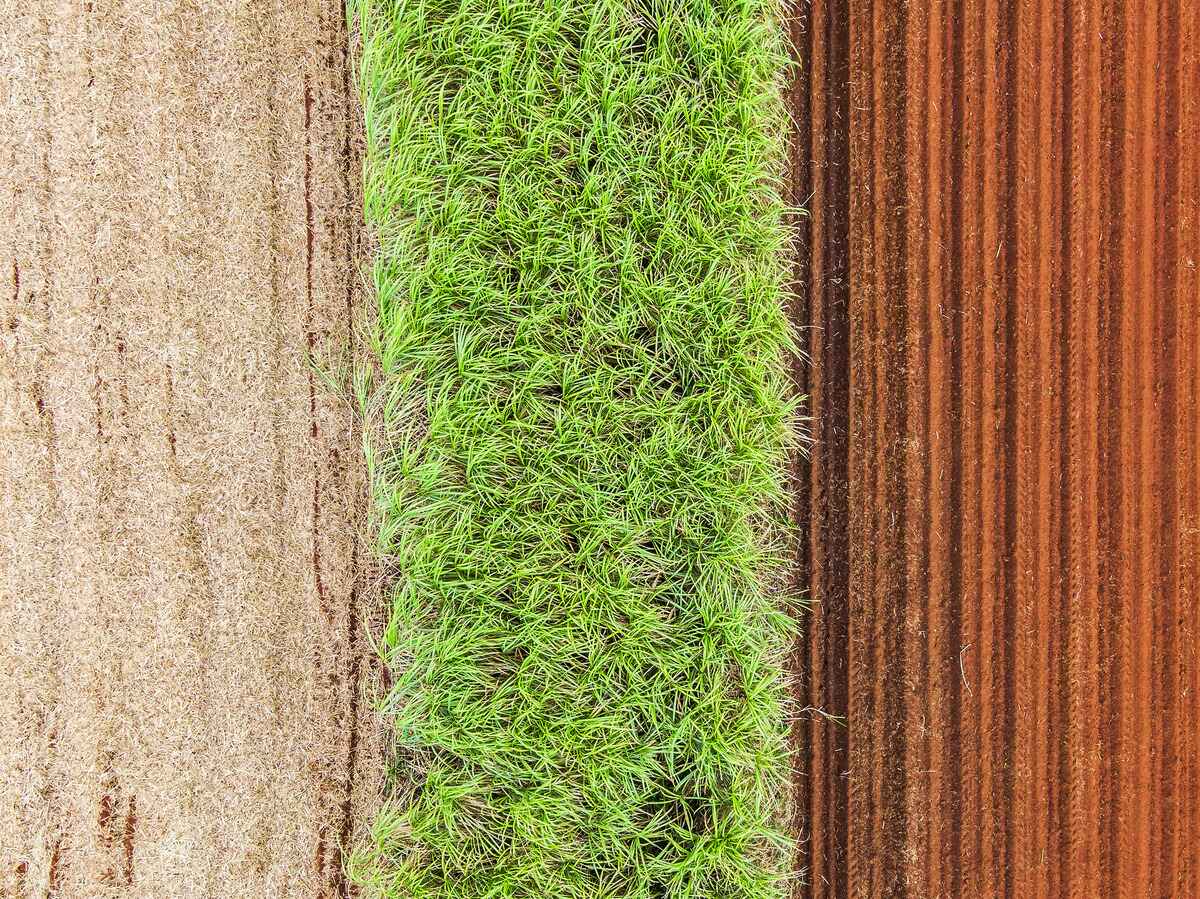
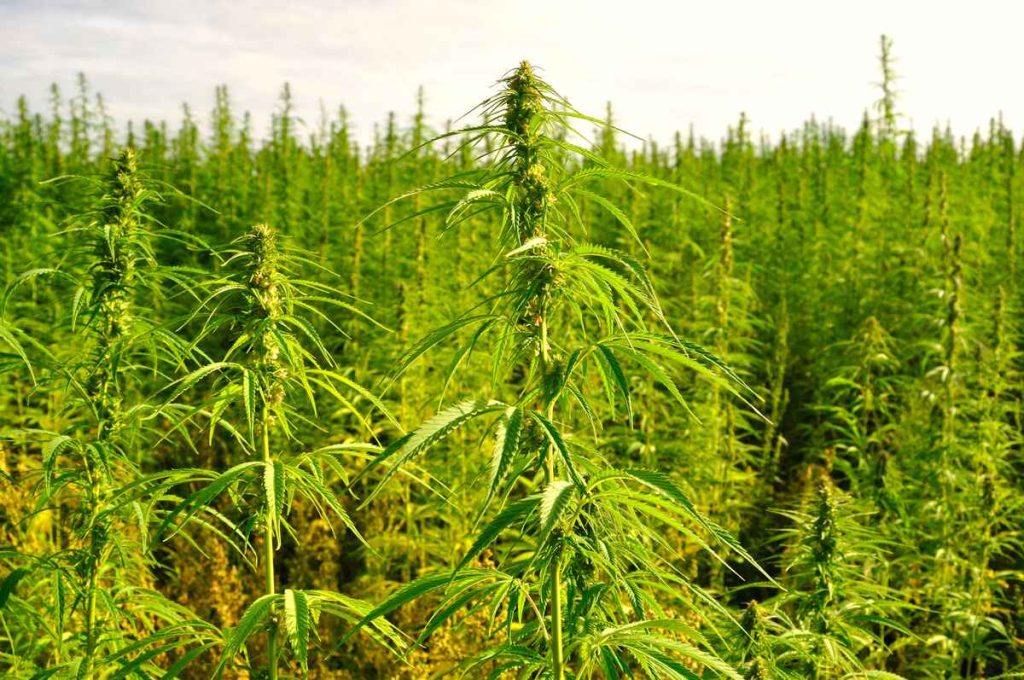
Crop rotation is a farming practice that involves systematically changing the type of crop that is grown in a particular field or location, usually from one year to the next – so instead of planting say, corn, in the same field year after year, the farmer rotates his crop by planting a different crop or group of plants in a specific sequence.  The types of crops in a rotation will depend on climate, soil type and the farmer’s goals.

Why do farmers rotate their crops?

In almost every aspect of the living world, variety is a good thing.  The more diversity that exists in any ecosystem, the healthier it will be – and soil is no different.  By rotating their crops, farmers can change up the variables when it comes to their soil ecosystem – factors like root depth, the volume of organic matter, moisture uptake and even the presence of insects can all have beneficial effects for the soil, and therefore subsequent crop yields.

Key benefits of crop rotation

Let’s take a look at some of the benefits of crop rotation as opposed to monocropping (growing the same crop in the same place every year).

  1. Soil health improvement

Crop rotation is primarily used as a method of enriching the soil by rotating crops that deplete nutrients with crop that add nutrients – particularly nitrogen.  Leguminous crops like clover, vetch and peas are known as ‘nitrogen fixing’ plants, which means they capture nitrogen from the air and sequester it in the soil via their roots.  As well as being cheaper and more environmentally friendly than using man-made nitrogen fertilizers, it’s thought that using nature in this way makes nitrogen in the soil more readily available to subsequent crop cycles.

  1. Erosion prevention

Certain crops in a rotation can be used to minimize soil erosion.  Plants like grasses have deep roots and underground rhizomes that bind the soil together, reducing the risk of topsoil being washed away by rain or carried away by high winds.  Plants with deep, penetrating roots also help prevent soil from becoming compacted, which allows moisture to travel deeper and encourages the presence of earthworms and other organisms that work to break down organic matter and enhance the soil’s structure.

  1. Weed management

Crop rotations that include cover crops can aid with weed management by physically suppressing weed growth – stopping weed seeds from getting the moisture or light they need to germinate.  But changing up your crops – and therefore the wider conditions in the field – can also stop any one weed species from becoming dominant.  In monocropping systems, it’s common for one or two particular types of weed to thrive in the conditions that crop creates, and after several years, those weeds can become highly established and even resistant to herbicides.  Changing the crop means changing the conditions, which stops unwanted species from getting a strong foothold and makes all weeds easier to control.

  1. Pest and disease control

Much like with weeds, specific crops are vulnerable to specific types of pests and disease.  If you monocrop, the life cycles of those pests and diseases will quickly become established and can be increasingly difficult to break.  Switching crops prevents these cycles from occurring, giving your crops and soil a break from pest and disease problems that could otherwise become endemic – but also attracting beneficial insects and bacteria that work to keep soil ecosystems in balance long-term.

What does a typical crop rotation look like?

Crop rotations can vary a lot depending on climate, soil conditions and the farmer’s business objectives.  Here’s a very simplified example of a crop rotation and the reasons for the sequence:
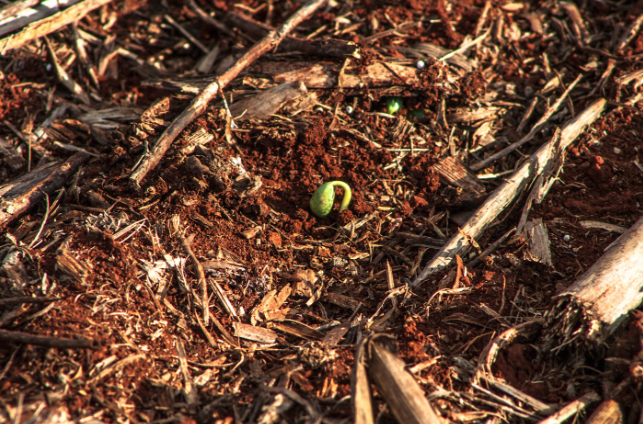
Year 1: Legume Crop

Legume crops like peas and soybeans are nitrogen-fixing plants. They have a symbiotic relationship with nitrogen-fixing bacteria in their root nodules, allowing them to convert atmospheric nitrogen into a form that can be used by plants. Planting legumes in the first year of the rotation enriches the soil with nitrogen, making it available for subsequent crops without the need for synthetic fertilizers.
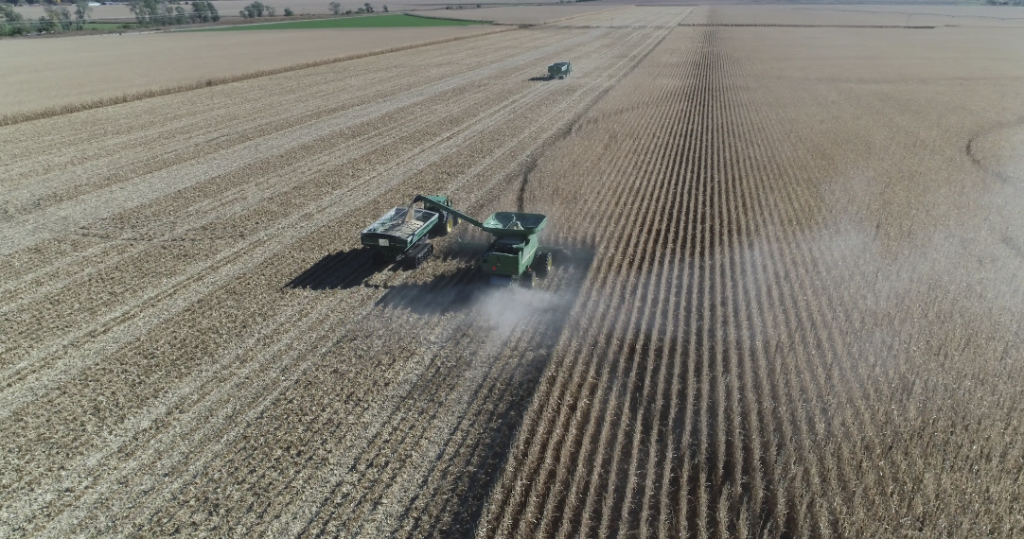
Year 2: Grass Crop

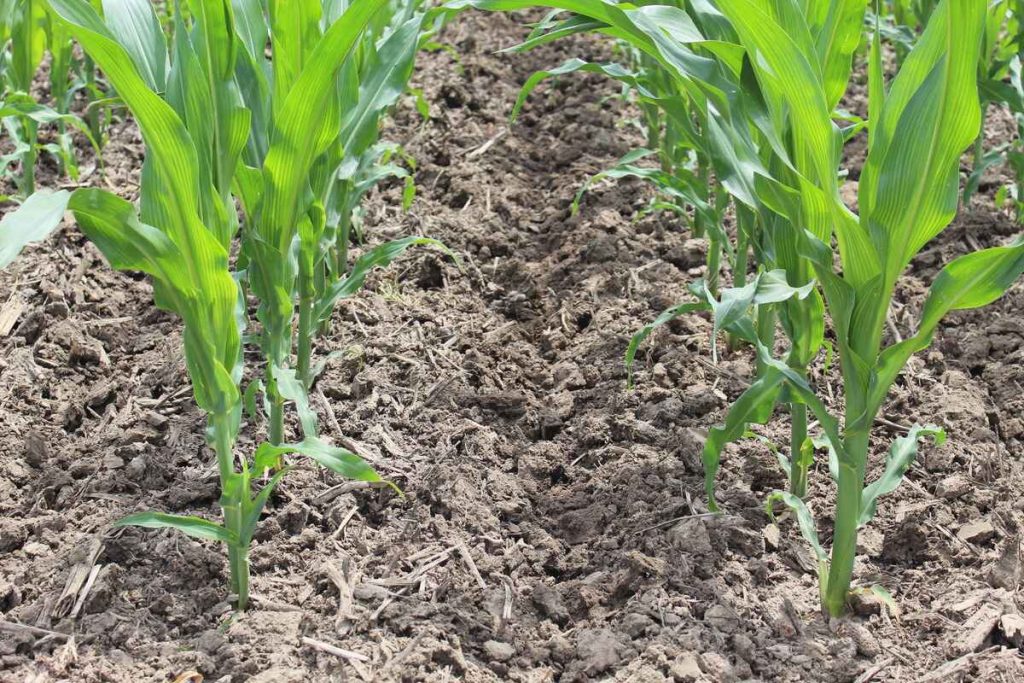
Corn, wheat and sorghum are all examples of grass crops.  They are heavy nitrogen users and will therefore benefit from the nitrogen fixed into the soil by the legumes in year one, reducing the farmer’s dependence on synthetic fertilizers.  Grass crops also have a different pest and disease profile than legumes.

Year 3: Root Crop

Root crops like potatoes, carrots and other vegetables are typically grown last in a rotation because they are less demanding on soil nutrients and also because they naturally break up the soil structure as they grow, and during harvesting.  Since legumes prefer a loose soil structure, this is a useful characteristic.  As with other crop groups, the pest and disease profile of root crops is different, and helps to break the cycle.

Many crop rotations are more complicated than this – particularly when cover crops are added in between cash crops or during fallow periods. The length of rotation can also vary – some farmers will grow their main cash crop for several consecutive years before going into a rotation. 

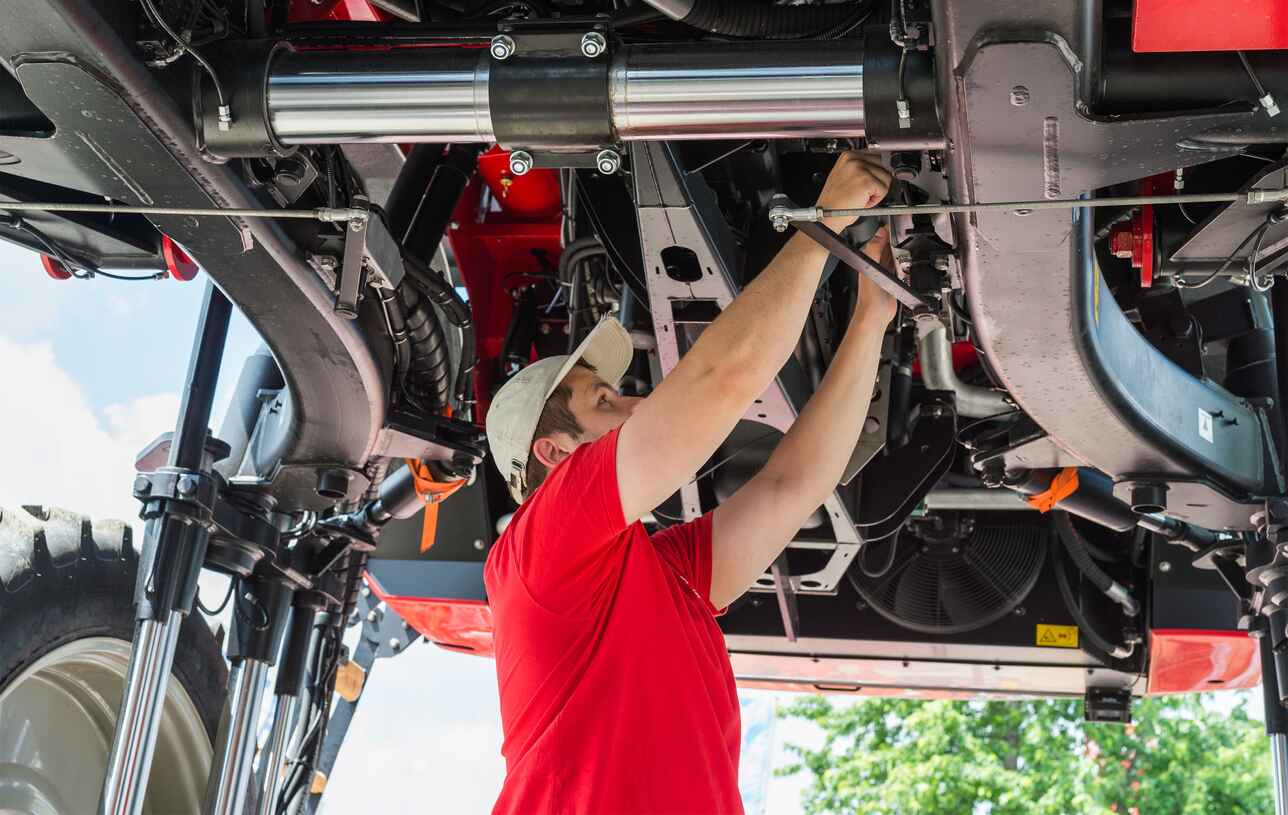
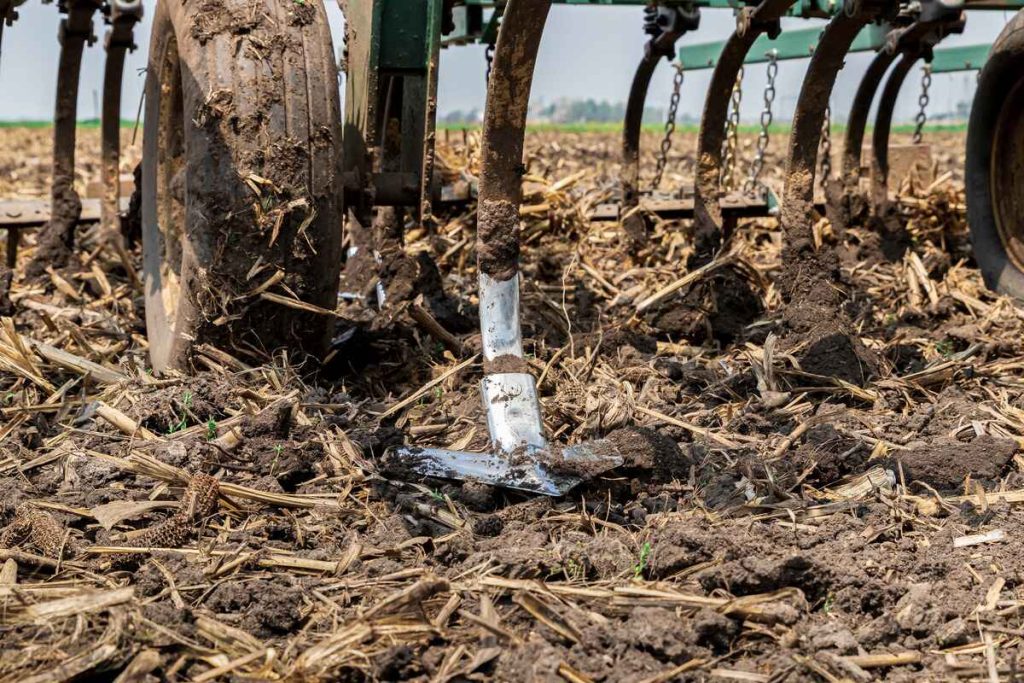
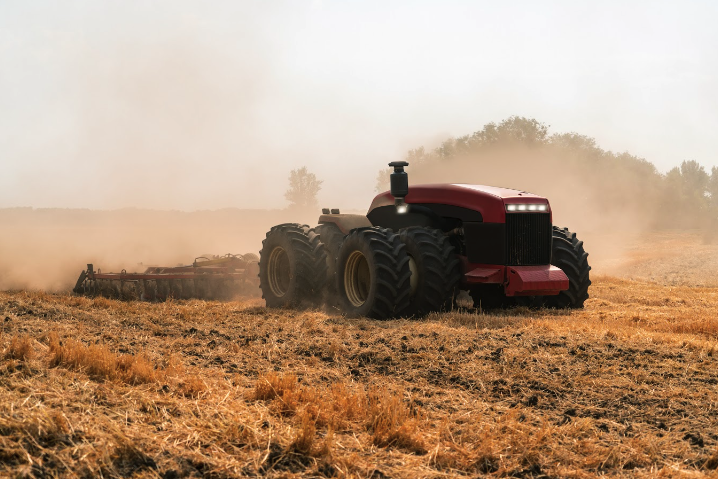
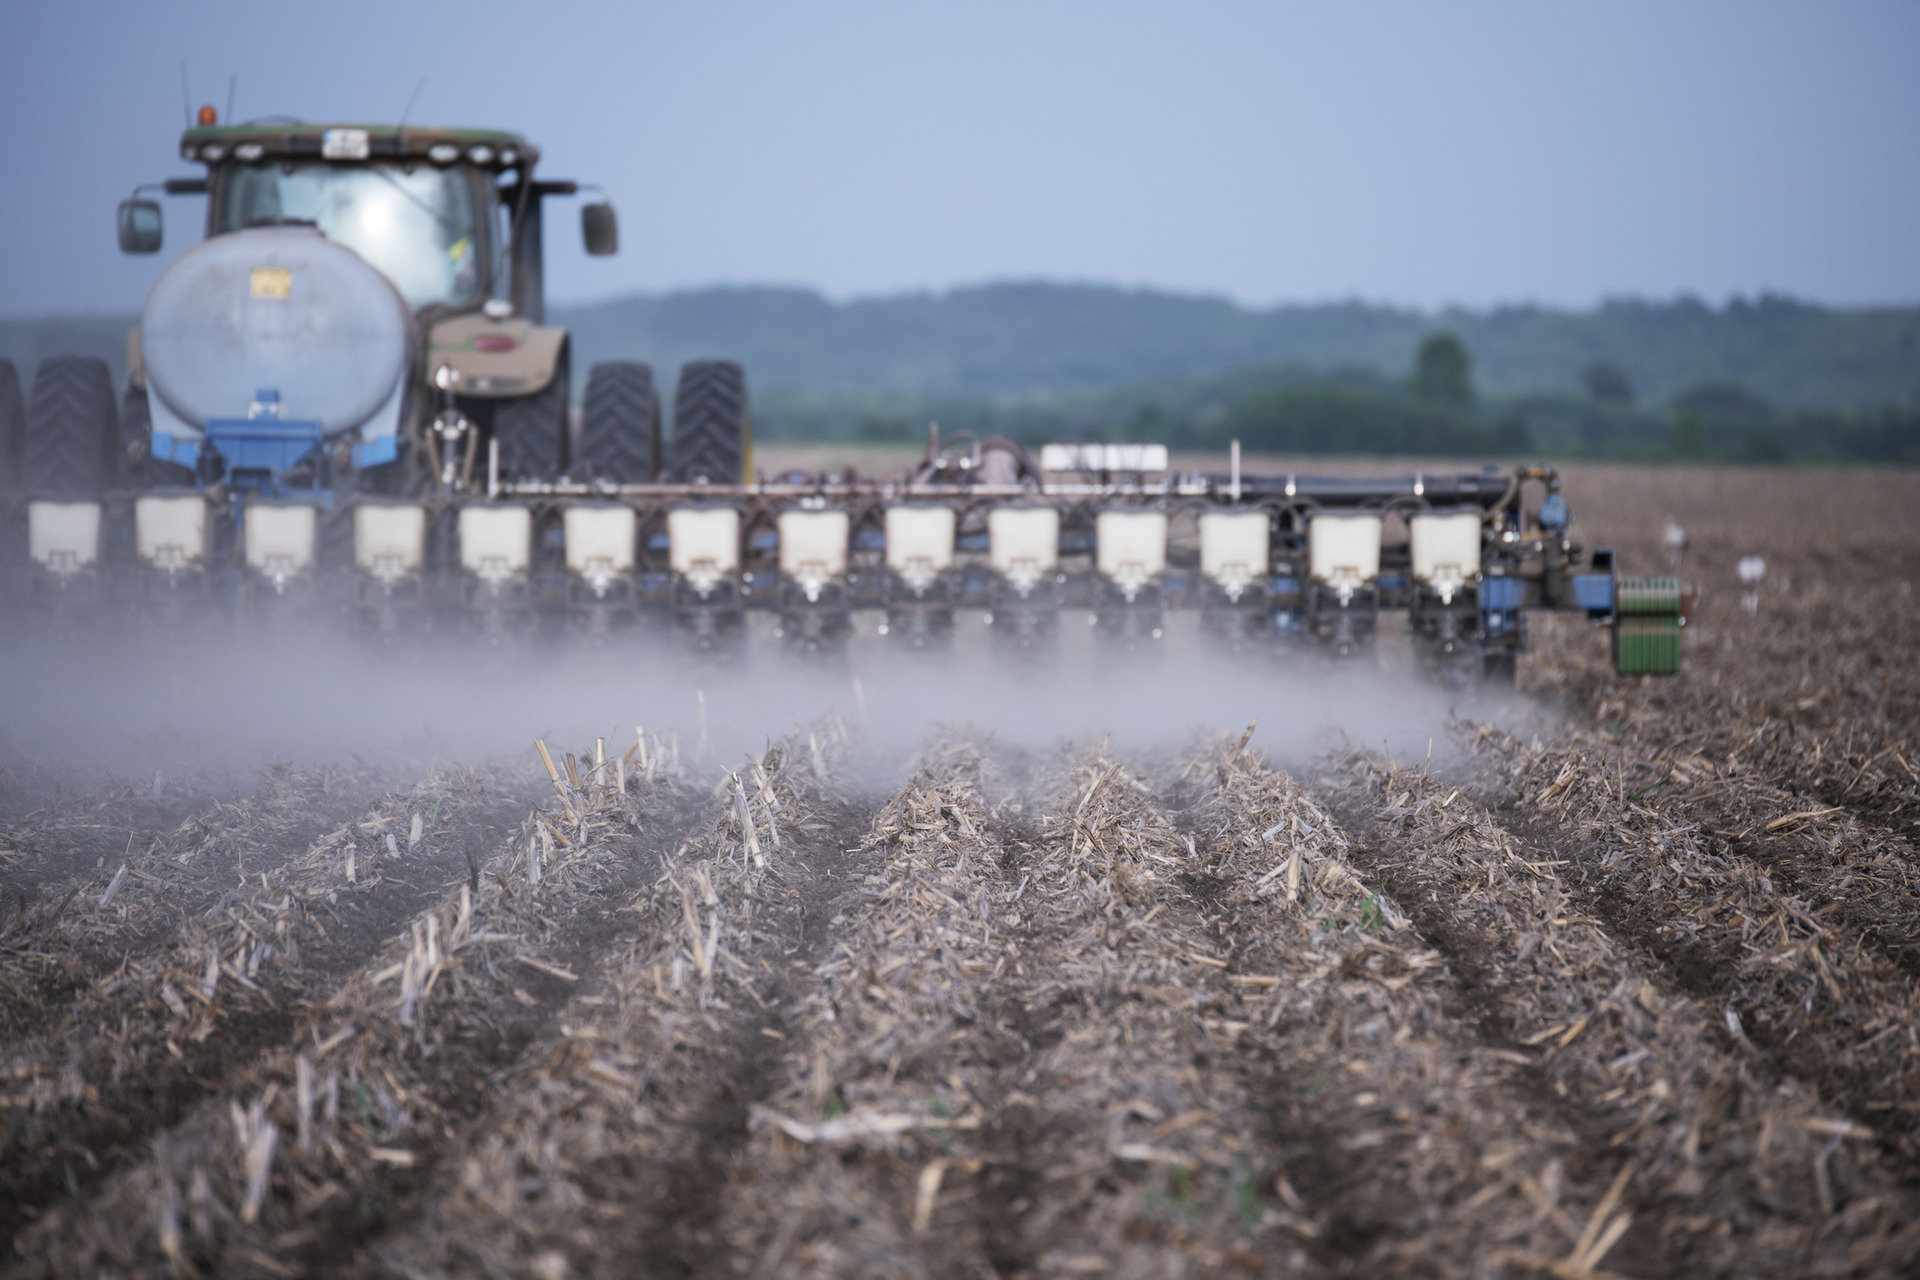
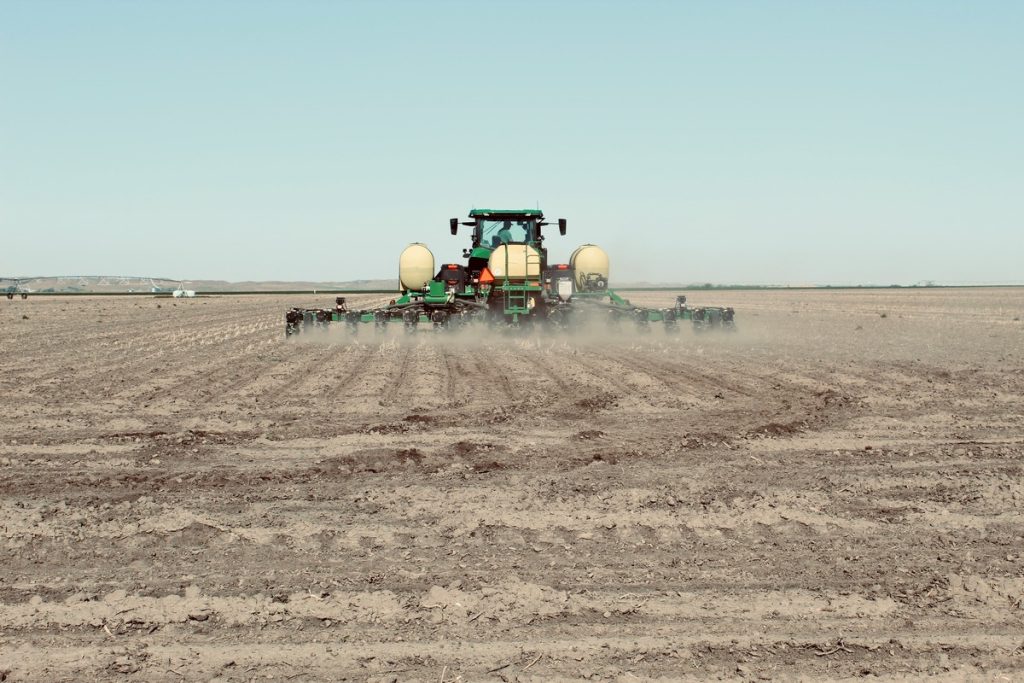
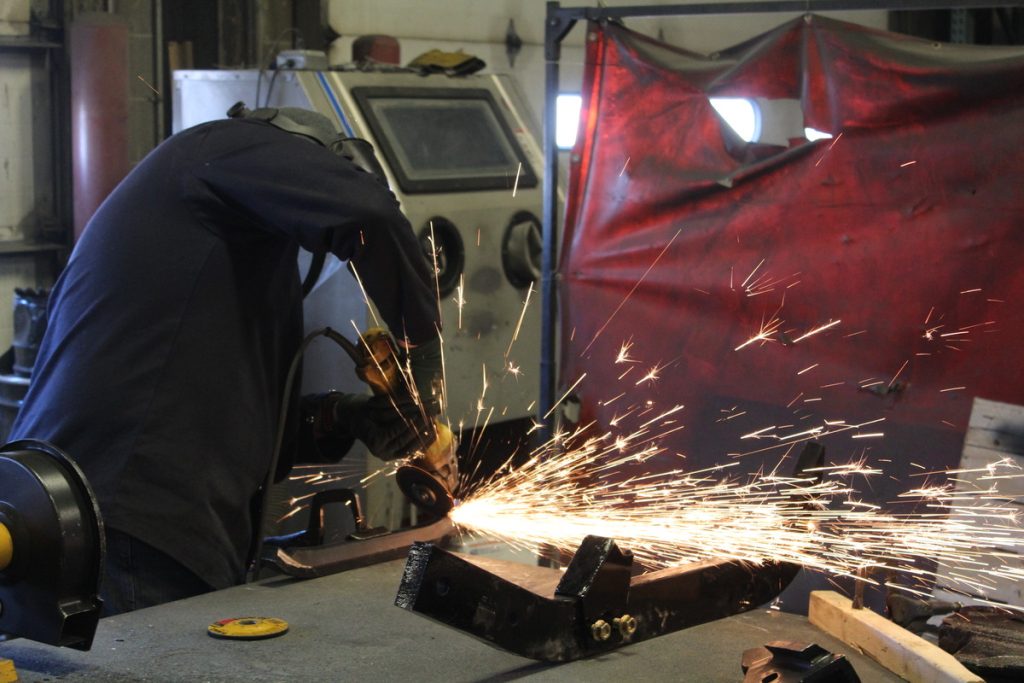
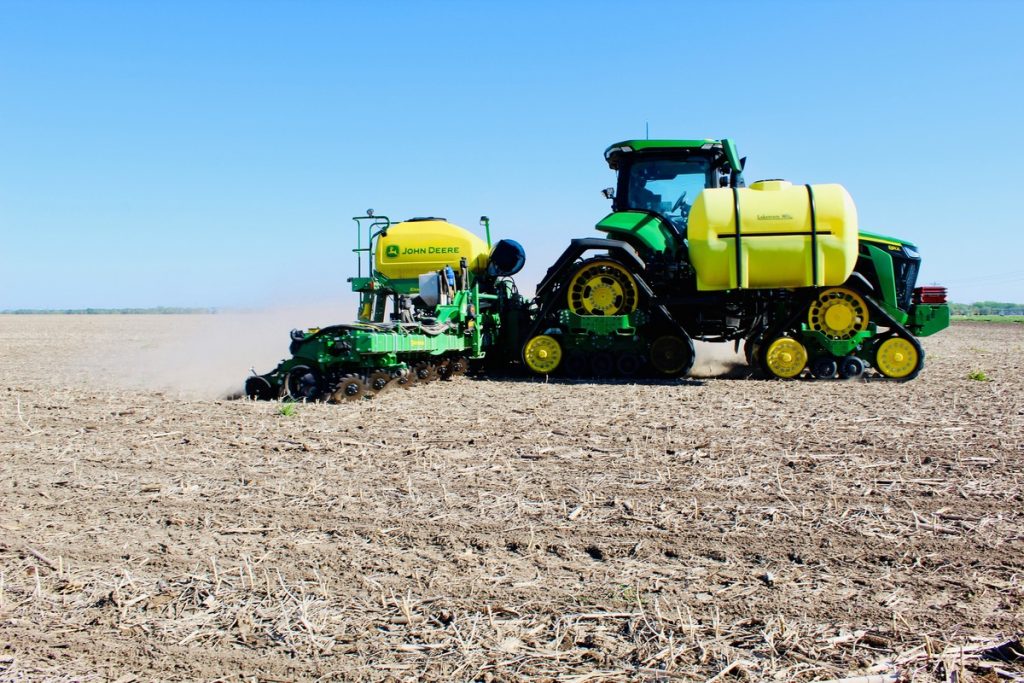
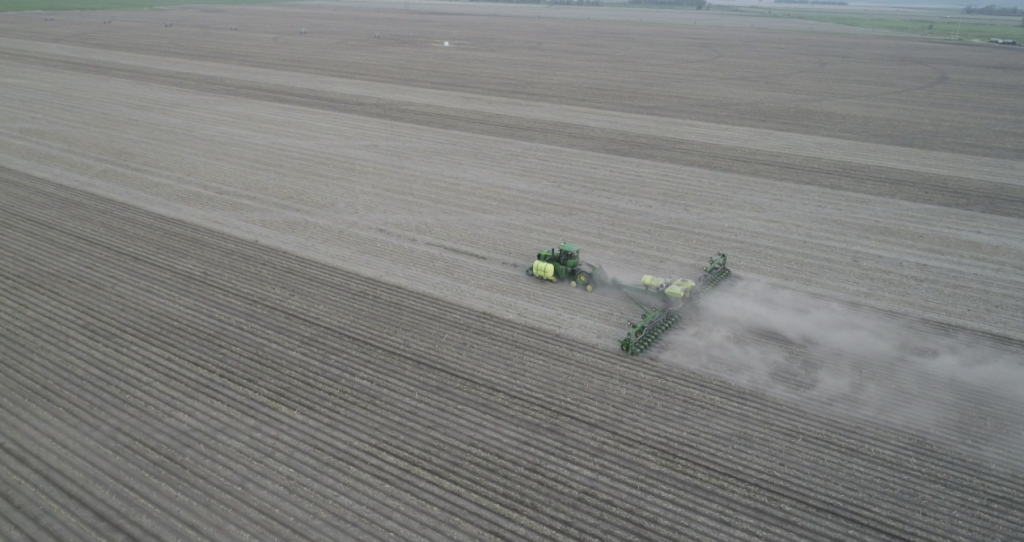
What planting and tillage tools are needed for successful crop rotation?

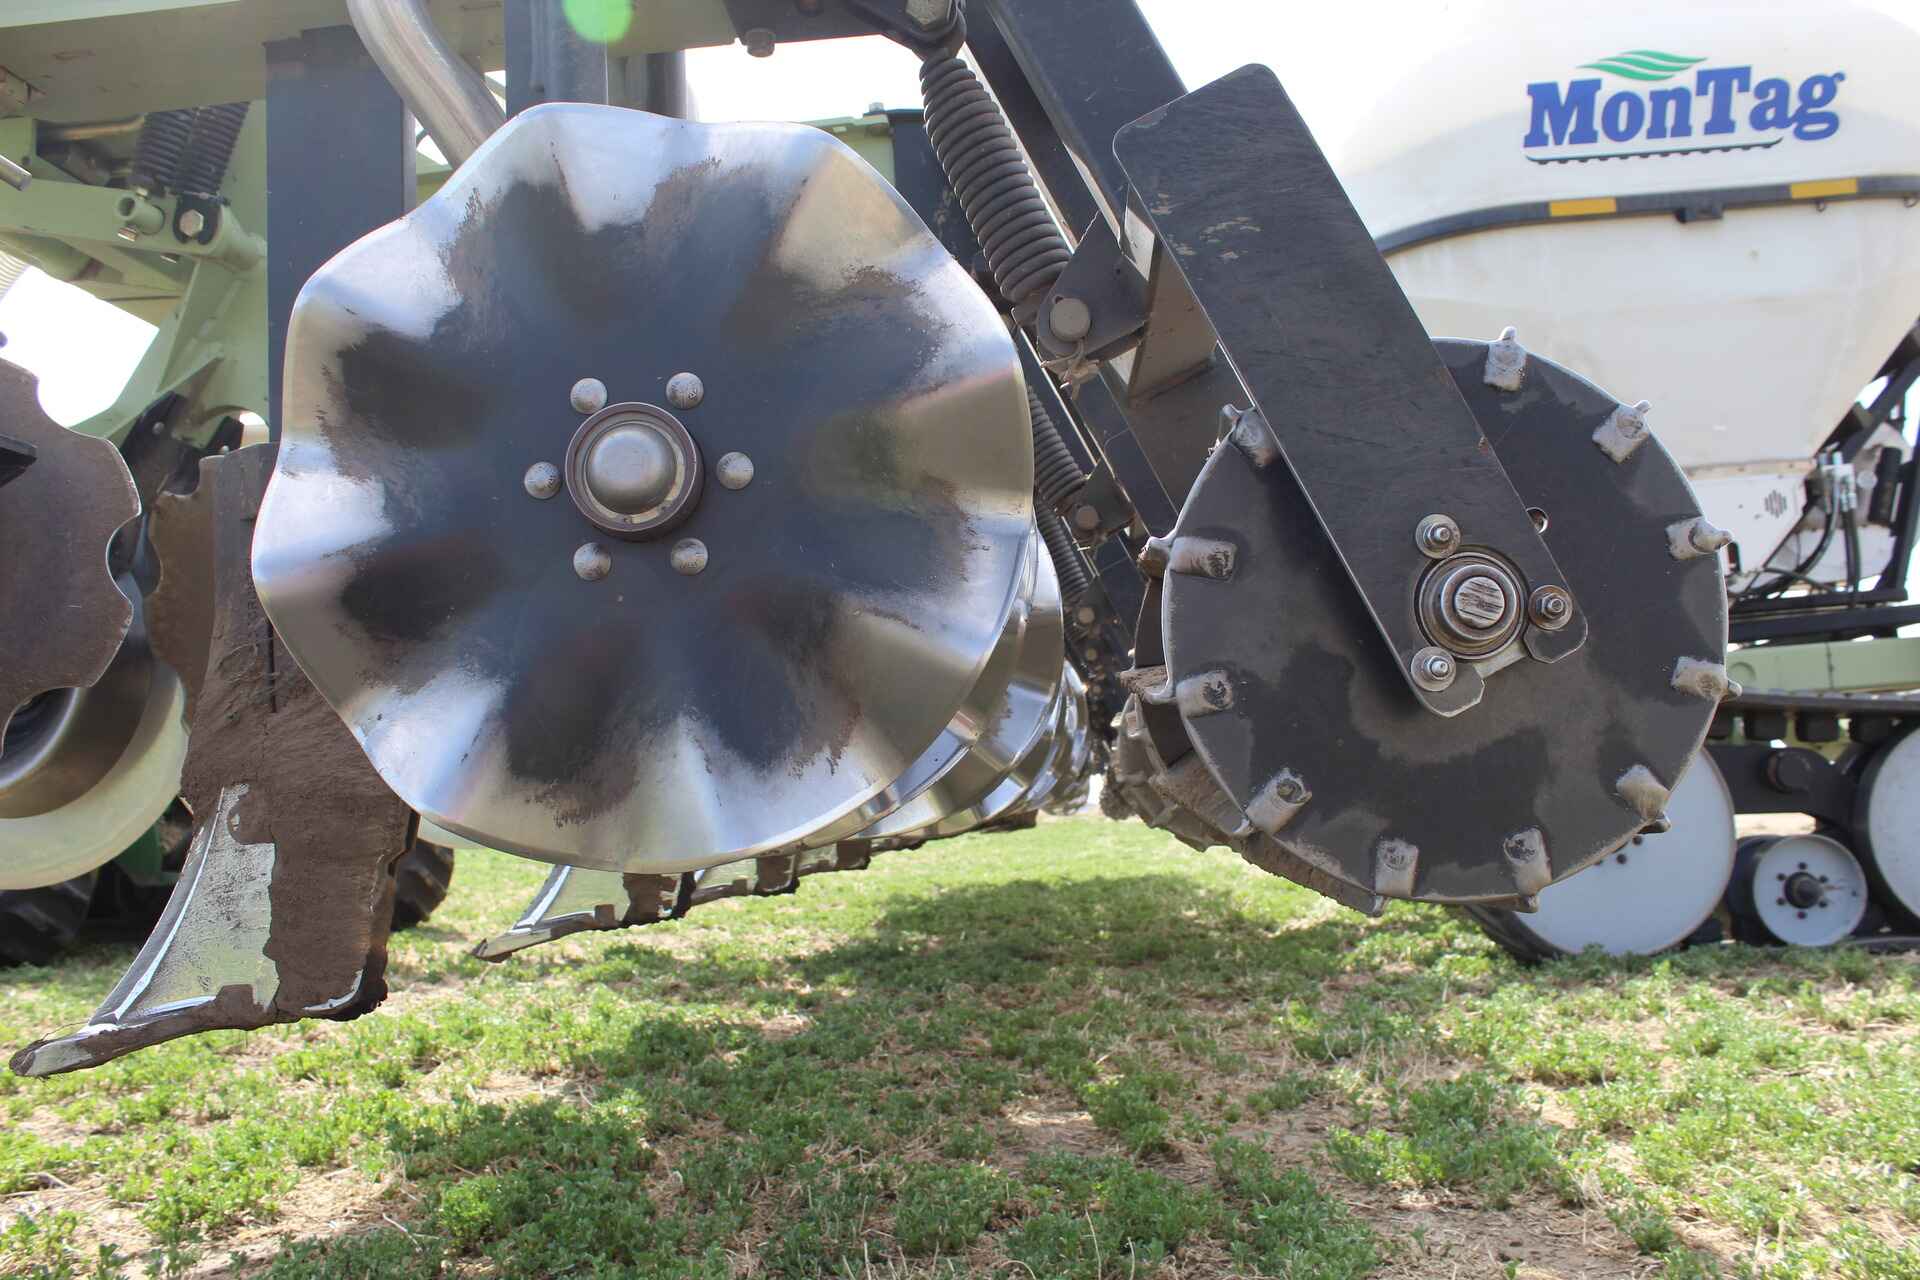
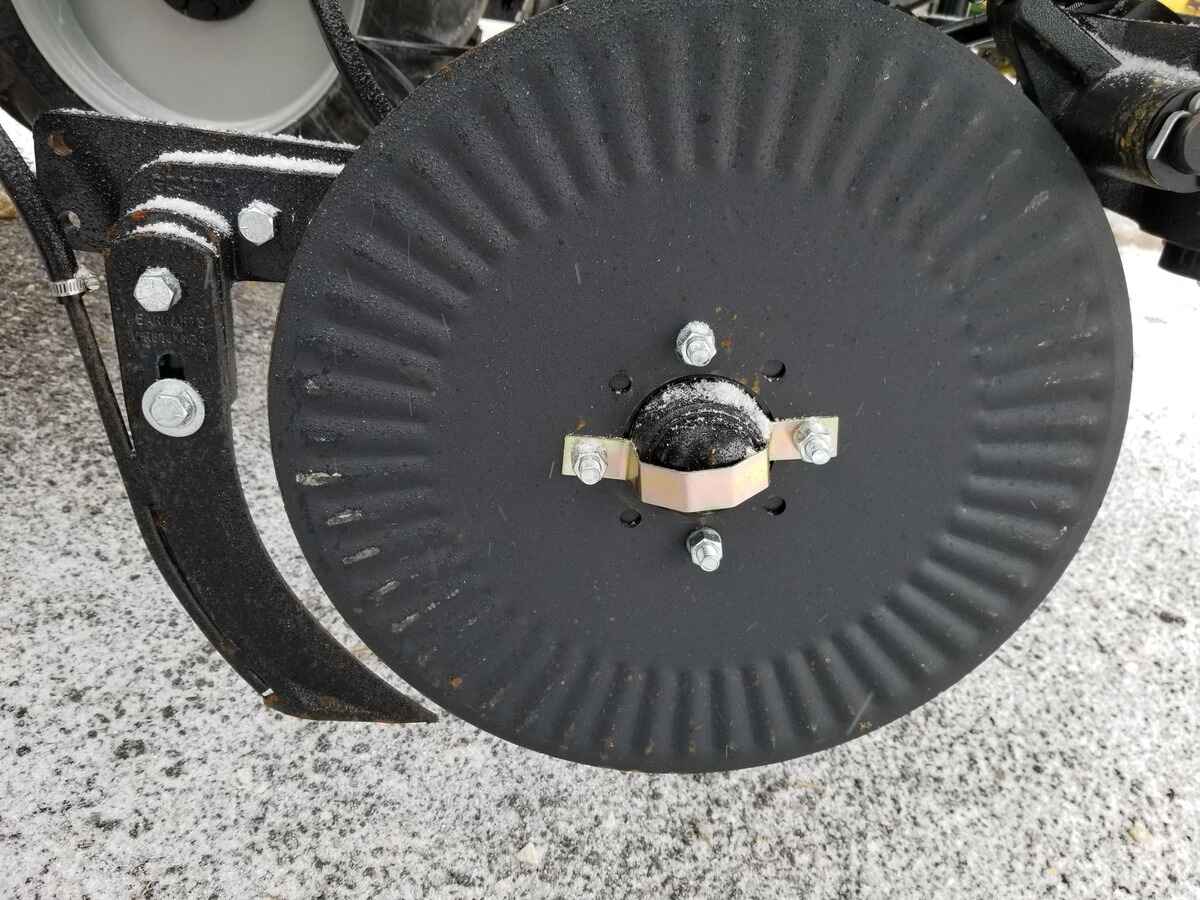
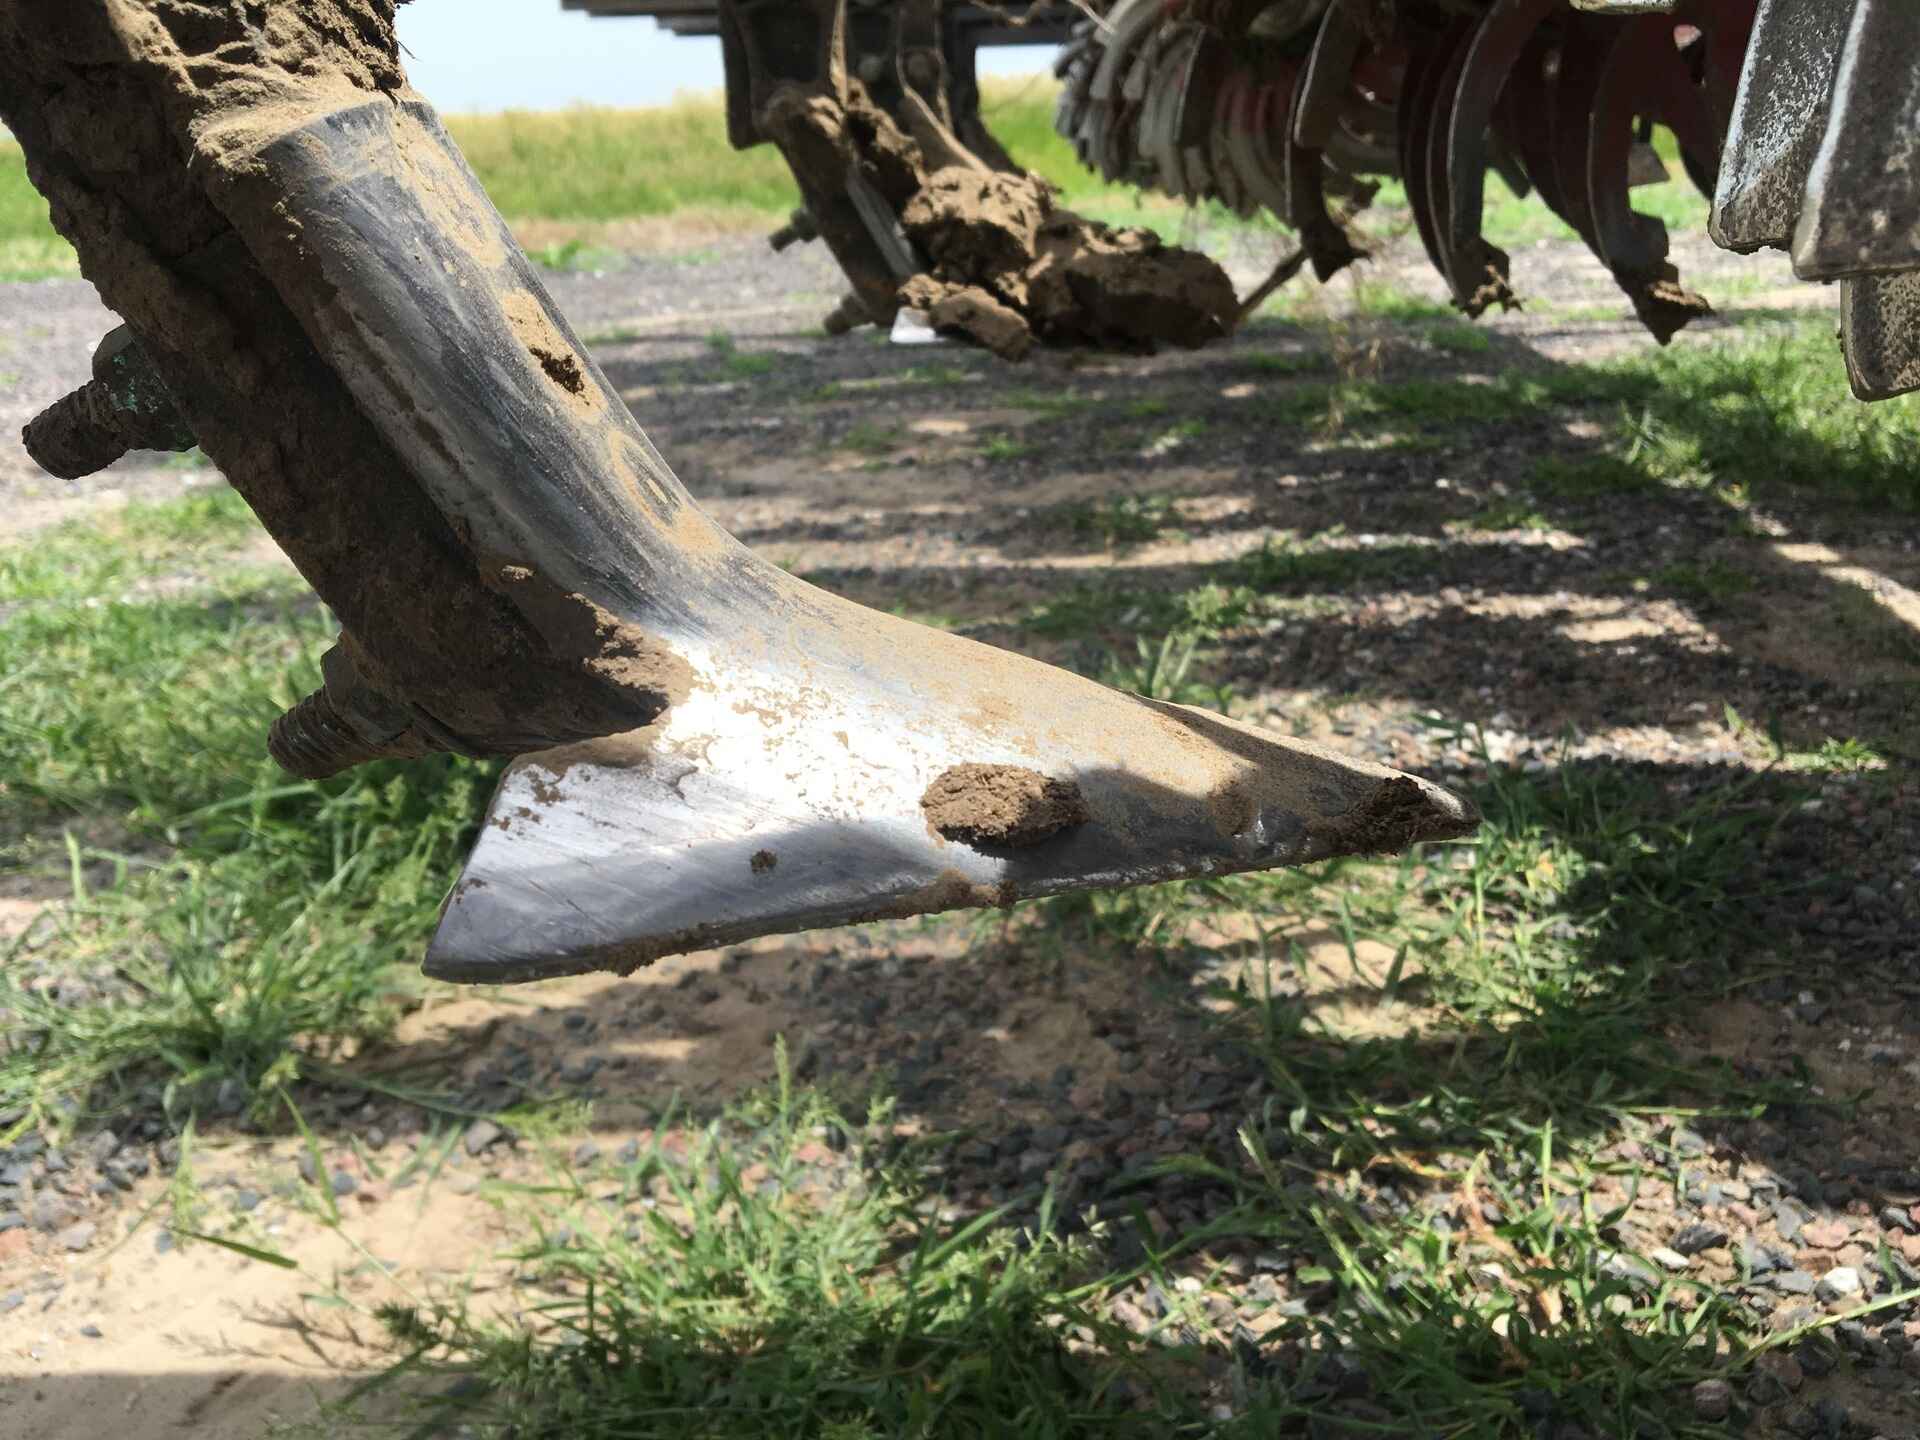
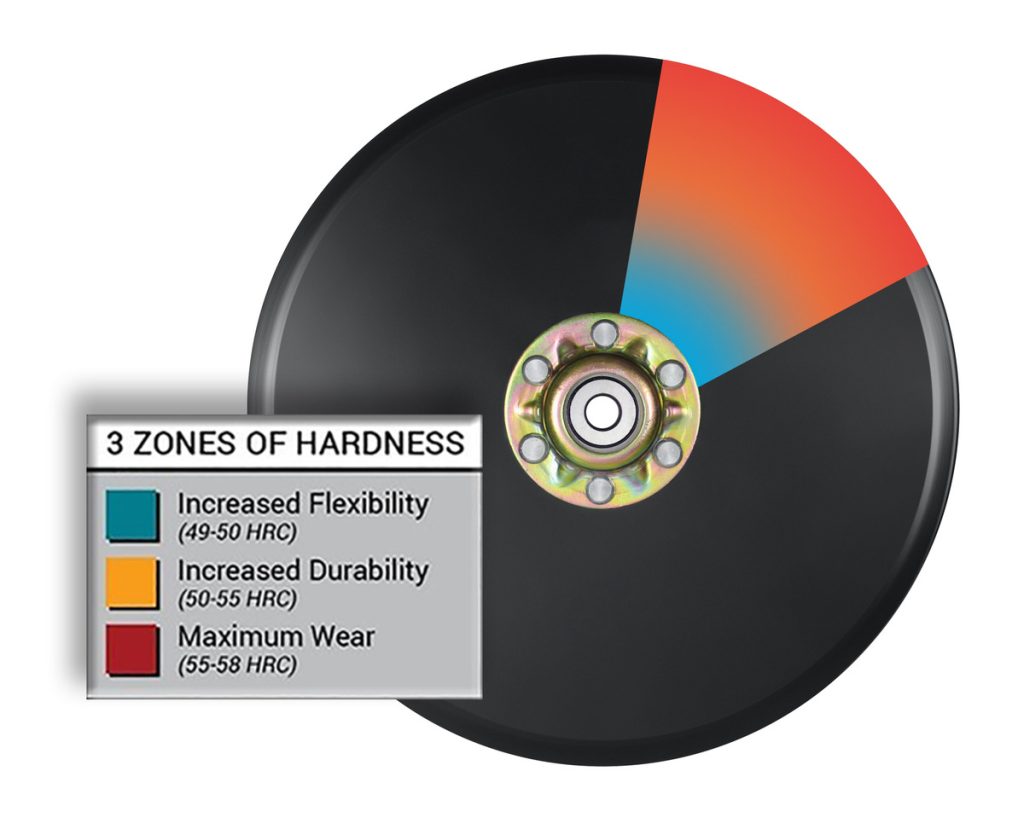
When it comes to tillage and planting in a crop rotation, efficiency is really important.  The more complex your rotation is, the less you can afford downtime, so it’s important that tools like disc blades are long-wearing to avoid frequent changing, especially halfway through a busy season!

Soil compaction can be a problem in complex rotations due to the sheer number of passes required to plant and harvest multiple crops each year.  Thinking about how you can reduce passes – by switching to no-till, or using multi-purpose machinery – can reduce the amount of compaction.  It’s also really important to ensure your machinery and parts are well-maintained, with appropriate tire pressures and sharp blades to reduce drag.

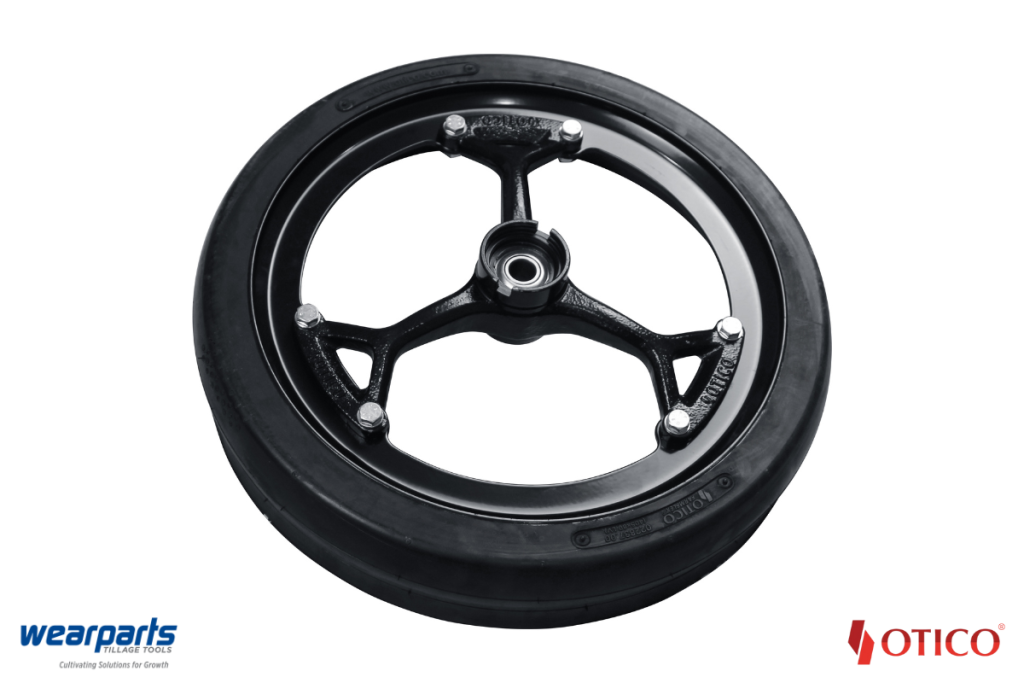
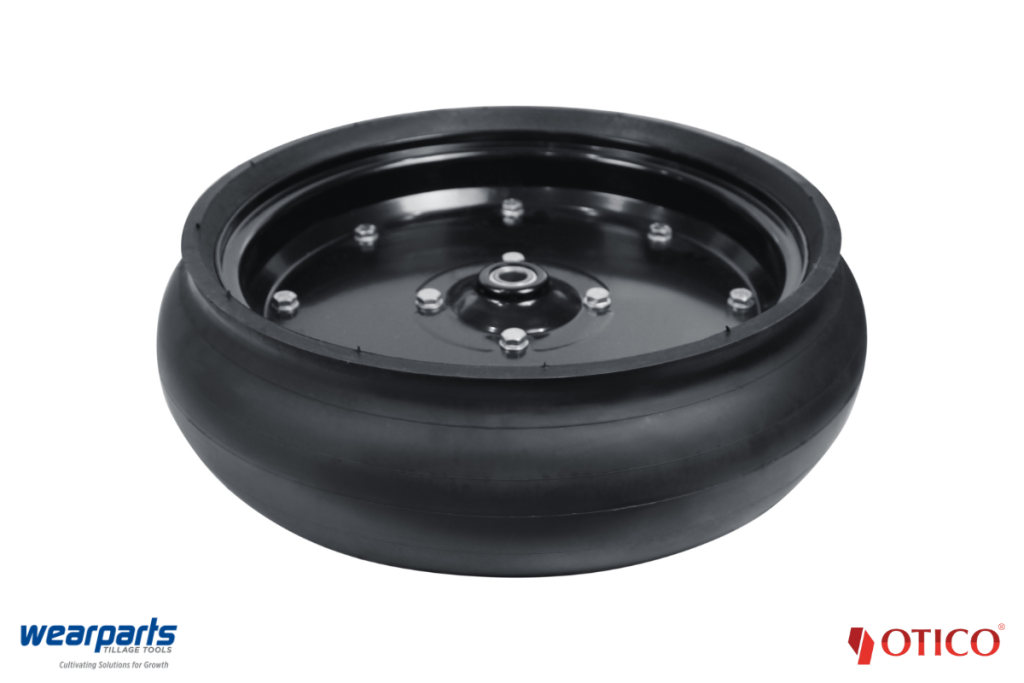
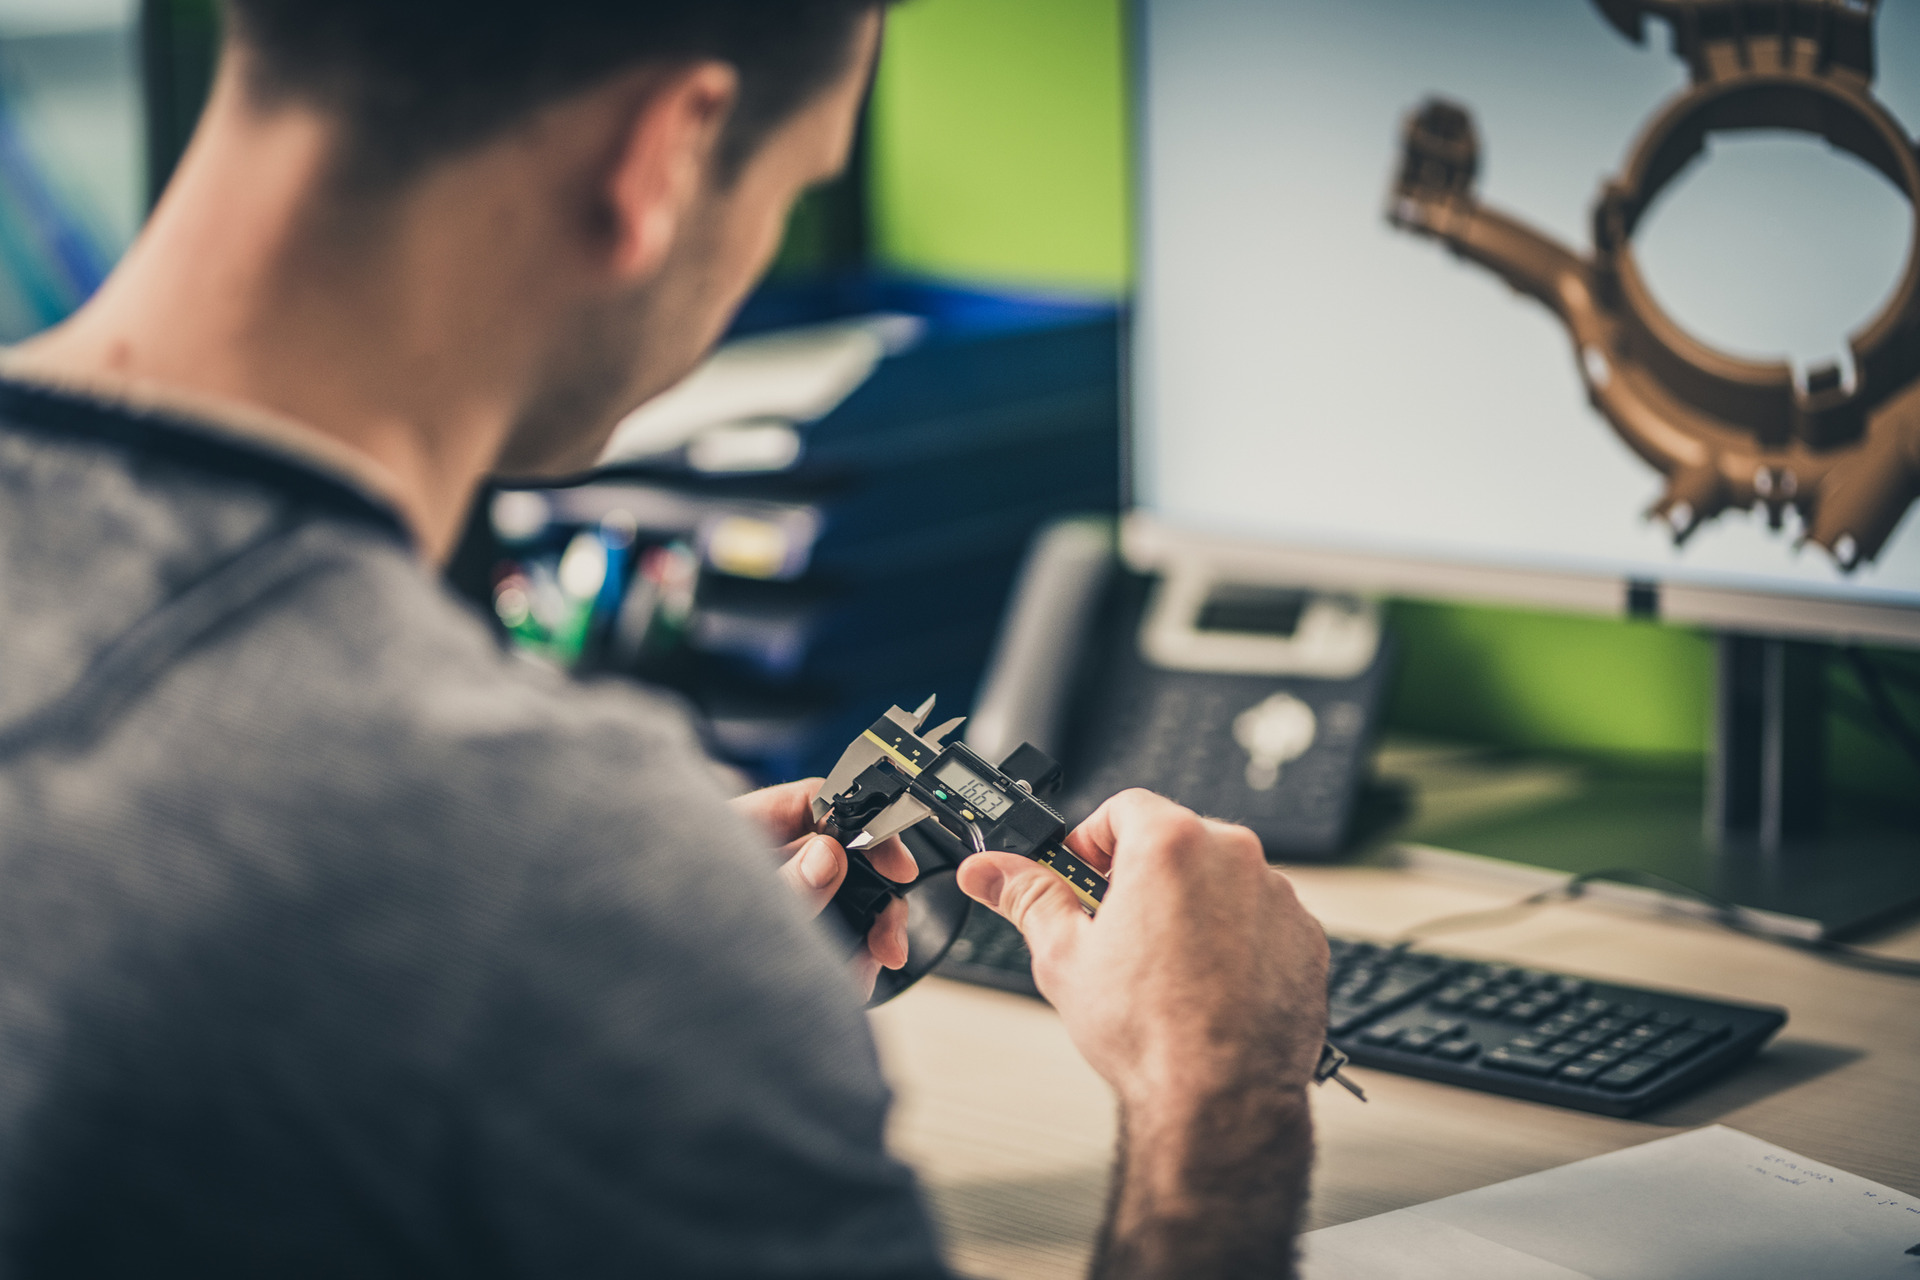
Precision planting is also important, and you can save valuable time and energy with Guaranteed True® seed disc openers from Wearparts – we test every assembly in-house to some of the tightest wobble and lope tolerances, so you don’t have to. 


To find out more about how quality parts from Wearparts can enhance your crop rotations, get in touch.

Plant 24 is coming | Preseason Offers Live Now!

With exclusive discounts and credit terms on advance orders placed between October 15th and December 31st 2023, now is the perfect time to stock up on spring tillage & planting tools.

Order in bulk to save big – plus FREE shipping on all orders over $2,000!

All orders will ship between January 1st and April 15th, 2024.  Please allow 2-6 weeks for shipping.  Warehouse constraints may mean you are asked to take product early.

Order Now or Contact Us for more info.

Farm Machinery Maintenance: Your 5-Step Summer Checklist

The middle to end of summer on the farm is a time for watching and waiting.  Crops are nearing maturity and almost ready for harvest, there’s little to be done by way of weed management or soil conditioning – so this is a perfect time for farmers to get on with some essential farm machinery maintenance.

Getting ahead on machinery maintenance now means harvest time and subsequent fall planting will be smooth sailing – and by the time winter bites, your equipment will be tucked up warm in the barn, ready to swing back into action in the spring.  Ensuring your farm machinery is kept in good working order can also extend its lifespan.

With that goal in mind, here are 5 essential farm machinery maintenance jobs to carry out during these quieter days of summer:

1. Analyze fluid quality

A bit like a blood test for humans, analyzing the fluids – like engine oil or hydraulic fluid – in your machines is a way to assess their health and ultimately, their lifespan.  Since you probably topped up your fluids right before the planting season, having them analysed midcycle is a great way to know if the products you’re using to lubricate moving parts are holding up under your specific farm conditions, and whether they’ll be good throughout harvest and fall planting before needing to be topped up again.

And it’s not just the fluid itself – if a component is contaminated or starting to fail, the evidence will be there in the fluid long before you notice any visible or audible signs of a problem.  Having your fluids tested is a valuable tool for identifying potential issues before they cause problems in the field. 

Fluid analysis laboratories are widely available and even in remote locations, you can have your fluid samples analysed by mail.  Most labs will provide free, easy-to-use kits for submitting a sample and the overall process is both simple to do, and inexpensive.

Summer Farm Machinery Maintenance Checklist - analyse fluid quality image

2. Check and adjust tires

You’ve heard the saying ‘no foot, no horse’? Well the same holds true for farm machinery and tires – and paying attention to the condition and pressure of your tires now can pay dividends for soil health later on.

Checking for punctures and signs of wear is a given – but overlooking tire pressure can undo years of careful soil structure management, so it’s vital to ensure that the pressure is right not just for your tractor, but also for the loads it will be pulling.

Manufacturers do provide information about the weight of their machines and components so it’s possible to do an ‘on paper’ weight calculation, but by far the best way to know the loaded and unloaded weight of your equipment is to borrow a platform scale and weigh it.  Accurately knowing the weight of your tractor and attached implements not only means you can ballast accurately for best traction, it also means you can select the right tire and pressure for your load/speed requirements. 

Using the lowest tire pressure possible for your required load and speed ensures minimal soil compaction without causing undue wear and tear on tires or using too much fuel.  These calculations may seem time consuming, but you only need to do them once – then you can simply refer to the manufacturer’s guidelines and adjust tire pressure for soil conditions in the future.

3. Inspect chains and belts

Belts and chains are vital components for power transfer in farm machinery, but over time they can stretch or even slip, causing reduced efficiency and potential breakdowns.  It’s important to perform regular checks on these components so you can spot any problems early, and make the call on whether to replace a belt mid-season, or wait until harvest/fall planting are complete.

Summer Farm Machinery Maintenance Checklist - inspect chains and belts image

4. Check cooling systems

Engine coolant is often referred to as antifreeze, but it’s actually just as important in hot weather as in cold.  Most newer tractors are liquid cooled which means they use a coolant fluid, circulated throughout the engine by a water pump to a radiator, where heat generated during engine combustion is transferred from the fluid to the air with the help of powerful fans.  The cooled fluid is then re-circulated to prevent overheating when the engine is under load. This process happens over and over again and every time it does, a proportion of the protective additives in the coolant are consumed, reducing its quality over time.  If the coolant is not refreshed or replaced, this loss of protective additives can lead to corrosion and electrolysis in the engine.

It’s important to ensure all components of the cooling system including the radiator, radiator cap, fan system and pump drive belts are kept clean and in good order.  You should also select the right type of coolant for your machine based on the manufacturer’s guidelines, and make sure levels are kept topped up – taking care to follow the correct concentrate to water ratios.  

NEVER mix coolants containing propylene glycol with ethylene glycol-based formulas, as this can cause a buildup of harmful deposits inside the engine.

5. Service air conditioning systems

Whether it’s harvesting in late summer heat or planting in strong spring sunshine, nothing gets a farmer hot and bothered like an overheating tractor cab.  Servicing your air conditioning system regularly means you’ll stay cool when it counts.

All air conditioning systems will leak refrigerant very slowly, so they’ll need re-gassing periodically by a specialist.  The system should be drained, cleaned and re-gassed annually for optimal performance.  Don’t be tempted to put this off, especially if you notice a drop in cooling power, because as with all fluids, a reduction in the quality of your refrigerant as it ages can cause expensive damage to the AC system as a whole.

In between professional services, you can ensure your system stays on point by keeping the cabin filters and condenser coils clean.  Make sure all hoses are flowing freely and not perished, cracked or damaged by rodents.  Over winter, it’s a good idea to turn on your AC for 15 minutes once a month, to prevent perishable parts such as hoses and o-rings from drying out in cold weather.

Replacement tillage and planting parts

It goes without saying that a part of farm machinery maintenance is regular inspection and replacement of ground engaging components and other wear parts.  If you’re satisfied that all routine maintenance tasks are under control and you’re looking to have some new tillage or planting parts on hand ahead of the new season, locate your nearest Wearparts dealer!

Coulter blades: Enhancing efficiency and productivity in tillage systems

First introduced in their most rudimentary form by the Romans, agricultural coulter blades have become an essential part of modern farming, and can be used in a variety of tillage and planting applications.

Choosing the correct coulter blade for your application, machinery and soil type is important for achieving consistent results and agronomic performance.  But with many different types of coulter blade to choose from, it can be difficult to know which will work best.  From no-till coulter blades to more aggressive styles, we’ve compiled a quick guide to coulter blades – what they are, what they do and how to navigate the different options available.

What is a coulter blade?

A coulter blade is a rolling blade that is fitted to mainly tillage implements, planters and seeders.  It is a primary cutting implement, designed to fracture the soil in advance of secondary tools like plowshares, disc blades, fertilizer knives, and seed openers.

What does a coulter blade do?

Coulter blades are designed to break up and soften the soil ahead of a secondary blade.  They can also chop up and bury trash left over from a previous crop, which serves to further enrich and aerate the soil.  Different coulter blades have different applications.  For instance, a strip-till coulter blade may be used to cut residue, where a no-till coulter blade is designed to extend the life of a seed opener blade by softening the soil and cutting residue. Coulter blades that are ran on fertilizer applicators will slice the soil ahead of the fertilizer knife.

image of Coulter blades

Why do farmers use coulter blades?

Coulter blades break up heavy, compacted or very dry, crusty soil in advance of the main blades.  This process delivers a number of benefits for the farmer:

  1. Reduces drag and prevents plugging of vertical blades
  2. Makes the plowing or cultivating process faster
  3. Enables other blades like disc blades or seed openers to penetrate to a consistent depth
  4. Creates a neater furrow  
  5. Reduces overall fuel consumption and cost per acre

What are the main types of coulter blade?

The very earliest coulter blades were fixed, vertical blades but today they are typically rolling discs.  Some coulter blades are flat, but most have a degree of concavity (they are shaped like a shallow dish) and are available in a range of profiles including:

image of Coulter blades

Smooth coulter blades

As their name suggests, smooth coulter blades have a smooth profile with no additional blades features like notches or waves.  Smooth coulter blades are thin and sharp, with the ability to effectively chop up debris – but they only offer minimal soil disturbance so are normally used for residue management in fields with good soil conditions, or for refining soil that has already been tilled using another method.

image of Coulter blades

Notched coulter blades

Notched coulter blades have notches cut out of the cutting edge at regular intervals around the blade circumference.  The benefit of notched blades is the amount of grip they have on the soil – this enables the blade to keep turning even in heavy soil conditions or where there is a thick layer of debris present, even at high speeds.  Like smooth coulter blades, notched blades provide a narrow cutting path with minimal soil disturbance.

image of wavy Coulter blades

Wavy coulter blades

Wavy coulter blades have an undulating edge that resembles a pie crust.  This shape means that the blade gives an aggressive action with a lot of lateral soil movement.  They are designed for residue management and offer excellent tilling action in almost any soil conditions, especially at slow speeds.  Wavy coulter blades come in different wave patterns or numbers – for example 8-wave or 13-wave blades.  The more waves a blade has, the shallower its overall profile will be, and the narrower its cutting width – so an 8-wave blade has a wider profile, and moves more soil than a 13-wave.

Fluted coulter blades

Fluted coulter blades are typically used when you want to achieve depth without a lot of lateral soil movement.  They have a grooved pattern around the edge of the blade that increases its cutting power without adding width to the furrow, that is ideal for slicing through thick stubble or breaking up a hard soil crust. The flutes also help drive the blade and prevent it from slipping in the soil.

Directional coulter blades

Directional coulter blades are similar to wavy or fluted coulter blades, except that the waves or flutes are set at an angle to the center point of the blade.  The benefit of directional coulter blades is that they offer an aggressive cutting action for residue management or hard ground, with little lateral movement of the soil.  The blades run forwards, without throwing the soil sideways out of the trench. The flutes on these blades enter the soil exactly vertical, and leave when at horizontal. This helps lift the soil.

What is a no-till coulter blade?

A no-till coulter blade can be any type of coulter blade – what’s different is the way it’s used.  A no-till coulter blade is there to lightly till the soil ahead of the seed opener on a planter unit, reducing the amount of wear on the seed opener and therefore prolonging its life.  Most no-till farmers will opt for a less aggressive coulter – a smooth or fluted blade perhaps – for no-till applications.

What benefits do coulter blades bring to the soil?

Using coulter blades has a number of benefits for the soil, and therefore the success of a crop yield.

Weeds & residue

Firstly, they facilitate good weed control and residue management – chopping up organic matter, which stops it from growing and competing with crops, and then incorporating it back into the soil where its sequestered nitrogen will be used to feed those same crops.

Moisture absorption

Breaking up the soil – particularly in very dry climates or on heavy clay – enhances its ability to absorb moisture, and mitigates against surface runoff which can result in soil erosion and also flooding.

Soil aeration

Using coulter blades also improves soil aeration, creating tiny air pockets that allow microorganisms to flourish, and also enhancing the soil’s ability to absorb nutrients whether they are naturally occurring in the form of organic matter, or synthetic fertilizers applied by the farmer.

Optimal seed placement

Lastly, coulter blades prime the soil for optimal depth control when using other implements, particularly seed openers.  By breaking up the crust and deeper soil structures, farmers can ensure their seed openers run smoothly at a uniform depth, and that good seed-to-soil contact is achieved after the furrow is closed.

What should I look for in a coulter blade?

There are a number of key things to look out for in a quality coulter blade.

Material

The first question to ask is ‘what material is the coulter blade made from?’.  Coulter blades are typically made from steel, but some are heat treated or hardened, and some are made from different types of steel.  At Wearparts, we use boron steel to manufacture our coulter blades because it gives the finished blades an exceptionally hard edge and long wear life, even in tough soil conditions.

Our premium Forges de Niaux blades have undergone a specialised triple heat treatment process that changes the properties of the steel along the radius of the coulter blade, making it harder at the edge and more flexible in the center.  This extends the life of the blade further, and guards against breakage.

Profile

Next, look at the blade profile – is it concave, or flat?  Concave or dished blades act like a scoop, moving soil sideways as they travel.  The more concave the blade is, the more soil it will move.  Combined with notched, flutes or waves, a dished blades can create a large amount of friable soil in a short amount of time.  By contrast a flat blade will move less soil, but will have a more powerful vertical tillage action which is useful for managing residue.

Bolt pattern

When choosing an aftermarket alternative to OEM coulter blades, it’s important to check that the bolt pattern cut into the blade matches your machine.  Wearparts offers in-house plasma cutting which means we can produce blades for any specification.

How to maintain coulter blades

To get the best performance from your coulter blades, it’s important that they are fitted properly and maintained throughout their lifespan.

You should always ensure that your coulter blades are fitted securely to the shanks of your plow or cultivator, and that they are set to the correct depth and angle for your application and/or soil type.  Setting the angle too steep or the depth too deep can cause your blades to wear unevenly, or shorten their overall life.

Coulter blades are typically mounted on a bearing housing that contains a ball or roller bearing.  The bearing is responsible for evenly distributing the loads that are exerted on the coulter blade by the soil.  Therefore it’s important to make sure that bearings are in good condition, and well-greased where appropriate.  If you notice a lot of noise coming from your coulter blades when they are turning, or if individual blades are wearing down unevenly, the culprit is usually a worn bearing.

Last but not least, keep an eye on your blades for signs of wear and tear.  Coulter blades will naturally wear down and become dull over time – but blades that are dull will struggle to penetrate the soil, and instead of cutting trash can push residue into the furrow in a process called hairpinning.  When this happens, seed to soil contact is often poor which results in lower yields. 

As a rule of thumb, blades should be replaced when they have lost 1 inch of their original diameter.  Some coulter blades are self-sharpening; others can be sharpened manually, provided that they have enough remaining diameter.

Want to know more?

At Wearparts, we offer a complete range of aftermarket coulter blades to fit all popular plow and cultivator brands, including Kinze, Case and Great Plains.  To find out more about our product range, get in touch – or click here to locate your nearest Wearparts dealer.

Mastering weed control: The power of sweeps in tillage farming

Sweeps – or shovels and plows as they’re known in some parts of the US – are an important tillage tool, used at various points throughout the farming year to aerate and condition the soil.

A sweep is a v-shaped or curved wing metal blade, typically designed to attach to the shanks of a row crop, or field cultivator or chisel plow.  The sweep penetrates the soil to a fixed depth, and then as it is pulled through the soil it lifts and turns over the top layer.

The primary purpose of agricultural sweeps in tillage farming is to disturb the top layer of soil, break up any compacted soil, and incorporate crop residue or cover crops into the soil. This process helps to improve soil aeration, water infiltration, and nutrient availability, which are essential for healthy plant growth.

But there’s another important use for sweeps, and that’s weed control.  With planting season now well underway, it won’t be long until farmers have to start thinking about suppressing weeds to ensure their crops receive optimal levels of light, nutrients and water.

image of soil following weed control

How can sweeps be used to control weeds?

Controlling weeds with sweeps is referred to as mechanical weed control.  It can be done prior to planting, or during the growing season.  Some farmers will do both in order to give their crops the best chance of successful germination and growth.

Mechanical weed control is suitable for organic systems, and if done meticulously, can negate the use of chemical herbicides.  Farmers may also use mechanical weed control in conjunction with herbicides.  Here are some of the ways sweeps can help farmers to control weeds in their crop fields:

Weed removal

Using sweeps can physically uproot or sever young weeds as they push up through the soil.  The young plants will then wither and die before they have a chance to become established or set seed.  Shallow sweeps are usually sufficient for this task because the plants are still tender with poorly developed root systems, so soil disturbance is minimal.  Regularly using sweeps can help farmers keep on top of weeds without the need for any other treatments.  

Incorporating cover crops

Planting a cover crop is one method farmers can use to prevent soil erosion and reduce weed problems.  Cover crops may be planted in the season before the main crop (for example, winter wheat), or they can be planted a short time before the main crop is due to be planted.  In the latter case, the most common crops are fast-growing legumes like clover, peas, soybeans and alfalfa.  These plants accumulate biomass quickly, crowding out weeds.  The cover crop is terminated right before planting of the main crop, and the residues are incorporated into the soil using sweeps.  This process is sometimes called ‘green mulching’.

Disturbing weed roots

For more established weeds, sweeps are a great way to cut through their root systems beneath the soil, preventing the plant from absorbing water and nutrients so that they wither up and die.  It’s important to use strong, sharp blades and set the sweeps to a sufficient depth where they can cut through tough tap roots effectively.

Enhancing herbicide application

In some cases, sweeps are used in conjunction with herbicide application. The sweeps disturb the soil, which allows herbicides to reach the weed roots more easily. Combining mechanical and chemical weed control can significantly reduce the farmer’s dependence on expensive herbicides.

What’s the best type of sweep for weed control?

Sweeps come in a variety of shapes and widths for different tillage applications.  Some are very narrow and pointed, while others have a shallower angle for less aggressive cutting.  Sweeps also come in different depths.

Sweep shape

The angle and crown of a sweep wings will determine how it moves through the soil.  Narrower winged sweeps are subject to less soil resistance so they can move more quickly and easily, especially in row crop cultivation.  These sweeps are suitable for shallower cutting.  Sweeps with a steeper angle will be met with more soil resistance and may be used in very dry or rocky conditions, so they move more slowly and smoothly, but are only suitable for use at shallow to medium depths.  

Sweep width

The width of a sweep determines how much ground it can cover in a single pass.  Wider sweeps typically have a shallower angle, and vice versa.   

Sweep depth

The depth of a sweep is determined by the length of the stem or mounting bracket.  A longer bracket will allow the sweep to penetrate more deeply, as will increasing the downward pressure on the plow or cultivator itself.  Some machines have adjustable shanks so that farmers can get variable depths.

Narrower sweeps are better for cutting through the roots of established weeds.  Wider, shallower sweeps are better for removing young weeds, or incorporating cover crops.

image of sweeps being used for weed control

What should I look for when choosing sweeps for my machinery?

The most important thing is to ensure the sweep you choose are compatible with your machinery brand.  At Wearparts, we offer a range of sweeps to fit all common chisel plow, row crop, and cultivator brands, including FallowMaster.

The second thing to think about is the durability of the sweep versus the cost.  Think about your soil type – is it dry and rocky, or heavy clay?  Perhaps it’s loamy and easy to work.  If you’re going to be working in difficult soil conditions, it’s worth investing more in heavy duty sweeps that can withstand the intense friction and loading that will occur as you pass through the field.

In these conditions, cheaper sweeps are usually a false economy – they wear much more often, so you have to replace them more frequently, and you lose valuable time while your machine is down for maintenance.

Hardfaced sweeps

At Wearparts, we use premium-grade materials like boron steel to manufacture our agricultural sweeps.  This gives our sweeps a unique balance of strength and flexibility that increases wearlife and reduces the risk of breakage, while maximizing efficiency even in tough soil conditions.

We also offer custom hardfacing as an option on all sweeps.  You can choose to have your sweeps hardfaced on the top or bottom plus the stem.  CMT Hardfacing is a cold welding process that adds material to the ground-engaging portion of the blade, without superheating the base material.  This stops the formation of weak spots that can lead to premature wear.  Our own independent tests show that our hardfaced sweeps can deliver up to 30% longer wear life in the field.

To find out more about our range of sweeps for chisel plows, row crop and field cultivators, get in touch!

A farmer’s guide to growing hemp in the USA

Agriculture in the USA has increasingly become an industry of fine margins.  A tweak here, an innovation there – farmers must tune in to small changes in the industry and technology that can help them to squeeze that vital extra profit out of a business that is largely stretched to its limits.

But a few years back, a change to legislation triggered something of a gold rush in farming.  Changes to the Farm Bill 2018 took hemp off the list of controlled substances, and opened a floodgate.  

Farmers raced to plant hemp, lured by soaring demand.  Many made a tidy profit in 2019, but just a year later, the bubble seemed to burst.  Huge supplies of hemp lay unsold as farmers struggled to access processing facilities, while others suffered crop failure due to bad weather.

Despite this, many farmers remain interested in the possibilities of hemp as an alternative crop – but they’re understandably cautious.

Why grow hemp?

Industrially-grown hemp is an extremely versatile crop.  It grows quickly, often in less than 100 days, requiring less pesticides and weedkillers than other crops, and using less water.  It’s also known for its deep roots, which can help to break up compacted soil, prevent soil erosion and sequester carbon.

Hemp used to be widely grown across the US for these very reasons – even the founding father, George Washington, is known to have cultivated hemp, and an early draft of the Declaration of Independence was printed on hemp paper.

Today, demand for hemp is growing worldwide due to increased awareness of the potential health and environmental benefits.  This makes hemp growing an extremely interesting prospect for farmers who may be struggling to make money from other crops.

What’s the difference between hemp and marijuana?

Industrial hemp is part of the cannabis sativa plant family, which essentially means it’s related to marijuana.  But industrial hemp varieties are extremely low in the psychoactive component of the plant, called THC.  The USDA specifies that agricultural hemp grown in the USA must have a THC content of less than 0.3%, or it must be destroyed.

What is hemp used for?

Hemp has a huge variety of uses.  The majority of hemp grown in the USA is grown for its flowers, from which oil can be extracted for use in the manufacturing of CBD products.  The demand for CBD oil is growing exponentially due to its health benefits and effectiveness as a treatment for a wide range of complaints, including pain, anxiety and insomnia.

Hemp can also be grown for its fibre, which has a huge range of uses.  It’s an environmentally-friendly alternative that can be used to make paper, textiles, plastics, biofuels and construction materials.

Lastly, hemp can be used as food.  It’s approved as a foodstuff for humans and pets in most states, but currently it cannot be fed to livestock that will enter the food chain.

Is growing hemp legal in the USA?

The 2018 Farm Bill removed hemp from the USDA’s list of controlled substances, making hemp production legal at federal level in the US.  But many individual states have their own laws and regulations governing hemp cultivation, and some (like Colorado and Oregon, for example) are more welcoming to the cultivation of hemp than others (such as Idaho and South Dakota).

Before investing in hemp as a crop, it’s important to understand what guidelines your state requires you to follow.  Regardless of where you want to grow hemp in the USA, you require a license to do so and you must inform the relevant authorities about exactly where and how much hemp you intend to cultivate each year.

Is it easy to grow hemp?

Once established, hemp is easy to grow.  It is not vulnerable to many of the diseases and pests that can affect other conventional crops like corn, and is an extremely effective weed suppressor due to its rapid growth rate.

However, hemp does require certain conditions to grow well.  It likes rich, well-drained soils with a neutral pH, so testing before planting is always advisable.  Hemp can be killed by frost, so seeds should not be sown until the risk of frost has passed.  Established hemp plants have deep roots that make them fairly drought tolerant, but young plants need moisture and will require irrigation for the first six weeks if the soil is dry.  

Hemp is a photoperiodic plant, which means its growth is directly impacted by the amount of light it receives.  The crop needs a minimum of 12 hours sunlight per day during the growing season, which means it may not be suitable for shaded fields or valleys.

In the USA, the pacific northwest has an ideal climate for growing hemp, with a mild climate and long growing season.  Hemp is also widely grown in Colorado, Kentucky, Tennessee and California.

What tillage and planting tools are needed to cultivate hemp?

Farmers don’t need any specialist tillage or planting tools to cultivate hemp.  Land for the cultivation of hemp should be identified well ahead of time and tested for the appropriate pH (6.5-7).  

Hemp seeds germinate best in moist, well-aerated soil.  Strong, rapid germination is essential if the young plants are to out-compete weeds.  Good seed-to-soil contact is required so a firm, level and relatively fine seedbed should be prepared (similar to that for other forage crops) using the appropriate tillage tools.  

Hemp can be sown in rows or using a grain drill. Narrow row planting may negate the use of pesticides or herbicides in organic systems, but planting density varies depending on the variety and purpose of the hemp – flowering varieties for oil extraction often being planted more densely than varieties for fiber or grain.  Hemp can be successfully grown in no-till systems provided that the soil is warm and moist at planting, providing optimal conditions for rapid germination and growth of the seeds.

Hemp in crop rotations

Hemp makes an ideal crop to add to a crop rotation system.  It grows rapidly and matures quickly, with a deep taproot system that reduces soil compaction and erosion, and draws nutrients to the surface. Hemp’s natural disease resistance means it can help to reduce pathogens in the soil while contributing to increased potassium and nitrate levels.  Many farmers planting fall cereals after a hemp crop have reported increased yields and less dependence on herbicides.

Is hemp a financially viable crop?

Hemp has the potential to be a game changer for US farmers.  Acre for acre, hemp’s value far exceeds that of corn and the global market for industrial hemp is expected to grow to $17bn by 2030.  Hemp can also be used for many things besides foodstuffs, with the added benefit of being more sustainable to grow than almost any other crop (given the right conditions).

However, farmers who are early adopters of industrial hemp face significant challenges and must weigh the pros and cons carefully.  Hemp does require fairly specific conditions for successful growth, and even if you get a large crop, there are still question marks – for instance, too much sunlight can cause the plants to grow ‘hot’, with a THC level over the 0.3% threshold that will result in those plants being destroyed.

Then there’s processing.  Whether it’s CBD oil extraction or processing hemp fiber, there’s currently a lack of hemp processing facilities in the US.  Farmers face significant costs to transport the bulky fiber to processing centers, and may face legal challenges along the way due to differing state laws on transportation.  But with prospective processors nervous about investing in more facilities due to limited supplies of raw hemp, it’s a chicken-and-egg situation – one that farmers across the US will be watching with interest over the coming years.

12 songs to make your crops grow taller

April Fools’!  

The truth is that some scientists DO believe there’s a connection between music – specifically the vibrations created by certain soundwaves – and plant health.  Studies are ongoing all over the world to discover how plants use sound waves to ‘learn’ about their environment and adapt to certain conditions.

For right now, the only way to stimulate optimal growth of agricultural crops and ensure a bumper yield is to take good care of the soil, and make sure your seeds are planted well – and at Wearparts, we can help with that!  Check out our range of quality tillage and planting parts here.

Of course, we know that humans thrive on good music, so here’s a playlist of the best farming-themed songs to enjoy next time you’re in the truck or tractor cab!

  1. Thank God I’m a Country Boy – John Denver
  2. Alabama Clay – Garth Brooks
  3. Heartland – George Strait
  4. Hard Way to Make an Easy Living – Toby Keith
  5. Where Corn Don’t Grow – Travis Tritt
  6. Where the Green Grass Grows – Tim McGraw
  7. Daddy Won’t Sell The Farm – Montgomery Gentry
  8. Rain is a Good Thing – Luke Bryan
  9. Here’s To The Farmer – Luke Bryan
  10. International Harvester – Craig Morgan
  11. John Doe on a John Deere – Lonestar
  12. Amarillo Sky – Jason Aldean

Want to know more about how Wearparts helps farmers work smarter, for better yields and bigger profit margins?  Contact us today, or find your nearest Wearparts dealer.

Autonomous Agriculture Vehicles: Future of Farming | Wearparts

Autonomous agriculture vehicles – the future of farming?

If you were born before 1995, you probably grew up thinking that by now, we would all have flying cars and robotic servants attending to our every need.

In reality, technology has advanced more slowly than the kids of the 70s and 80s thought it would. But we’re still seeing some incredible progress, particularly in automation. 

A hot topic in the agriculture industry right now is the potential of autonomous agriculture vehicles to revolutionize farming.

Autonomous agricultural vehicles include everything from drones that can take soil samples and monitor crops from the air to robotic seed planters that can plant and fertilize in a single pass, to autonomous tractors that can literally give farmers extra hours in the day.  

Autonomous farm vehicles have been generating a lot of interest since John Deere launched the world’s first fully autonomous tractor in Las Vegas in 2022 – so let’s take a look at this technology, and what it could mean for the future of farming.

What is an autonomous tractor?

An autonomous tractor is a driverless tractor that can be programmed and controlled by computer, so it doesn’t need a human driver in the cab. 

John Deere has been pioneering autonomous tractor technology after launching the 8R410 – although what they actually launched was not an all-new tractor, but technology that could make an existing 8R autonomous.  

This included fitting the vehicle with 12 stereo camera pods and making some changes to its transmission.  As a result, the company says this technology will eventually be available for retrofitting to certain John Deere models, with the tractors able to be driven manually or autonomously.

Interest in the technology has been high because of significant labor shortages in the American agriculture industry and the length of time farmers currently have to spend sitting in their tractor cabs to perform large-scale operations such as tilling or cultivating.

How do autonomous tractors work?

Autonomous tractors work by using Satellite GPS and other advanced electronic controls without requiring a driver present. 

In fact, much of this technology has already been in use for some time – the only difference is that in an autonomous tractor, the onboard computer systems can be controlled remotely, using a computer or mobile app.  This is combined with a number of onboard GPS-enabled cameras and radar technology that allows the vehicle to ‘see’ where it’s going, and avoid obstacles.  

The tractor can be programmed to follow a specific course, at a specific speed, with its operations tailored to suit the terrain, weather conditions and task being performed.

As the farming industry becomes ever more competitive, the autonomous capabilities and extreme precision offered by self-driving tractors is likely to fuel growing demand for the technology.

What are the benefits of autonomous tractors?

Autonomous tractors can save farmers a significant amount of time, given that they can spend up to 15 hours a day sitting in a tractor cab at key times of the year.  

Driverless tractors allow farmers more time to focus on other work, increasing productivity on vital farming operations.  These autonomous vehicles can also work at any time – including through the night, when workers are asleep.
For large-scale farms, autonomous technology holds a possible solution to increasing labor shortages – a problem that’s on the rise due to change in US immigration policy.  Driverless tractors may also hold the key to helping US farmers feed a growing global population despite dwindling human resources.

Precision agriculture

Precision is another key benefit of automated vehicles, which eliminates human error that can push farming costs up.  The technology could even have long-term benefits for the soil.  

Farmers currently choose the biggest machines they can afford to get the most amount of work done in the least amount of time. 

But take away those time constraints, they could perform the same task with smaller machines, reducing ecosystem disturbances and soil compaction.

Eventually, it could be the case that even the largest farms can operate a fleet of small, automated machines instead of a few huge ones.

What are the downsides of autonomous tractor technology?

The biggest obstacle to adoption of autonomous tractor technology is currently the cost. 

Although innovations such as John Deere’s retrofitted technology are aimed at reducing capital costs, and other factors – such as labor savings – this will undoubtedly mitigate them too. 

New technology safety concerns

There’s been a lot of debate around whether autonomous tractors are safe – what happens if a driverless vehicle becomes uncontrollable? Who will be liable for the damage?  Again, advances in technology are all about easing these concerns.  

Deere’s autonomous tractor for example, is programmed to stop if it detects an unexpected obstacle closer than 90 feet away – and will alert the farmer to perform a safety check or re-route before moving off again.  The vehicle will also stop if its cameras or GPS systems go offline for any reason (though this can be a drawback if you farm in a cellular data blackspot).

Artificial intelligence use could impact jobs

There’s the suspicion that is currently impacting all industries – what will this mean for human jobs?  It’s true that the use of autonomous agricultural vehicles could affect seasonal workers. But the type of jobs that can currently be carried out by driverless tractors is limited, so for now those jobs are likely safe.  

In the future, it’s likely that autonomous vehicles will be able to do much more. With seasonal farm labor already in short supply, and dwindling numbers of young people coming into the farming profession, autonomous technology is likely to solve more problems than it creates.

Are automated vehicles the future of farming?

Autonomous tractors have a long way to go before they are widely adopted on US farms. 

But other types of autonomous agriculture vehicles – such as drones – that were once regarded as a fad, have now become widely used and hugely valuable for farmers.  

While there will always be those that prefer to do things the conventional way, it’s very likely that many will eventually embrace autonomous tractors and other autonomous machines in the same way.  

As farming becomes more challenging due to climate change, labor shortages and rising costs, it’s possible that autonomous technology holds the key to global food security in the future.

Gauge Wheels: Planting’s season’s supporting act

If planting season was a rock concert, seed opener blades would be the stars of the show.  But just as a rock star is nothing without the band, so seed opener blades rely on a supporting act – gauge wheels – to do their job.

The seed opener and the gauge wheel work in tandem to open a furrow at the correct depth, leaving enough soil in the right place for the closing wheel to place back over the seed.  The specification of your gauge wheels will depend largely on which planter you’re running – but factors such as soil moisture, tillage system and even crop type can all inform your decision about which gauge wheel to choose.

Here’s a look at some of the options available on gauge wheels, and the factors to consider when making a choice.

image of tractor planting

Gauge wheel placement

The vast majority of planters have the gauge wheel positioned right next to the seed opener blade – and for good reason.  This is the closest practical point to where the seed drops, and therefore the point at which you can achieve the most precise depth control, which has a direct impact on soil contact and seed germination. 

Locating the gauge wheel alongside the blade also prevents soil from being thrown out of the furrow by the opener blades. This is important in no-till systems where minimal soil disturbance is the name of the game, and is also vital for successfully closing the furrow, since the close wheel can’t replace soil that is thrown too far from the furrow.  It’s also important if your soil is prone to waterlogging, since moving too much soil out of the furrow can lead to depressions in the surface that collect water and can cause seeds to rot.

Soil compaction

The function of the gauge wheel is to hold down the sidewall of the furrow that naturally wants to rise up as the seed blade passes through.  This results in a clean furrow that facilitates precise seed placement, and enough soil to effectively close it again.  But an unwanted side effect of this is compaction of the sidewall, which can in itself cause problems with seed-to-soil contact, resulting in restricted root growth, poor emergence, and lost yield potential.

Some manufacturers – such as Case – have attempted to get around the problem with design tweaks to their machinery.  The Case IH gauge wheel uses a Reduced Inner Diameter (RID) tire with a unique relief profile that leaves space for the soil to bulge upwards along the edge of the furrow, while still retaining a clean furrow profile.  The system works thanks to a ‘seed boot’ that runs along inside the furrow itself, preventing the loose soil from collapsing inwards before the seed is placed.

image of baby corn

Choosing a width

Gauge wheels are available in a range of widths, typically 2.5”, 3” and 4.5”, with the latter being the most common.  The width you choose depends on the importance of depth versus compaction – the narrower the wheel, the more depth you’ll achieve since the wheel is less prone to obstruction by trash or clumps of soil.  

2.5-inch wheels are typically run on twin row planters because there isn’t room for a wider wheel.  3-inch wheels tend to be used in strip or ridge till systems, where they help to achieve a good balance between depth and soil compaction – but there’s an increasing movement towards their use in no-till systems too because of their ability to run smoothly through trash.

Gauge wheels over 4 inches in diameter are most commonly used in conventional tillage systems, but in no-till they’re an ideal choice on heavy soils where plugging is an issue.  They serve to keep the row unit out of the ground and maintain consistent depth.

image of wearparts otico gauge wheel 1

Spoked or solid?

Gauge wheels come in both solid and spoked profiles and the choice really comes down to soil conditions, farming system – and personal preference.  The idea of spoked gauge wheels is that mud and residue can escape between the spokes so they don’t get clogged up, and also so that it’s easier to clean out any debris that gets lodged between the seed disc and the gauge wheel.  However, in no till systems – particularly corn fields – the leftover corn stalks and other trash can end up getting tangled in the spokes, leading some farmers, especially those in drier climates, to opt for a solid wheel profile.  

image of wearparts otico gauge wheel 2

Which tires?

Gauge wheel tires always have a convex profile to reduce drag and therefore increase agronomic efficiency. They have traditionally been made of rubber, which has a key benefit – its flexibility allows the tire to easily shed mud and debris as it moves along.

But rubber tires struggle to stand up to the extreme wear they encounter in conservation tillage system – especially no-till, where corn stalks can shred up a tire like nobody’s business.  For this reason, polyurethane tires are becoming more popular for gauge wheels.  Polyurethane wheels retain their lips for much longer which results in a superior furrow – but they can also be heavy and hard, leading to increased soil compaction, and the risk of the tire bouncing over an uneven surface, leading to inconsistent depth.  In addition, polyurethane wheels don’t shed mud easily so they are prone to plugging.

The solution?  Rubber semi-hollow tires like the FarmFlex range by Otico, available from Wearparts.   These tires are manufactured from rubber and are hollow like a normal tire, but the proportions have been altered to deliver superior performance.  The void in the centre is just big enough to give the tire that necessary flex, while the rubber is thick enough to be puncture-proof and deliver that long-wearing, semi-rigid lip.  Superior shock absorption ensure consistent planting and crucially, less wear and tear on your planter.  Tire profiles vary by machine, and FarmFlex has options to fit them all – including the RID option for the Case IH planter.

For more advice on which gauge wheels are best for a specific planter or how you can tackle particular in-field challenges, contact our knowledgeable sales team.

How farmer feedback informs our product innovation process

If necessity is the mother of invention, it follows that when it comes to knowing what tools farmers need to get the job done, nobody knows better than farmers themselves.

Almost every piece of farm machinery we use today can trace its roots back to an implement that was designed by a guy looking to solve a problem on his own land – because when you see the problem close up, you’re best placed to develop a solution.

That’s why our customers – ag dealers and the farmers they serve – are integral to the NPD process here at Wearparts.  Where OEM manufacturers are focused on the big, ‘one size fits all’ solutions, as an independent business we’ve got the agility and the grassroots knowledge to respond to the specific challenges farmers are facing in a much more intuitive way.

Inspired by experience

Take our seed opener assemblies, for example.  The points of difference between OEM openers from different manufacturers are negligible – but after attending a workshop with a group of farmers, we learned that most conventional assemblies were coming up short on some key factors: hardness, bearing size, sharpness and bevel length.

So we took this information to our NPD department, and the result is our unique seed opener assembly, developed in conjunction with French company, Forges de Niaux.  

Our seed openers look the same as most – but look closer and you’ll find we’ve used an innovative heat treatment process that delivers a harder edge while retaining flexibility through the center; a longer bevel that stays sharp for longer; and a larger bearing and rivet.  What this adds up to is precise performance, a longer wearlife in the field, and less costly downtime for the farmer.  The differences are subtle, but in a game of fine margins, they can add up to significant uplift in a farmer’s bottom line.

Innovating for excellence

This NPD process isn’t unique to our seed opener blades.  We’re always listening to farmers and thinking about ways we can improve or update our products to better meet the challenges they face, in an industry that gets more competitive every year.

At any given moment, we’ll have a number of products at various stages in our NPD process, which starts with our sales team gathering feedback from customers and culminates in the launch of a new tillage or planting tool.

For obvious reasons, we can’t develop a new product every time we get a query or some feedback from a customer – but over time, we’re able to build up a clear picture of where there is a need, based on the volume of requests for a specific product adaptation or new solution.  

Our sales team are out on the ground right across the USA, listening carefully to what dealers and farmers are saying about our products and about our competitors, so once we’ve established there’s a need for something new or different, we move to the next stage of the process.

wearparts NPD engineering image

Advanced agronomics

We start by scoping out the design and product engineering parameters, as well as the commercial side.  Do we need to develop something new from scratch, or can we adapt an existing product?  What will it cost to make?  What do we need to sell it for – and how do the costs stack up for the farmer in terms of cost per acre?  Only when we’re sure that it makes agronomic sense will we proceed to actually develop the concept.

This process begins in our engineering department where, following a product request from the sales team, our designers begin by creating a CAD drawing and/or a 3D model of the product.  Once they’re happy with this, they submit it to the preferred manufacturing vendor – we use vendors across Europe, North and South America and some in the Far East – for one or more prototypes to be made.

Once we receive the prototype/s at our headquarters in Gothenburg, Nebraska, we proceed to carry out fitment and field tests.  The fitment tests are to ensure that the prototype/s are fit for purpose – that it fits the intended machine, and that it moves freely, interacting with any other components as it should.  Once we’re confident that the product works ‘on paper’, it’s time for the real test – in the field!

wearparts NPD image showing tractor moving across a field

Field tested, farmer trusted

We carry out field tests to establish the precision, effectiveness and wearlife of all our ground-engaging components, comparing them against data from our own similar products where available as well as comparing directly with competitor products where appropriate.  

This process quickly shows up where any adjustments need to be made on the design and manufacturing side.  Prototypes may travel back and forth to the manufacturer a number of times until we’re completely satisfied with the performance and specification.  As a result, the time frame for our NPD process varies significantly from product to product – it can take up to a year or more to bring a product from concept to market-ready component.

Once we’re satisfied that the new product meets our stringent requirements on performance, wearlife and value for money, we place our first batch order, and recurring purchase orders thereafter.  All product is received into our Nebraska HQ and quality checked before it’s stored in our warehouse ready for shipping to our nationwide dealer network.

We want your feedback

Whether you’re a farmer or an ag dealer, if you’ve got an idea for a new product or a modification to our existing range that would save you time and money, we want to hear from you!  Get in touch to add your feedback to our database, and shape the future of tillage and planting with Wearparts.